A DIY USB Theremin, Theremino Theremin

THE GRANDFATHER OF SYNTHS

The Theremin can easily be consider the grandfather of the analog monophonic synthesizer. Looking very much as a vintage laboratory tool, its two antennas tend to make it look more as an experimental valve radio than a musical instrument,  with some obvious Cyberpunk flavor!

Invented by Lev Termen almost 100 years ago, its name Theremin is the Americanized version of the inventor’s name. The ghosty like and very natural sounding voice it has, could have become much more popular if it wasn’t for the Theremin’s ridiculously difficult interface, that make playing it in tune a really hard task without a proper preparation. The two antennas capture the movement of any object around. Arms and hands are used for the two possible variables that can be changed: Pitch and volume. What sounds pretty easy is in reality very tricky, the movements must be very precise, millimetrical. I suppose this is the main reason Theremin has been popular to violinists. Violins are notoriously difficult to play in pitch with precision, to do it you have to dedicate a hard work of learning.

THEREMIN TODAY

Just a few manufacturers build theremins today, the most popular one, being Moog Music still producing one of the classic designs:

https://www.moogmusic.com/products/etherwave-theremins/etherwave-theremin-standard

Obviously they’re the perfect choice if you’re looking for a reliable service, but possibly limited to professional performers only, due to their expensive price.

To save some money, several DIY kit exist, a couple offered by the same Moog company, a classic is a kit from Paia:

http://w.paia.com/theremax.asp

One extremely cheap and valid alternative is the Theremino Theremin.

http://www.theremino.com/downloads/multimedia

THEREMINO THEREMIN

To be honest a Theremin with a USB port only, can look extremely suspicious to the more traditionalists of us.
Especially considering that from a Theremin, we  should expect one of the purest analog sounds possible,
having to do with a soft synth sound generator, can look not too interesting.
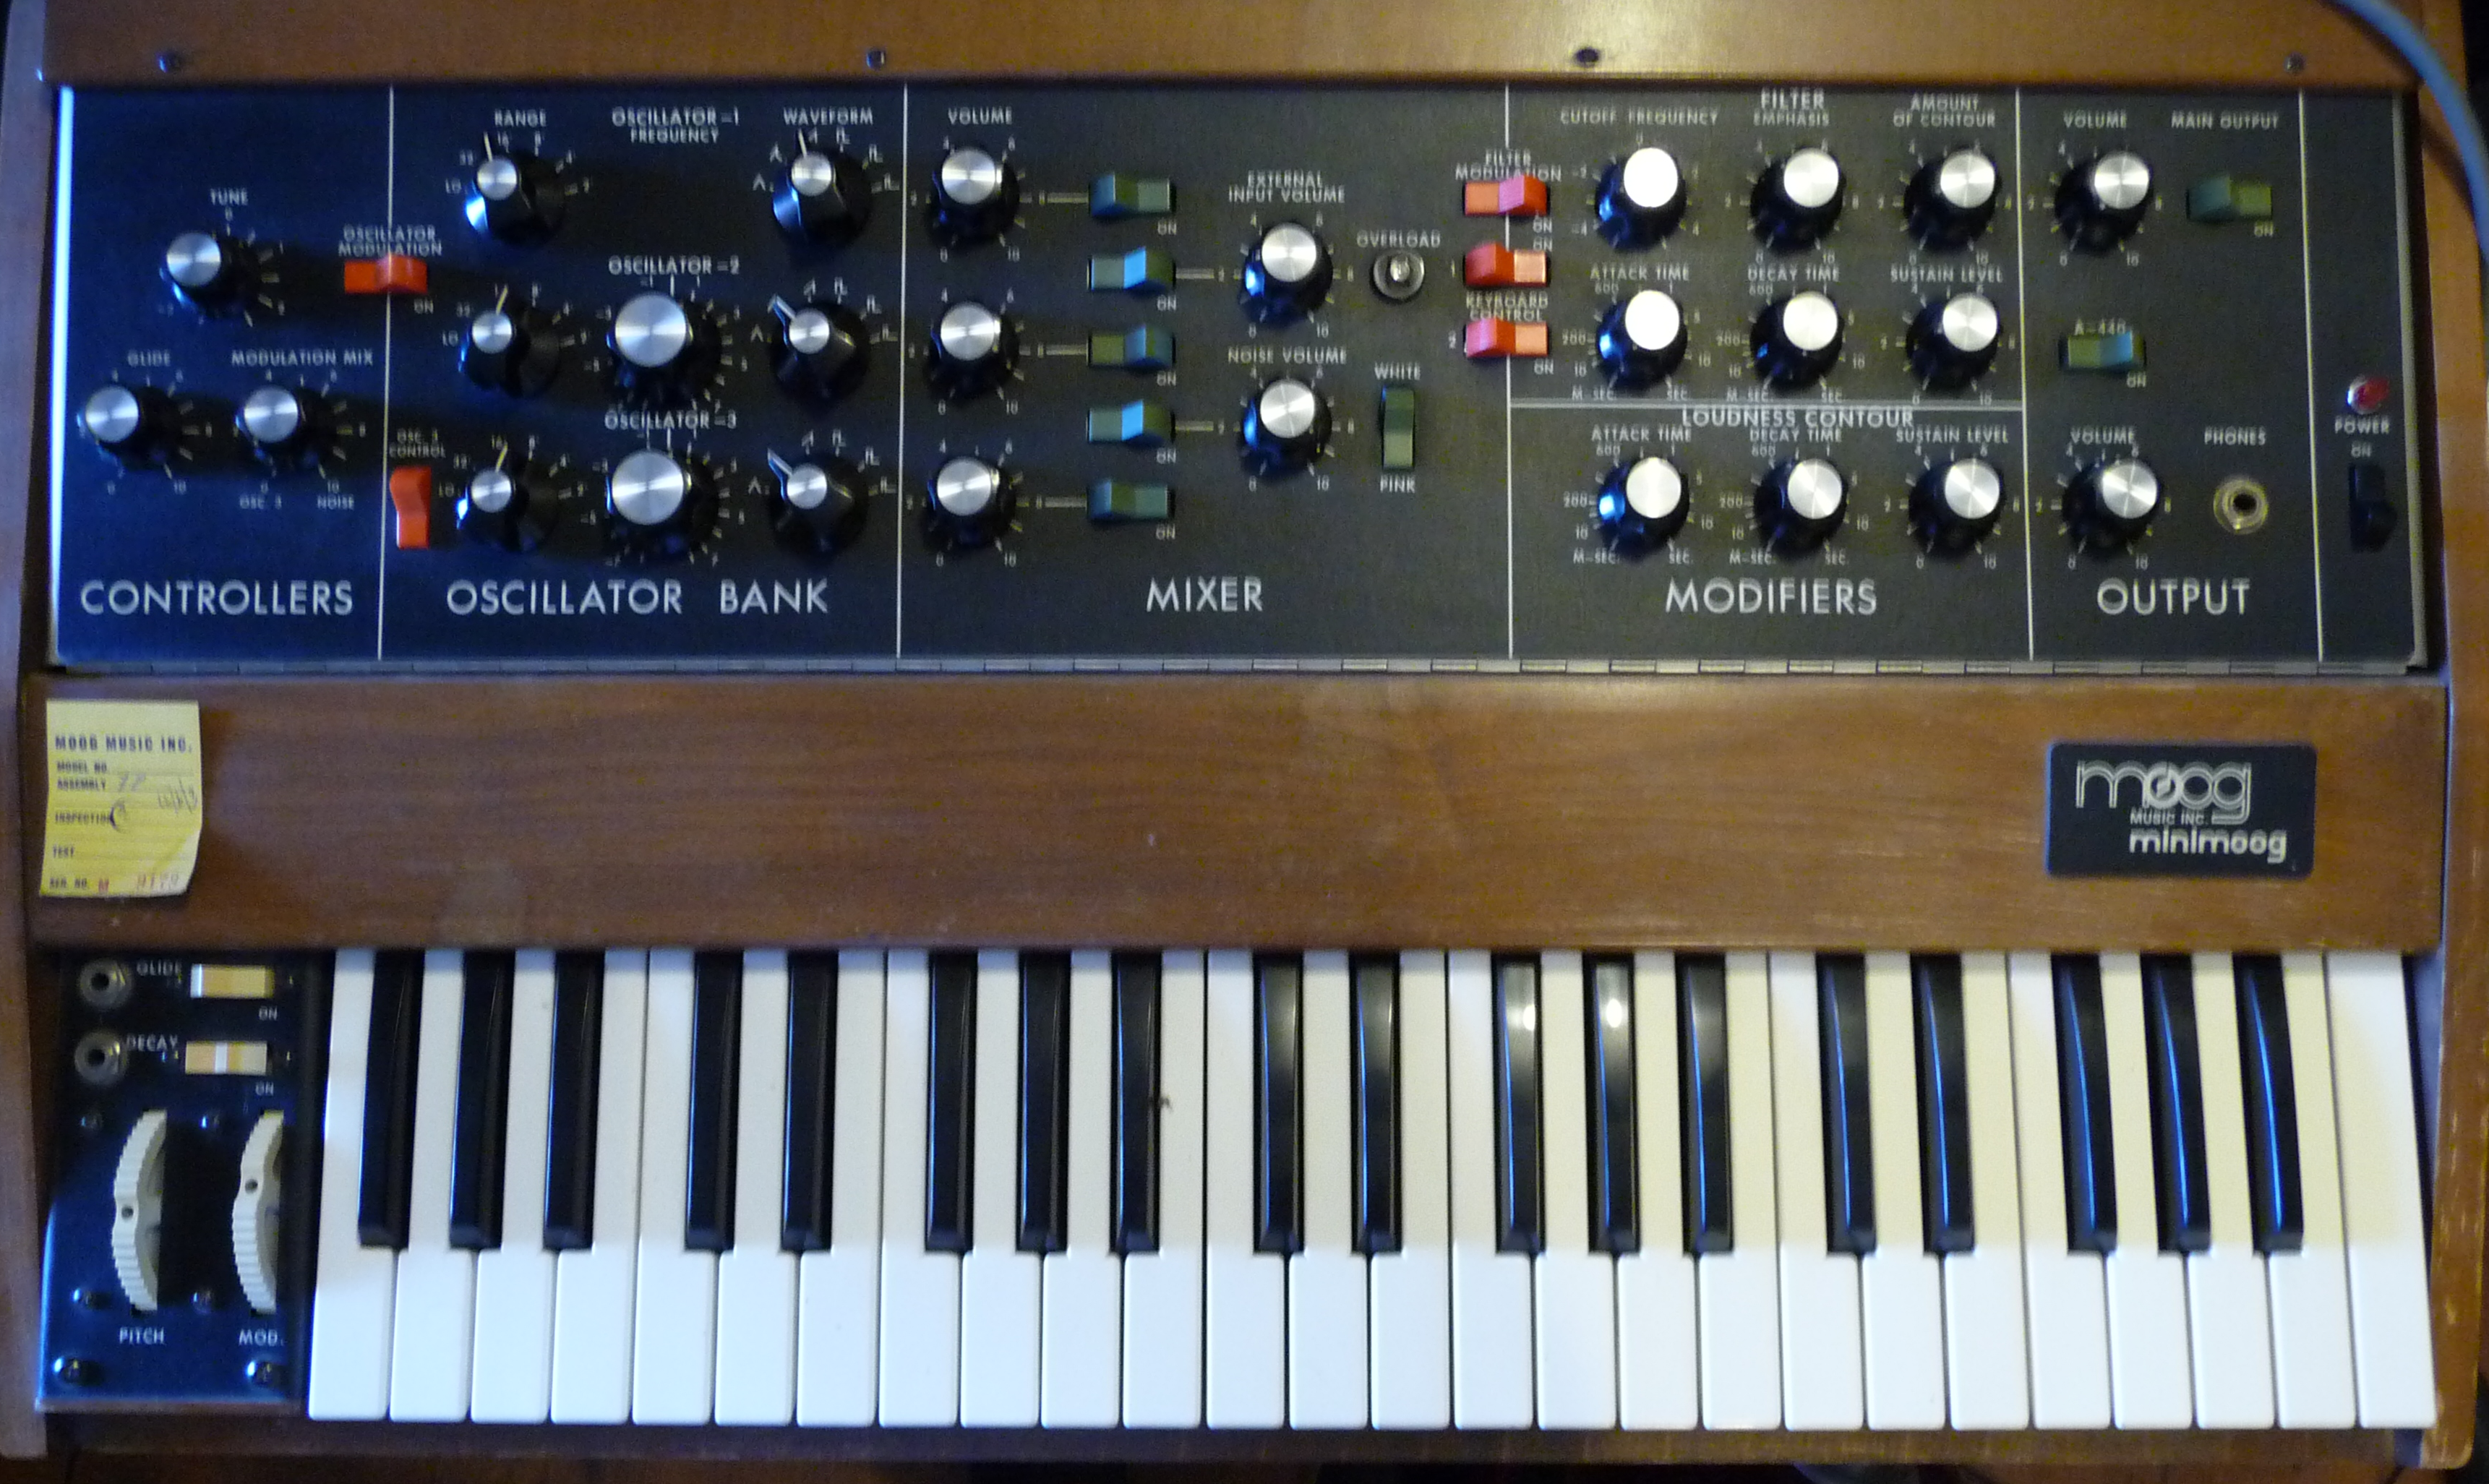
What we will consider here, is the opportunity to have a valid and easy to setup interface, to be used to drive our trusted analog synths. The scope of this experiment will be to play through the Theremino Theremin interface a 1977 Minimoog. Using one oscillator only and its triangular waveform, we should arrive to a pretty good Theremin sound!

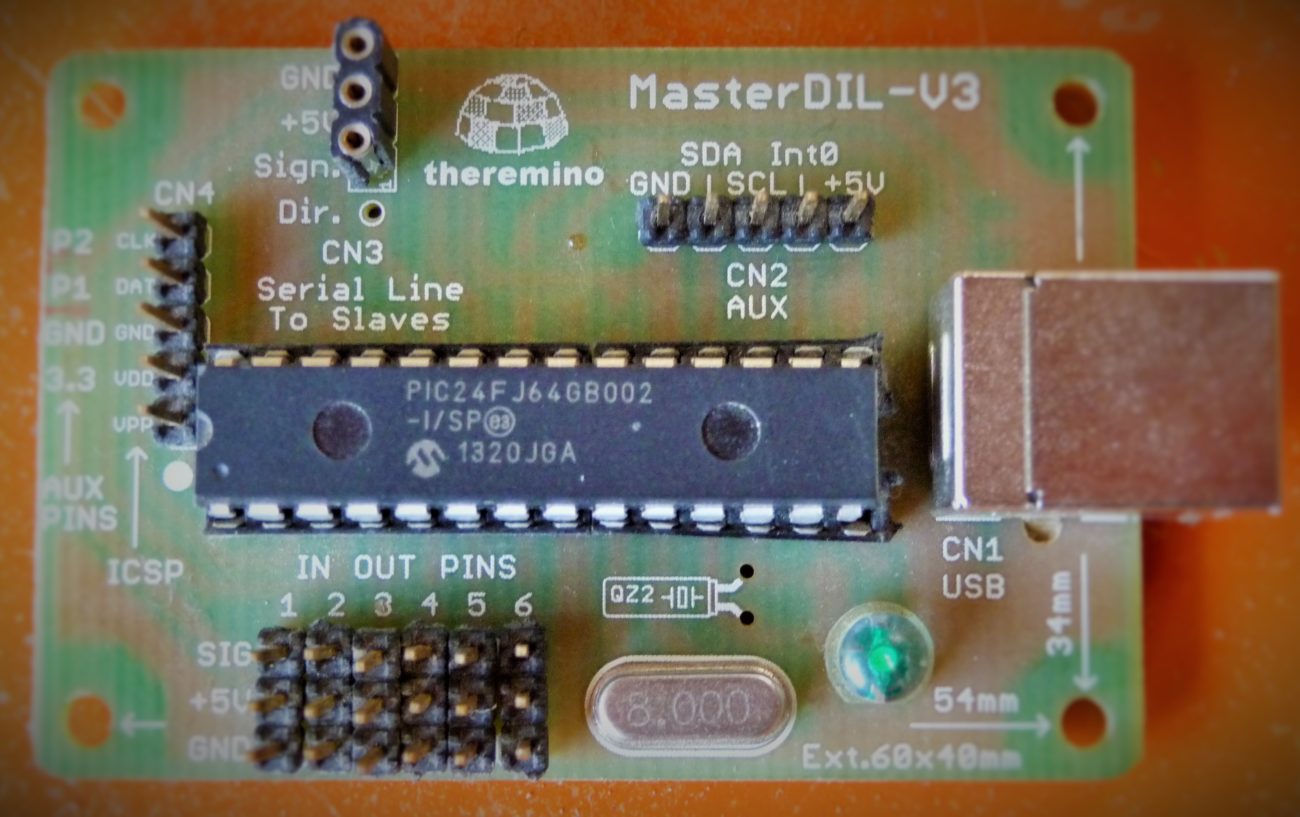
As the cards can be bought already assembled, mounting a Theremino Theremin is an easy and fast operation.

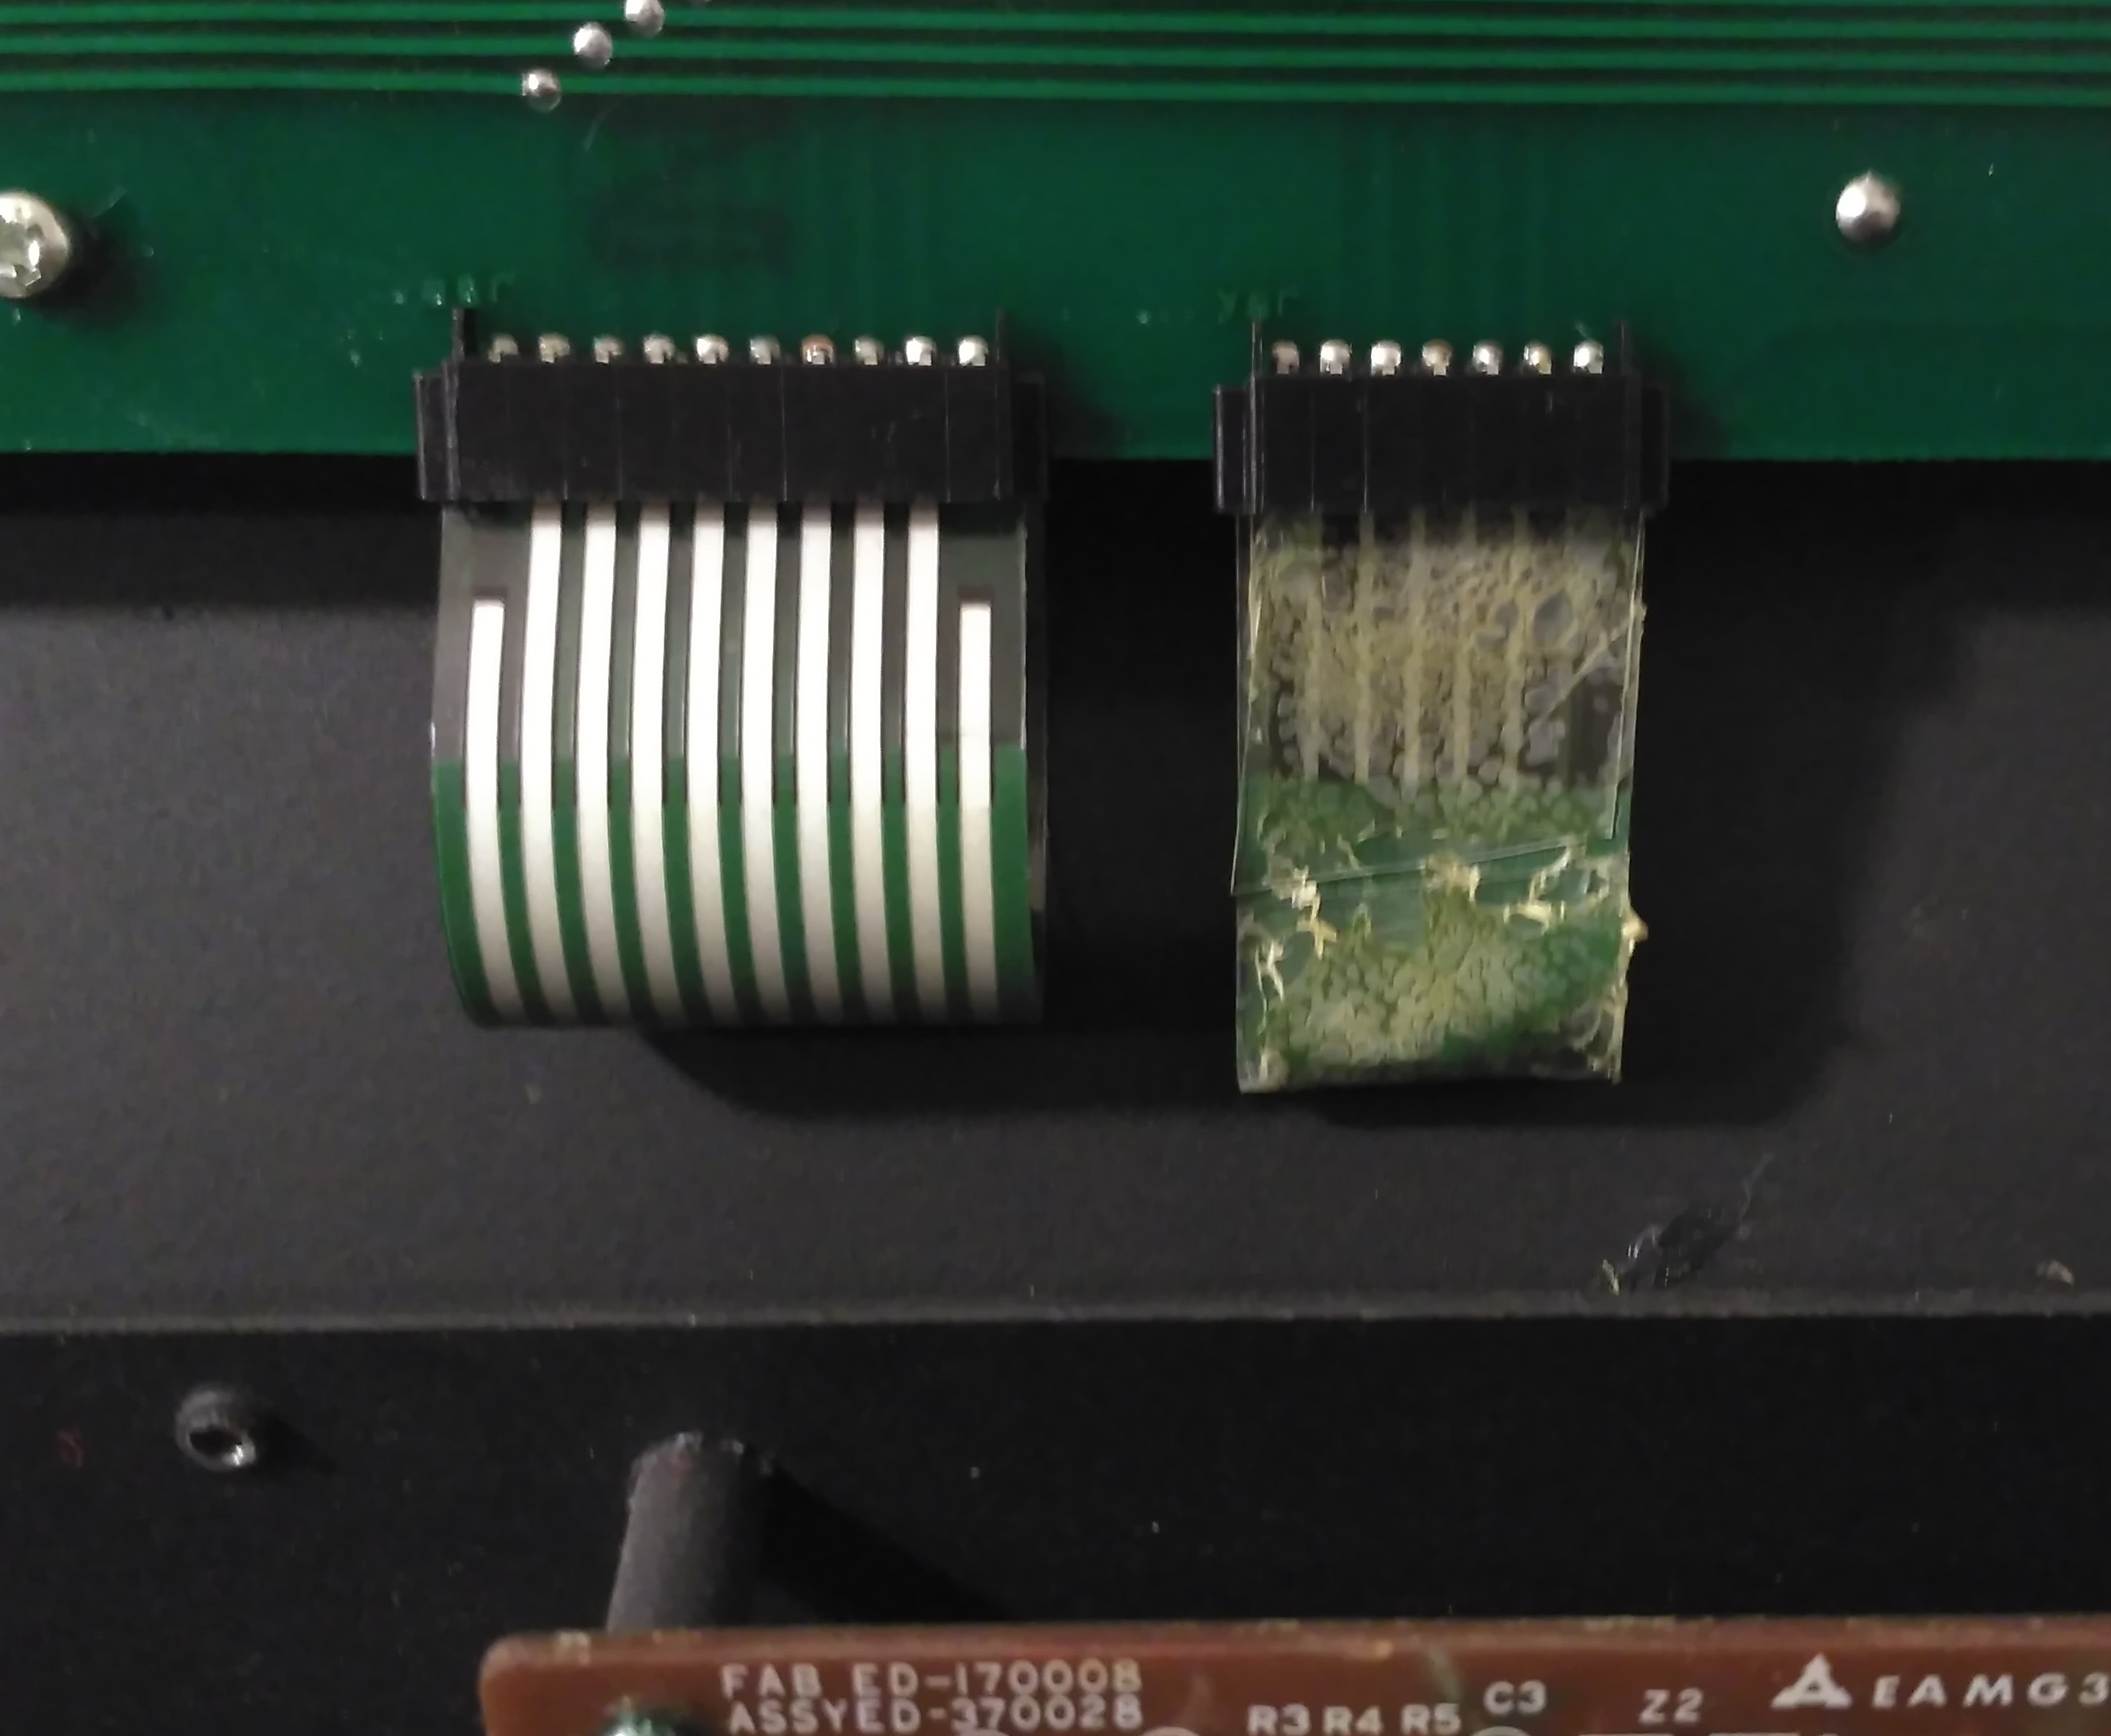
What we need for a complete Theremin is a Master and two CapSensor cards. All is connected through simple multi connectors ribbons and the USB is connected to the PC.

Theremino Master

What happens is that the two antenna capture the movement of the body and generate SLOT values, that are converted from the Theremino Theremin software in notes. Usually the left hand is used for volume and the right for pitch information.

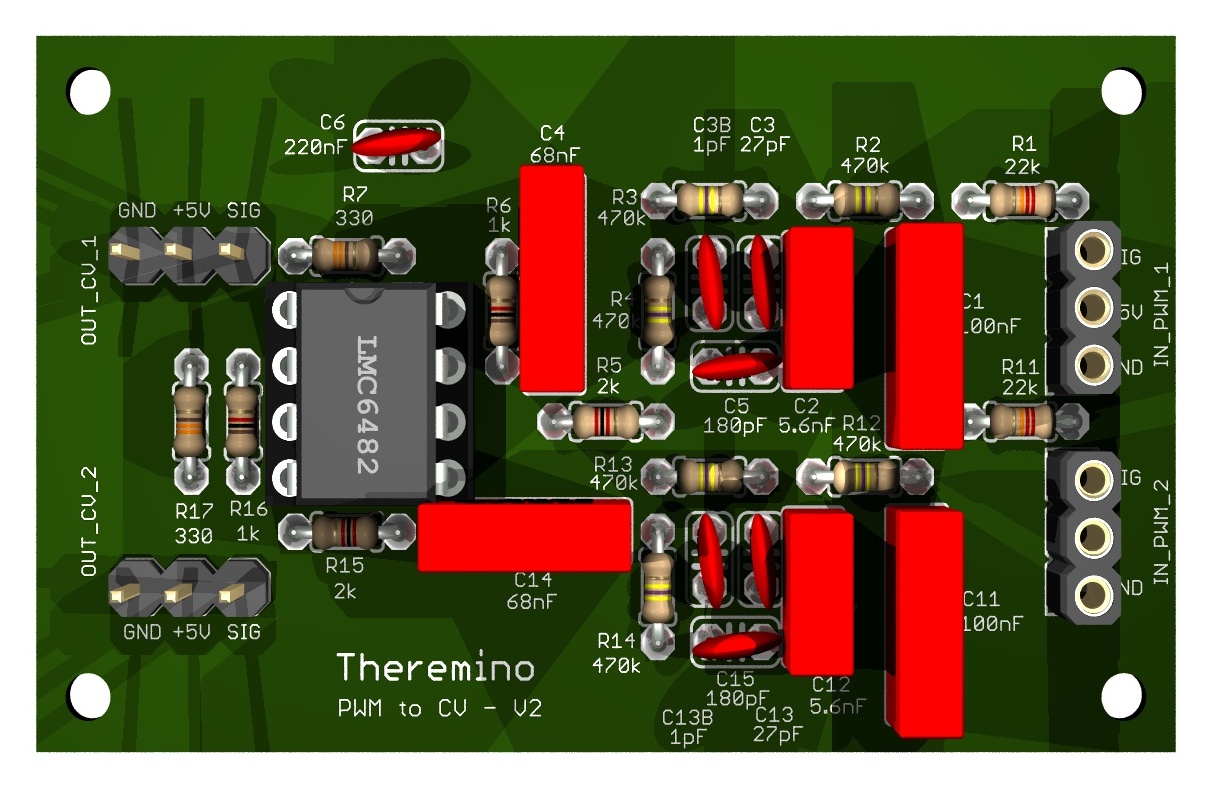
Originally the Theremino Theremin was able only to play its soft synth, but recent developments permit do a lot more. Installing the LoopMIDI shareware application, Theremino Theremin slot data can be converter in MIDI values through the Theremino SlotsToMidi, avoiding the use of the Theremin soft synth, but using the MIDI to play a real synth instead. To be closer in sound to the original, we will use a vintage Minimoog, converting MIDI to Voltage control, through a Kenton Interface.

The Theremino engineers designed a special card to be used as PWM to MIDI converter, but only the DIY design project and schematics exist.

Theremino PWM to CV


more information here: http://www.theremino.com/downloads/multimedia


I hope to write soon a follow up, experimenting with practical examples. The idea is to drive my minimoog through the Theremino Synth antennas.

Elektron Analog Keys broken keyboard and repair


OK, a failure can happen even to the most modern synths,  most commonly caused by a failing component, but finding a tiny polystyrene pellet right inside the contacts of my Elektron Analog Keys keyboard, has been really surprising. The small fluffy ball, found the way through, still in the production phase I guess, as when I opened the keyboard assembling all looked clean and the rubber tops were well sealed. As the warranty had expired already, I had the perfect excuse to check what was inside the only of my “unexplored” synths.

There are plenty of tiny screws to have access to the “insides”, better using a powered screwdriver.


Keyboard assembly


Keyboard PCB


Contact pads


Under the contact pads is where I found the small pellet


Simply removing it and assemble all parts back, the synth’s keyboard returned to working smoothly.


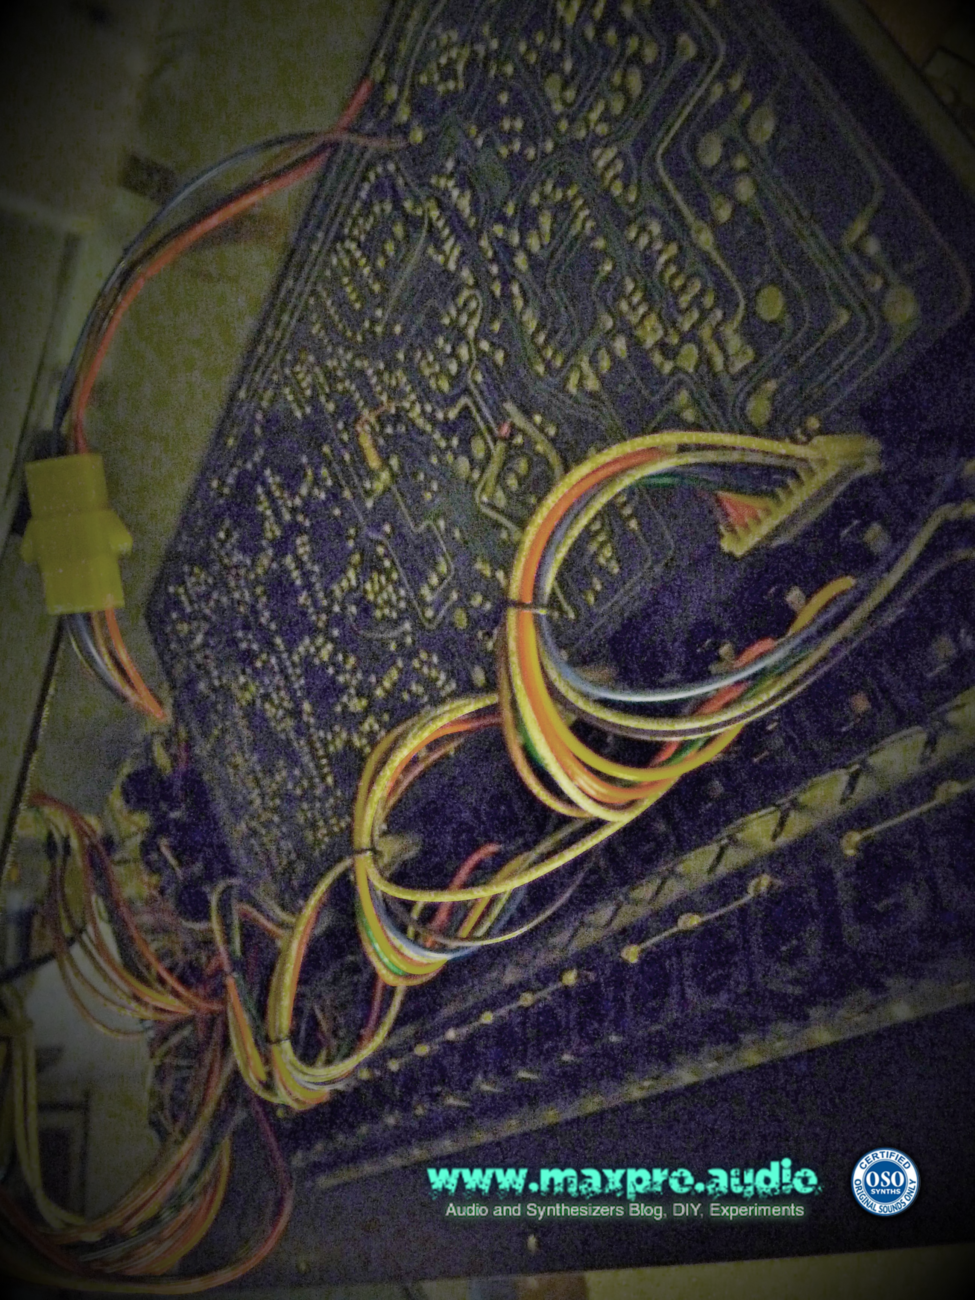
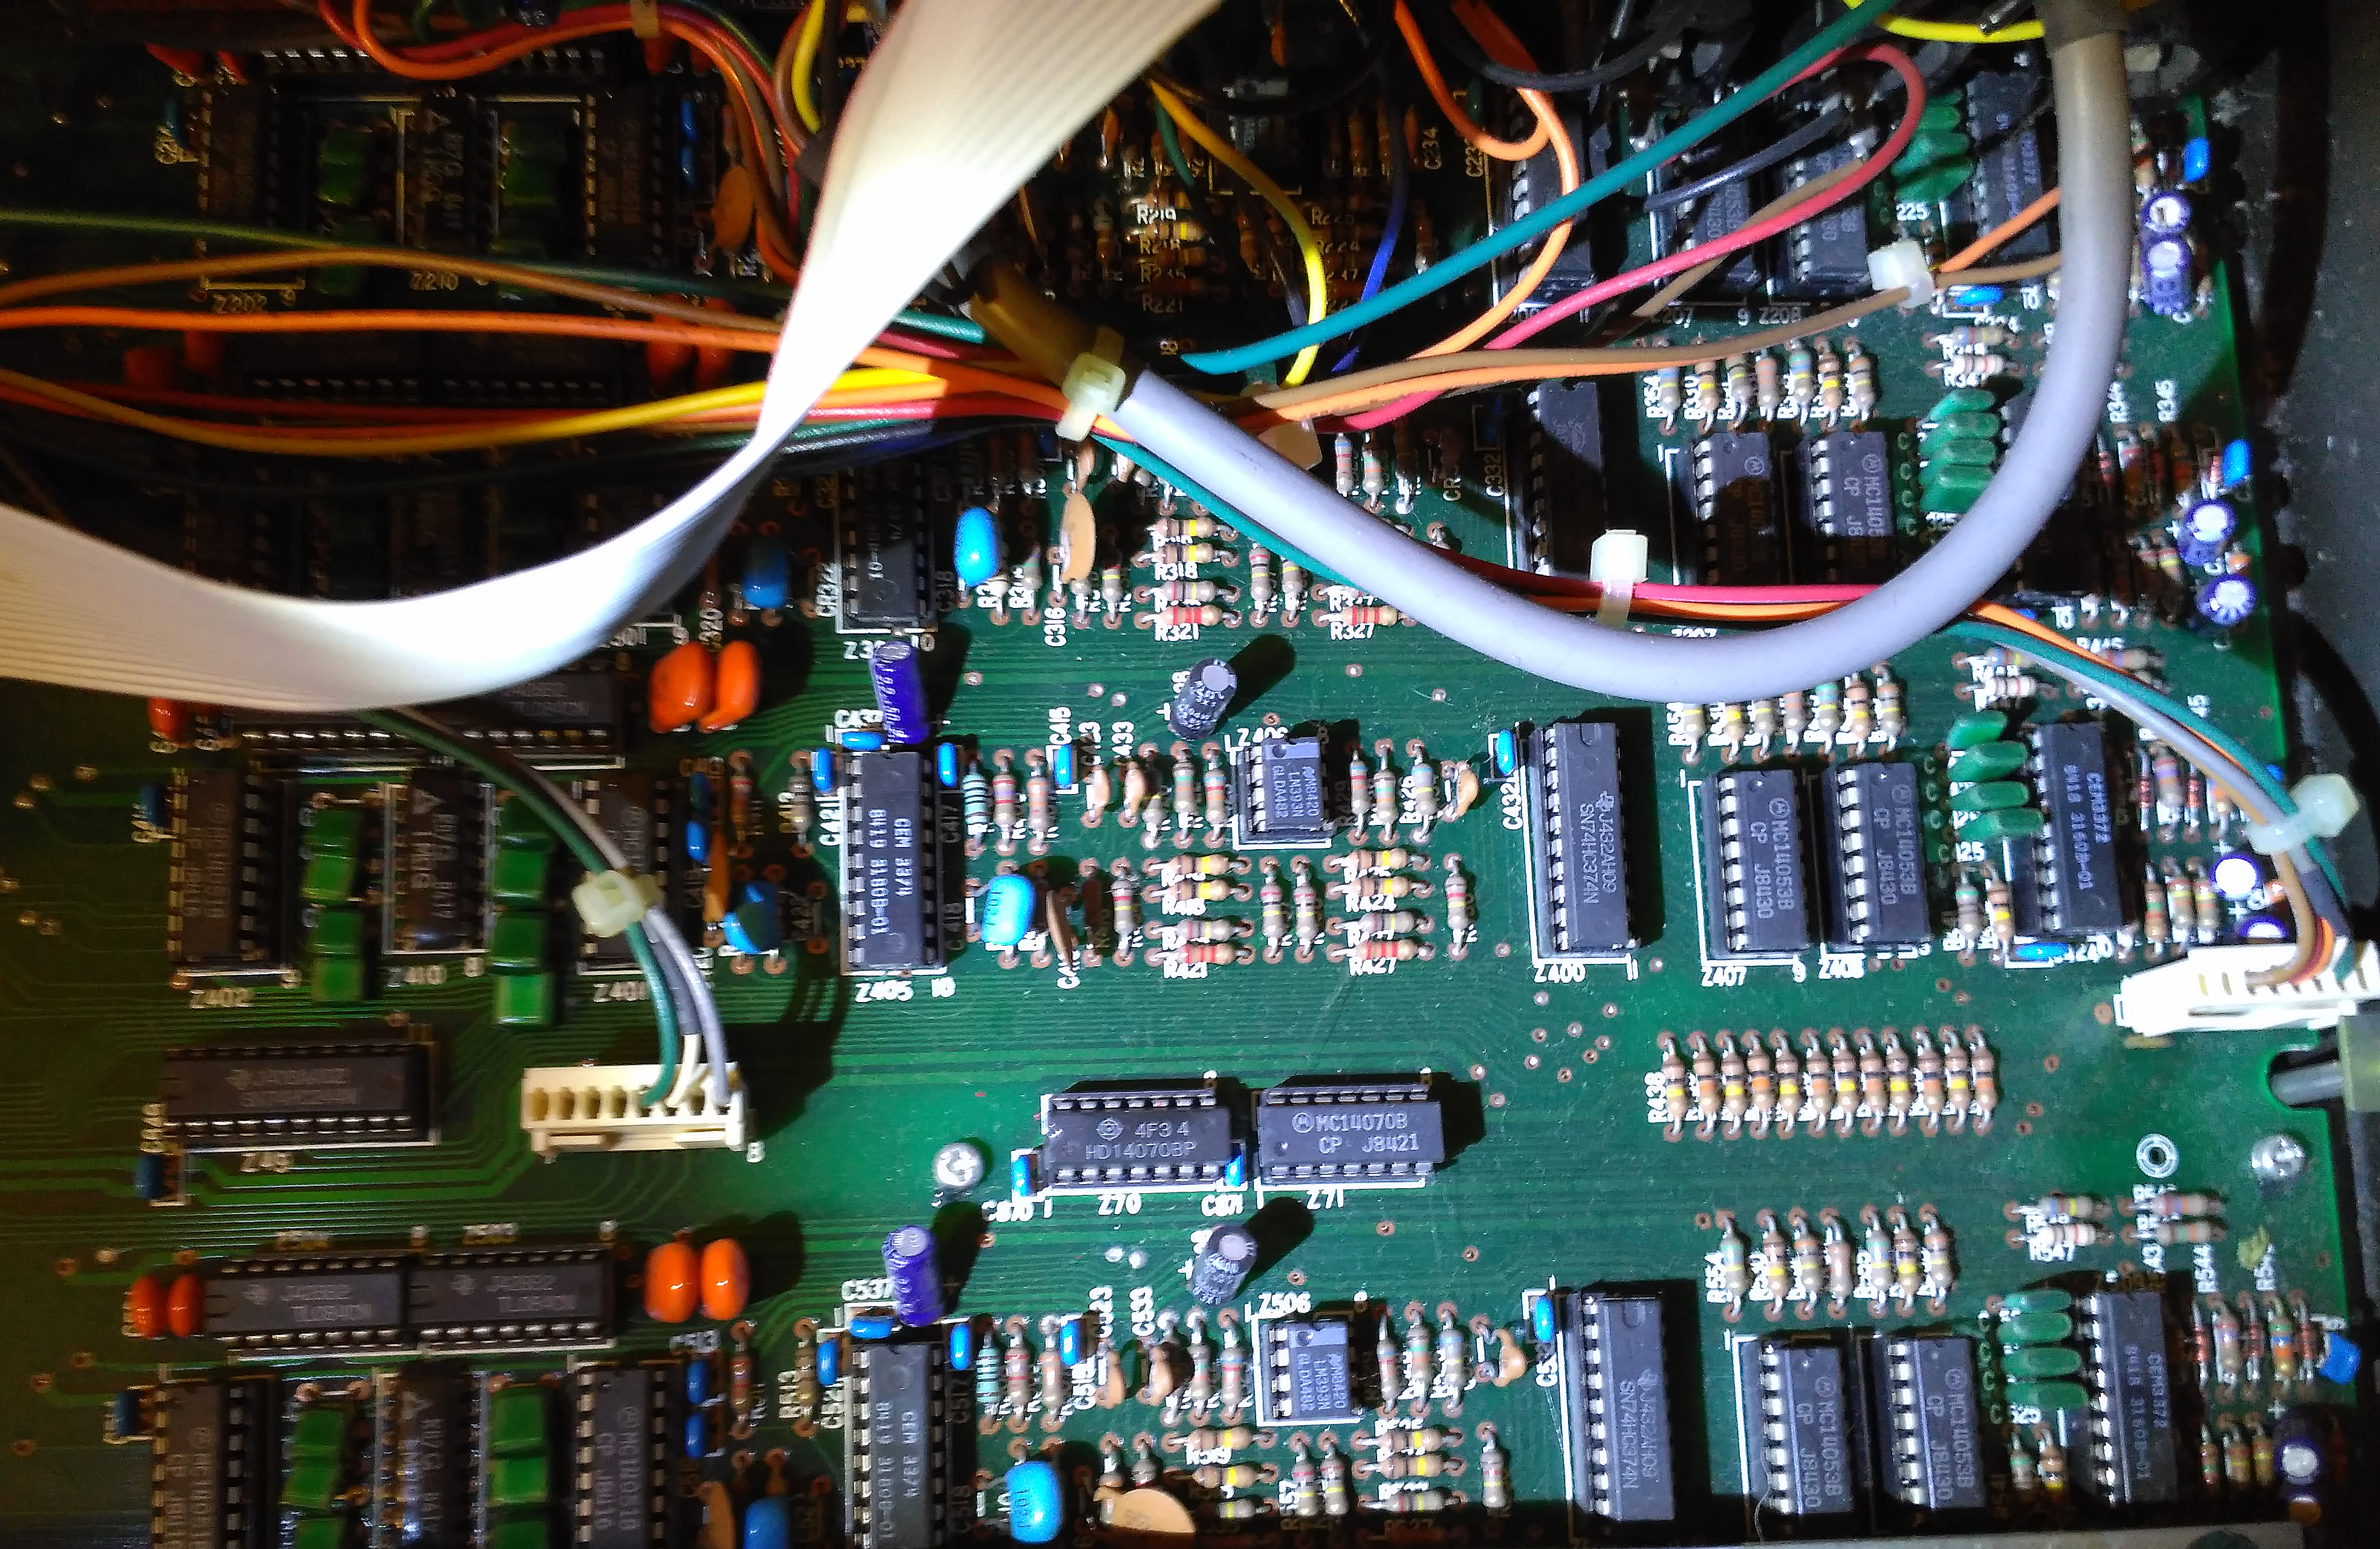
     Elektron Analog Keys PCB


The Dark Side of Vintage Machines: Part 1 – Korg MS-50, failing jack connector repair and test drive

KORG MS-50 1979 Modular Analog Synth


Korg MS-50
Korg MS-50

For “The Dark Side”, I mean the real nightmare always lurking, while playing with vintage machines: Their tendency to break apart, often in the middle of an important session.

Always the best option, if possible,  is to be able to do some small fixes in “DIY mode”, to save money and have the repair done promptly. The older the machine, the easier the repair is, usually. This is valid, if some rare parts availability, doesn’t interfere in the logic.

Doing some tests recently,  I found that the auxiliary VCA section of my Korg MS-50, had one of its jacks broken inside. The plug was not kept in its place, like if there was nothing inside to retain it. I suspected the positive pole plate got broken.

Good occasion to open up the synth and look what’s inside ;)

As soon as I unscrewed and removed the later panels, I remained impressed by the fact that in the interior of its panels the Korg MS-50,..ehm…IT’S EMPTY! :D It’s pretty impressive how Japanese technology was advanced, considering that this synth was in production, since 1979.

Korg MS-50 Inside 01

In the interior of the Korg MS-50, there are just a couple of thin PCBs, plus the PSU board.

What occupy much place, are the plastic slots for the jacks metal connectors plates.

The only thing really modular to me,  is the placement of the jacks in the front panel, simulating the modules of a real modular synth. Modules can be connected through external connections only , same as a modular and not as the rest of the MS series, where some internal patching is placed already.

This not complete modularity, can look a bit suspicious by the most purists, but the sounds that this machine is capable to create are fantastic, even with it’s limited single oscillator configuration.

The Korg MS-50 have been pictured in Aphex Twin studio and should have been used by The Chemical Brothers.

REPAIR


Korg MS-50 Inside 02

Inspecting the interior, (with major relieve) I discovered wasn’t necessary to disassemble the whole synth, as removing the main PCB from the front plate, must be a really tedious process, considering all the jack bolts, to unscrew.

The cause of the fail for the broken jack, resulted in being the connector plate of the + polarity, that I found off its slot.


MS-50_int connector fail


Just some glue solved the problem, a much easier solution than what I thought was necessary, at the beginning.


TEST DRIVE


To test the VCA repair, I decided to make a demo, squeezing from the Korg MS-50 single oscillator, all its waveforms. I triggered them from its two Envelope Generators and a Korg SQ-10 Analog Sequencer that plays the sequence.

Korg MS-50 and SQ-10
Korg MS-50 Patched, SQ-10 connected

Sawtooth – VCF – VCA – Valve audio preamp
PWM – Divider – VCA2 – Adding Amp
Triangle – (no ADSR) – Adding Amp
Adding Amp – Audio Amplifier – Transformer audio preamp


The signal split is sent to two different preamps, to spread it into the stereo field. No effects apart some dynamics control, have been used.


LINKS


Interesting articles on the MS series:

https://www.sequencer.de/korg/korg_ms20_ms50_ms10_sq10.html

https://www.sequencer.de/syns/korg/MS50.html

A post regarding MS-50 adjustments:

https://www.muffwiggler.com/forum/viewtopic.php?t=63534&sid=75a570d9988dbe7bd5d1122cb6973b44


Analog recording, extra cheap and easy!


Cheap and easy

TEAC 4 tracks tape recorder


Are you sure analog recording is reserved to just to a few lucky audio nerds, with big budgets at their disposal?

Even if this, considering the price and maintenance requirements for top end professional analog equipment, is pretty true today, recording in analog isn’t expensive when we take in consideration the amount of cheap consumer grade, analog recording devices we can find used for almost free, still around us. They have been lying down somewhere in our homes unused for decades, it’s time to give them a new life, tranforming them in “effect” processors!

With the abilities in time stretching and audio quantize, present on most of present day’s DAWs, time shifting problems of cheap devices, can be corrected in seconds.


Why, as plugins can do that?

Tape simulation software, can do a good job, at maybe 1/10th of the time needed for a real analog recording.
If your objective is to produce one hit after the other, time is money. Better to recur to plugins and stay tight to them, in this case.

But who loves producing music as a form of creativity expression, have fun in the process of making it, too.
Joy comes not only from the results obtained, but from the memories of the experience, by the process itself.

Creative and experimental techniques are many times the key to activate and stimulate creativity.
The collateral effect, is that the musical results are unique and very personal. The infinite number of variations obtainable while experimenting, is not possible by any plugin.


PC synchronization to tape

In the professional analog recording realm, to synchronize tape and a computer, the only way has always consisted in using a track of the multitrack recorder as guide for the computer, recording on it a special audio tracking signal. The sequencer is then adjusting continuously track tempo, taking this time code as reference, to remain synchronized. Tape recorders have always had small fluctuations in time and pitch (Wow & Flutter), impossible to correct, even on the most expensive machines, due to their mechanical nature. The problem was resolved through the standardization of a synchronization signal code, called SMPTE.   https://en.wikipedia.org/wiki/SMPTE_timecode
SMPTE audio track, can be read from an interface (for example a MOTU MIDI Time Piece) and transformed into MIDI clock, signal which keeps the DAW in tight synchro.


The perfect tool

Let’s go back to the main subject of this post and let’s start having fun, too!
Do you want to experiment with analog, without having to spend a fortune on rare equipment and with no hassle?
First we have to identify the perfect tool, maybe easy to find in a parents old technology drawer: a microcassette dictaphone or a walkman type cassette tape recorder, are perfect. Usually the narrower the tape, the less quality you would expect. Same with tape speed: Lowest speeds, less highs and more noise. Microcassettes have the most distorted and noisy sound around and can be useful for “sampling” speech and single instruments. Standard cassettes can be used to record drum loops too, their quality is a bit better.

recording sony walkman

What I’m suggesting on this post, is to record straight to one of these old analog devices, bounce the result in an audio track and time stretch the audio results, until correcting the differences induced by the “cheap analog” manipulation.

These devices have often an internal speaker, recording from it through a microphone, can add some variation to the recording sound.


Having fun!!

We gonna make an experiment using my old GE Microcassette tape player/recorder:

GE Dictaphone

Some audio manipulation will be needed after processing. When we deal with short vocals or effects, there’s nothing really needed apart normalizing the file, that will then sound super loud, due to analog narrow tape heavy compression. It will be also “enriched” with low frequency noise (hum) and its high counterpart (hiss). To make the file usable, we need to reduce its audible band through a band pass filter or a HPF/LPF combi. In the following example we will use a 250Hz High Pass Filter, combined to a 2kHz LPF, add some room effect, some phasing modulation and some delay.

I’m gonna record a drums loop, to make things a bit more difficult. To be usable, instead of only filtering, it will need some time stretching to correct analog recording tempo fluctuations. We then will see how it can work added to the original track.


As the effect we gonna expect is of a low quality, distorted oldschool sound, we gonna work on a classic Roots Reggae  “standard”,
Studio 1, Sound Dimension “Real Rock”. This is the original:


To record drums, I used samples from the Casiotone MT-40, http://en.wikipedia.org/wiki/Casio_MT-40 the same sounds used by the first digital Reggae Dancehall producers.

On the first example I playback the track to be recorded on the dictaphone. On the second you’ll listen to the result in the analog microcassette, but already filtered and effected, while on the third, you’ll find a mix including our analog dirty loop. The result should sound nice (at least it does this effect on me) and give the necessary dirtiness, to a loop otherwise too “cold”

Once bounced the audio from our tape recorder, we need to identify which is the first beat of what we consider the first bar and move the file to the beginning of one bar, in our sequencer. Having the sequencer grid as reference we then time stretch the audio, to make it correspond to the DAW tempo grid.


Due to the typical tape behavior, there will be some time shift from the original loop, even if time stretched correctly. Once in the right position, we can give an audio quantize (of more or less % depending on the variation required) and mix the result to taste.


The Dark Side of Vintage Gear: minimoog maintenance

Vintage gear have a special appeal, but need continuous cures and repairs to remain operative during the years. Older machines are usually easier to maintain, due to their simpler “discrete” design. Most of the components are easily available and rare parts are usually not too many.

The Minimoog is one of these machines, potentially “eternal”, if periodically maintained.

One of the most recurrent fails is its keyboard mechanism. The switches are small springs moved by the keys up to touching a contacts rail. Oxidation tends to form, making the contact erratic.

I took some pictures while cleaning the small springs of the keyboard contacts of my 1977 Minimoog:

Removing the bottom panel, gives access to the keyboard contacts

Keyboard mechanism and the rear of the control panel.

Keyboard contacts. Below the transparent plastic supports there are the tiny contact springs.

Cleaning the small springs with cotton swabs and alcohol. Notice the dirtiness left on the cotton.


DIY Roland TB-303 Bass Line, clone


AN IMPROPER USE


One  curious fact regarding the Roland TB-303, Bass Line is that it has become famous and super requested, only after its production ceased and by an “improper use” done by some young artists, that couldn’t afford expensive instruments. What was originally intended as bass sequencer to allow musicians, in combination with the TR-606, its sister drum machine,  to perform live over an electronic base, became the screaming lead or the hypnotic drone of the most extreme Acid House from the mid 80s.

The reason is that the TB was a pretty difficult machine to program, if you wanted to reproduce the typical bass line of a song with chords changes, but can be pretty easy to use, if your performing consists of a 3/4th arpeggio with just tonal changes. These machines were also very cheap and easy to modify. With only adding a resistor and switch, you could get a killer resonance monster!

X0XBOX, Roland TB-303 DIY clone

I owned a real 303, bought in the first 90s at my local music shop. It was a mint conditions used unit, at a very affordable price, as on those times a monophonic analog synth was so much out of fashion, to be unsaleable. I remember the  words of the salesman: “Be warned, it hasn’t any MIDI” But no problem, I was aware that this was the screaming tool of the recently born Acid House and in the studio there was a TR-808 waiting to party with, in Sync24! I know it can sound a bit crazy for a synth lover, but my TB ended traded in for a jazz guitar, the strangest musical instrument swap, in my life! Years passed and many emulations as well. I had a nice Novation Bass Station, sounding pretty well and several software synths pretending to sound identical to my missing 303, but nothing sounded as good as the real thing, to me..Until I could read about the Adafruit project and could assemble a X0XBOXhttp://www.ladyada.net/make/x0xb0x/


X0XBOX DIY BASS LINE CLONE


Assembling the X0XBOX

The X0XBOX is an authentic clone, everything is reproduced with fine detail, apart the front panel and the shape of the box and its sound is really convincing:

What really is unique on the TB, is its particular way of sliding notes and its accent combined with the filter envelope. Many very good sounding machines 303 inspired, could reproduce the sound well, but not this characteristic, not having the same sequencer.  The X0XBOX, clones have this same behavior, all is well reproduced, the PCB has the option to put the original Roland BA662A VCA, making even the attack transients identical to the original

Some years have passed and the project has developed so much that some of these clones were sold already assembled, under a company name, like if they were different products then an Open Source DIY project.


SOUND EXAMPLES

I recorded a couple of examples from my filter resonance modified X0XBOX, to give an idea of some of the pretty unusual and extreme sounds, it can create. The first is a loop recorded through a tube preamp and an analog compressor, with high resonance on, the second is with a lower resonance, but passed through an iron transformer preamp.


THE ATTACK OF THE CLONES!


I recently read about a product that is having quite a success in reproducing the TB, still remaining in analog, the Cyclone Analogic TT-303 Bass Bot*.

ACID IS BACK!!, even Roland* is showing its interest and has recently introduced a virtual synthesis version of the TB, sounding excellent from the demo videos.


*Just reporting, I have nothing to do with these companies

.


A Zombie Chroma Polaris

I want to dedicate my first post to a machine that I’ve loved very much, even if it has given me lots of troubles and..well, it still does every time I dare to touch it!

Just starting from its name, things are pretty weird.. On its back panel there’s a metal label with Fender written on it, that looks suspiciously similar to my guitar amp one’s. Something never seen on a synth, before! :D

An other pretty strange thing, is the Portamento ON/OFF switch activated by the pedal, a useful but pretty unusual design.

When you try to rise it from its stands, it reminds you clearly the reason of its Rhodes name (yes, its complete name is Fender Rhodes Chroma Polaris, there should be an ARP too..)..it’s so heavy! Anyone aged enough to have toured with a vintage Rhodes electric piano, knows about the heavy weight and the sacrifice needed to carry it around, obviously having the mechanics of a real piano it’s heavy..but the Polaris is an electronic device! Opening my Polaris for the first time, I remember of having searched for the alleged lead bars, I imagined they had put by design, to increase the image of solidity of the product! :D

The Polaris is an analog/digital hybChroma Polaris front panel rid, where an analog CEM chips based, 2 oscillators/channel, 6 voices of polyphony, 24dB filter synth engine, is computer controlled by a 80186 microprocessor, giving amazing features for the beginning of the 80s standards.

It had 132 preset memories (100 more than a Jupiter 6), MIDI, keyboards velocity control, Internal 12 steps polyphonic sequencer and the sounding juicy characteristic: Extra fast envelopes, giving attacks as sharp as the recently before born digital FM, DX7.

The project was a cut down, cheaper version of the original Chroma synth developed by ARP, the company known to the public for the epic synthesizer present in “Close Encounters of the Third Kind“, too. It’s development suffered several problems as ARP closed and was absorbed by CBS, the owners of Fender Rhodes. The project started under Paul DeRocco and was almost completed when CBS decided to pass it to Rhodes, leaving the team with much less advertisements funds, in a moment when digital was surging as the new standard with the Yamaha DX7, Oberheim and Sequential Circuits were still at the top of the sales while Roland and  Korg were offering alternatives at lower prices (Juno 106, Poly 800). The Polaris hasn’t been commercially too successful, but was still a very good synth with a distinct character.

CEM chips
CEM chips based design

http://en.wikipedia.org/wiki/CEM_and_SSM_chips_in_synthesizers

I should have get rid of it, when long time ago, it was officially diagnosed dead by my synth tech center. I sure overestimated my  qualities as repairer, even so what was really needed more then a tech, was a necromancer!

Failing ribbon connectors

The most common fail on the Polaris is the connection from the front panel to the PCB. The plastic film that holds the tiny copper connections, tend to dry with the years and brake, making the editing possible only through MIDI.

Not a big problem today, as we have free MIDI editors and cheap programmable control surfaces that can solve the problem. But mine unfortunately was victim of a flooding and some drops of water entered in it, making it literally drowning. Its synth soul abandoned it, but its corpse started having a new life, reacting to MIDI inputs, but in the funniest way possible! From there its nickname, Zombie Polaris.

When the mood is cool and in full moon, it is capable of such dreadful howls!

OSO Original Sounds Only

OSO Certification what??

The name is a parody of the  ISO quality management standards. The intention in the “certification” is to state that sounds do not come from pre cooked samples libraries, but from real synths/instruments and are tailored differently for each song and music parts are played for that song only. Apart the joke of the name, the promise to work only with original and different sounds for each song, is taken seriously.

Machines

Tools for production:
ARP Odyssey MkIII, ’77 Minimoog, Roland SH09, Roland TR-808, Crumar Spirit, Marion MRS-2 (Oberheim), Waldorf Pulse, Roland VT-3, Elektron AK & Octatrack, Korg MS-50/SQ-10 (my -20 died recently), X0XBOX DIY TB-303 clone, Roland RE-201 Space Echo, Yamaha Superbass 1200S, DIY Strat, Mu-Tron Bi-Phase, DIY U47 and C12 tube microphones, Reason 10 with Mix&Mastering Rig3

The human

maxpro.audio is an Italian musician, producer and singer, living in Spain. Fanatic lover of old analog gear, vintage synthesizers, tape recorders, DIY electronics, Sci-Fi and humor.
Aspiring to become an astronaut while he was a boy, he soon realized that twisting knobs and moving sliders of music machines was funny and the only possible alternative, to explore Space.
Sound sculpting:
Tracks are usually built using vintage synths and other, (often self built) unusual tools. Sounds from sound libraries, if used, are present on rhythmic parts only. Some are recorded on analog tape, some others are tracked with no MIDI, using the old DIN Sync24 and playing live the rest, to give a more “organic” sound.