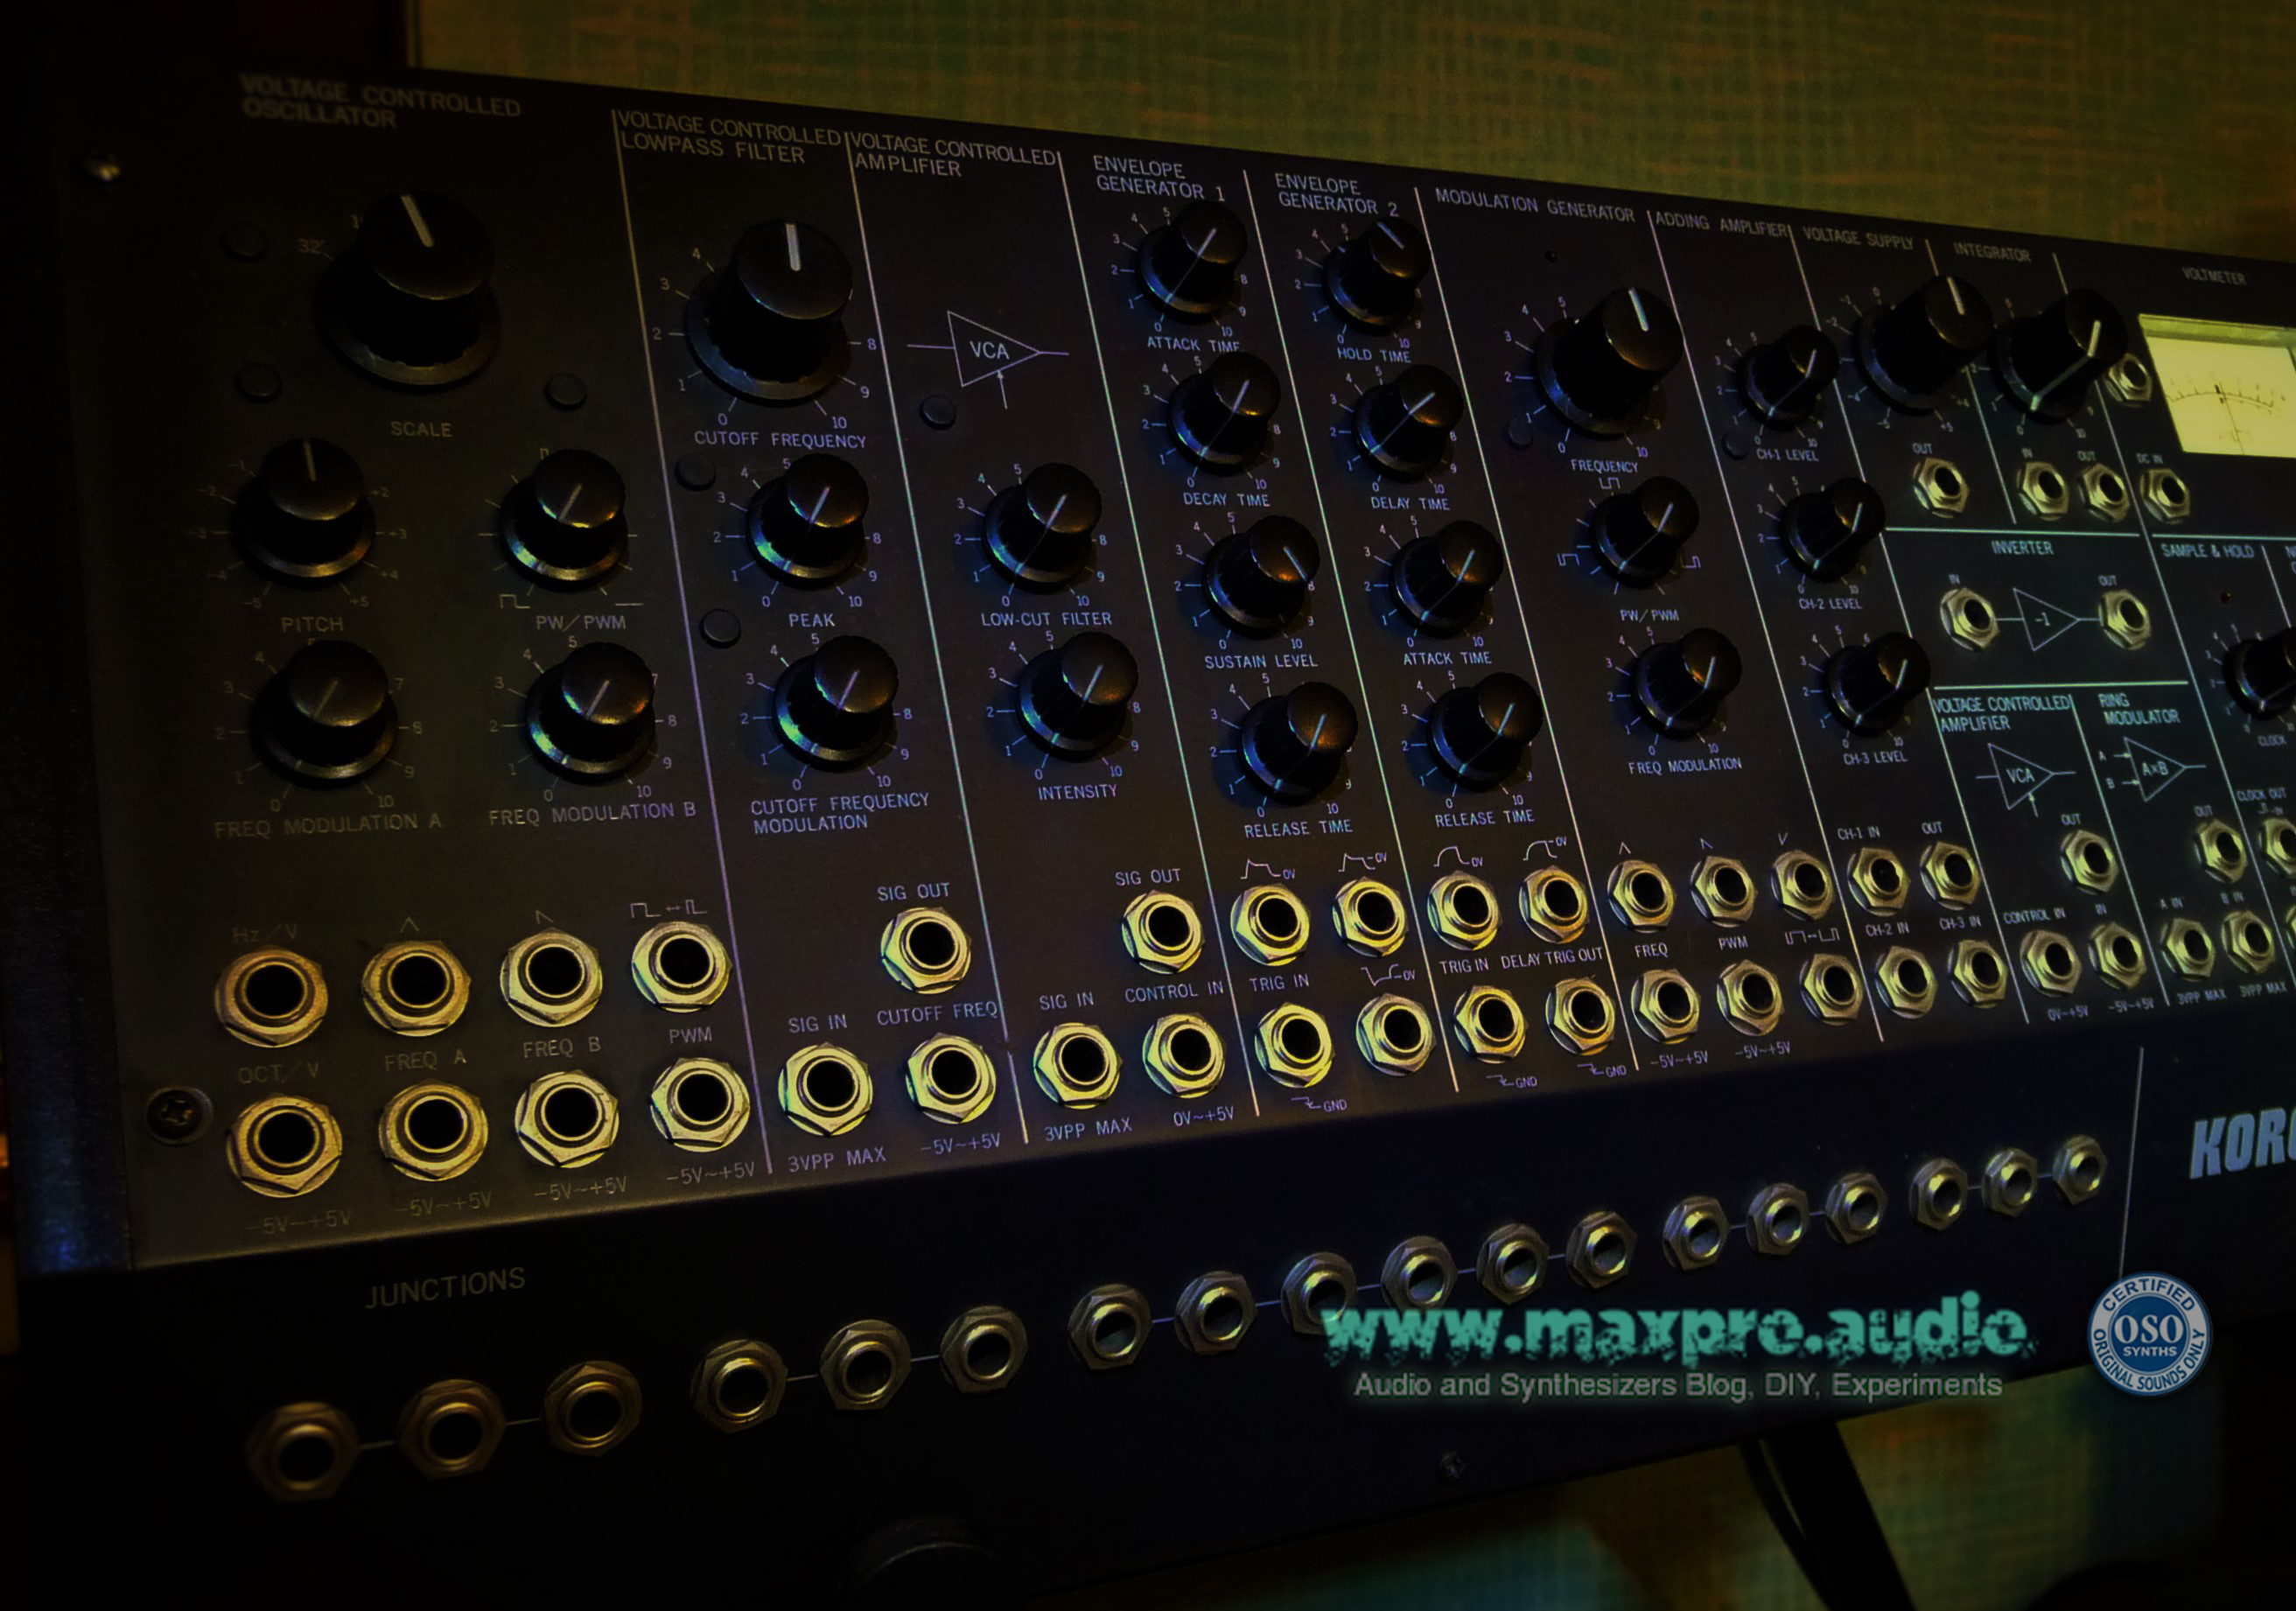
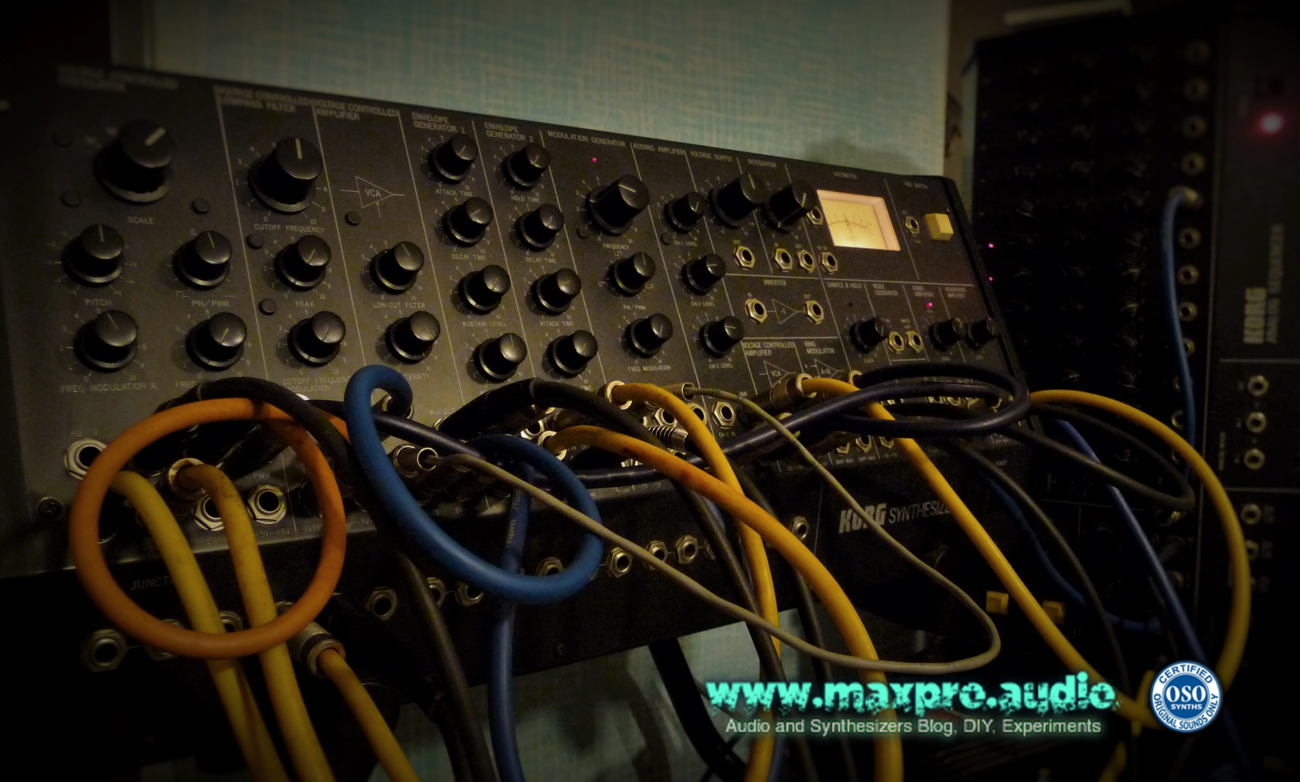
My poor synth was diagnosed as dead and no longer “resurrectable” (yes, resurrection is not that uncommon with electronic equipment), several years ago, already. On the last visit by my former audio technician, the response was: “Buy yourself a new Behringer clone, they’re not too expensive ..”
No, I couldn’t accept that my first synth was destined to be thrown away! Apart the economic side, there is another aspect that always makes me think: The old keyboards are a piece of our history, witnesses of our technological evolution and often rare survivors of other times, but not for these reasons, musically outdated. Indeed, like important art objects, they should be protected by special laws! :D
OK, joking aside, on those times, my technical knowledge in electronics was not sufficient to being able to make a diagnosis and schematics, looked to me like hieroglyphs of some alien race.
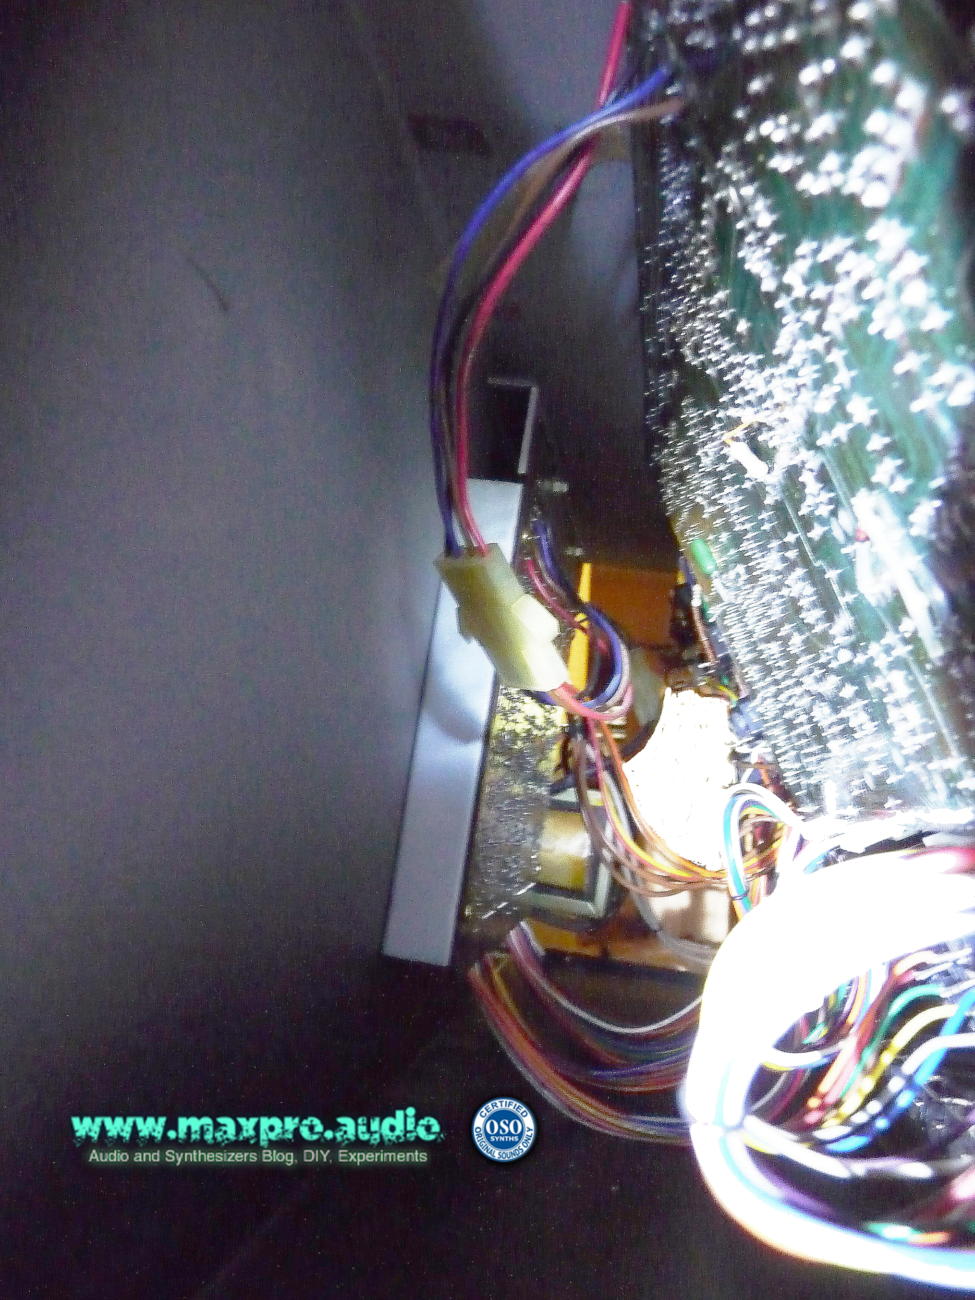
But with patience, reading texts, watching videos and consulting friends, I started to become more aware on how my old and stinky electronic musical instruments work, even inside their panels.
My synth remained open in a corner of the studio for very long, I walked past it without even seeing it, almost to avoid the pain of having to give up, but one day everything changed: I looked at it carefully and whispered “don’t worry my friend, we’ll be back playing together, like in the old days, very soon!” … Well, to tell you the truth, it wasn’t very soon really, but the promise was becoming true. The KORG MS-20 started always being on my mind and I was looking for information and literature to prepare myself to the repair.
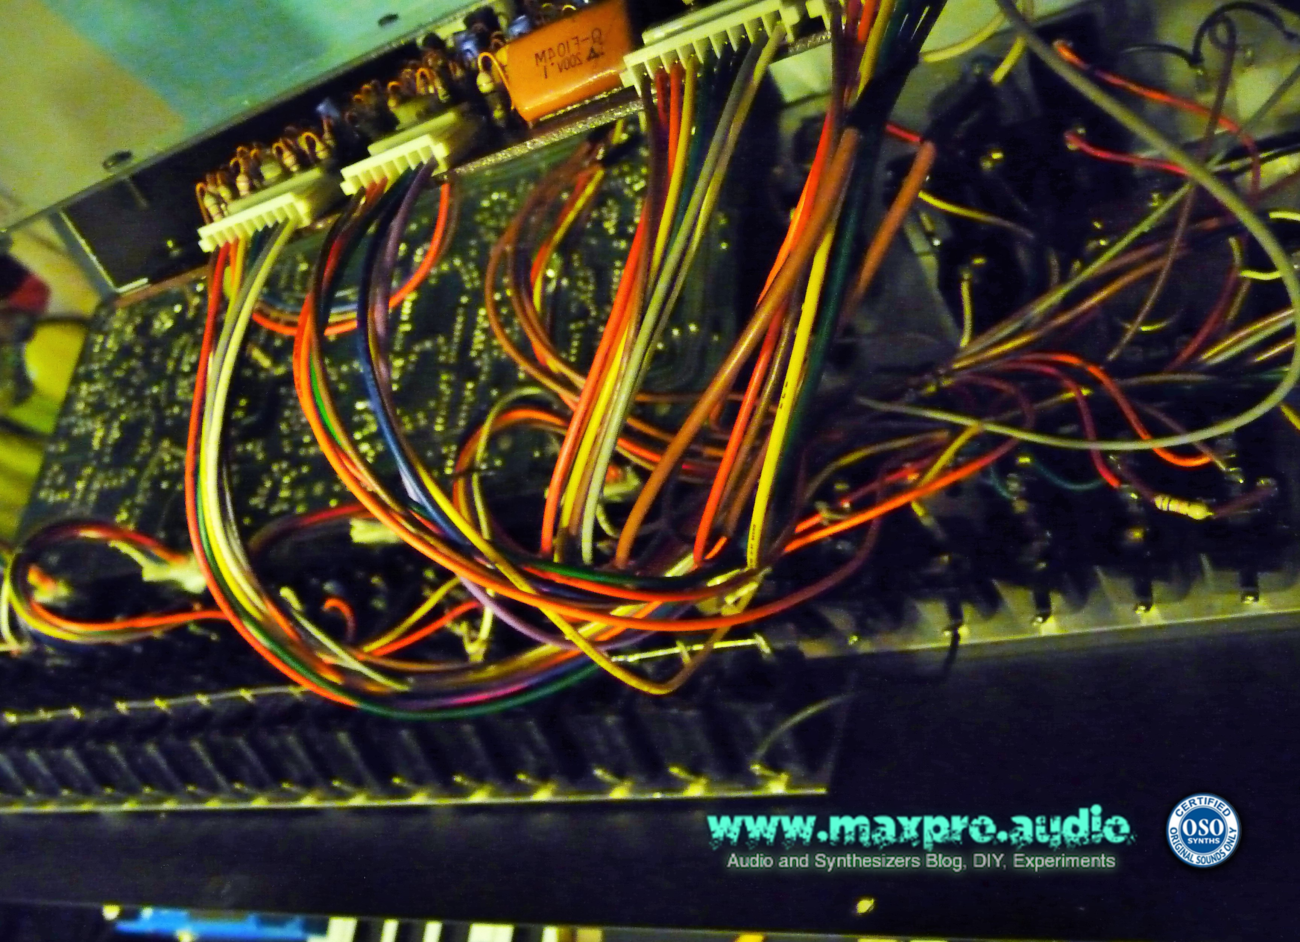
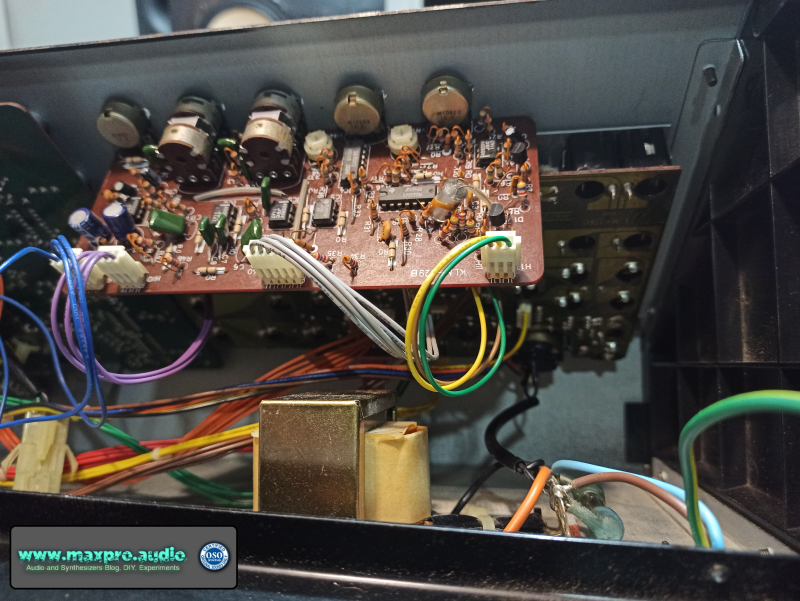
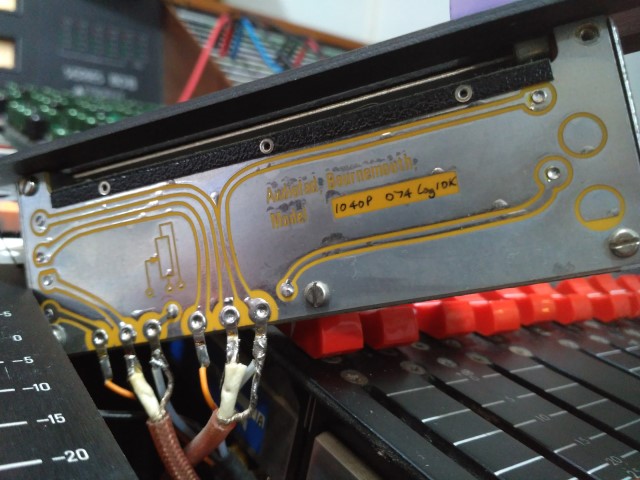
It took a couple of weeks to “unravel the problem”, check what the hell was wrong with it and try to figure out why the previous attempts had failed. Lacking power to one of the rails, I imagined there was a problem in the power source, but the fact that the technician hadn’t success, made me waste lots of time “looking” around. Eventually, to my horror, I discovered that the culprit for the inability to repair the synth was the technical manual, which unexpectedly contained an error! Yes, I understand that it seems impossible, but it is like this: The “sacred text”, obligated reading and time saver of every technician, seems like impossible it has not been studied in detail and made “perfect” … I could not believe my eyes!
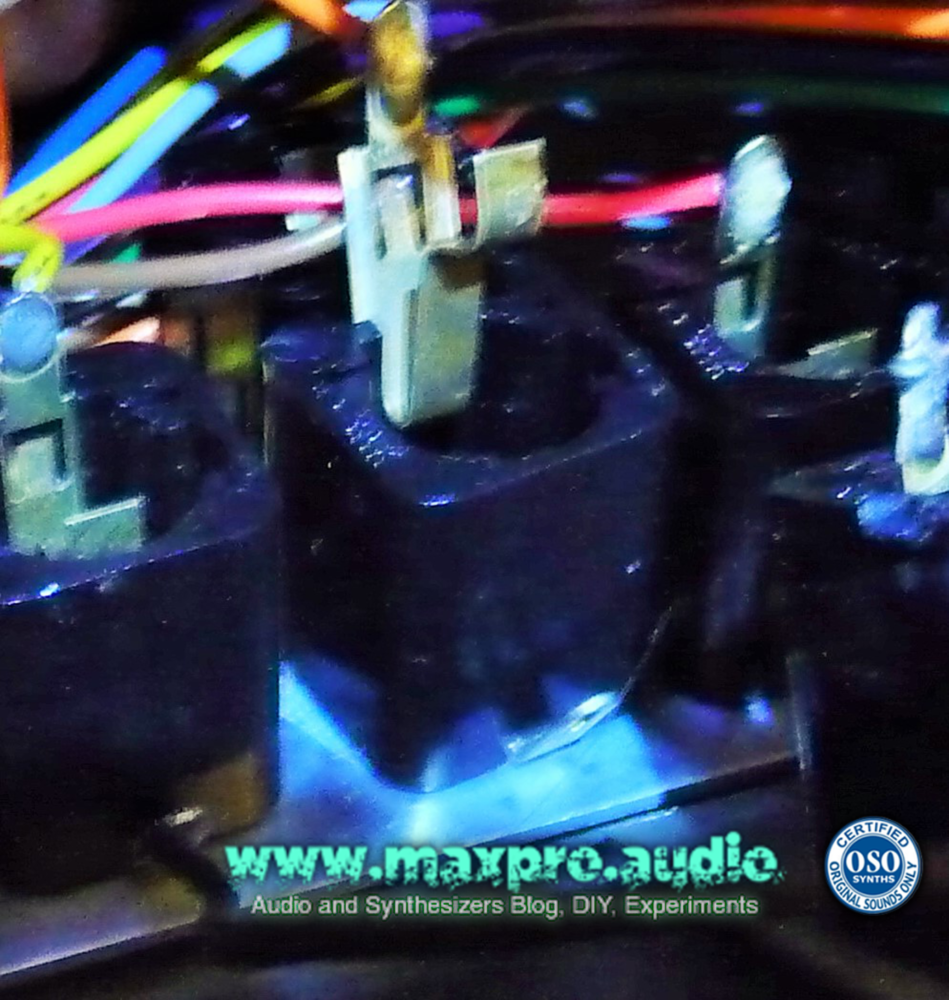
The reason is that, the only technical manual available on the internet about the synth KORG MS-20, it had a strange “BAD COPY” stamped on the cover, but having been misprinted, I thought the warning was related to this aspect. Who would have thought that BAD was SO BAD! : D Usually, a technical manual has a “layout” with the graphics of the components mounted on the board, with their relative values, a list of the installed components and the technical diagrams with the paths of the tracks and the symbol of the components. In this case, in the layout, the two voltage regulators were reversed and without a thorough study of the scheme, comparing the tracks with the real ones, the diagnosis would have been that of my technician, “non-repairable synth“.
Once the trick was discovered, it took a few minutes to “resurrect” the synth. You cannot imagine the happiness of seeing the mini-LED of the LFO flash again, to remain still in a metaphysical environment, “after the long death!”
It has been hard to find the time to write, this time! I’m starting producing videos related to this blog and as my knowledge in video editing is absolutely basic, this means long preparation times. Lots of things to learn so most of the time usually dedicated to music had to be diverted in watching instructional videos.
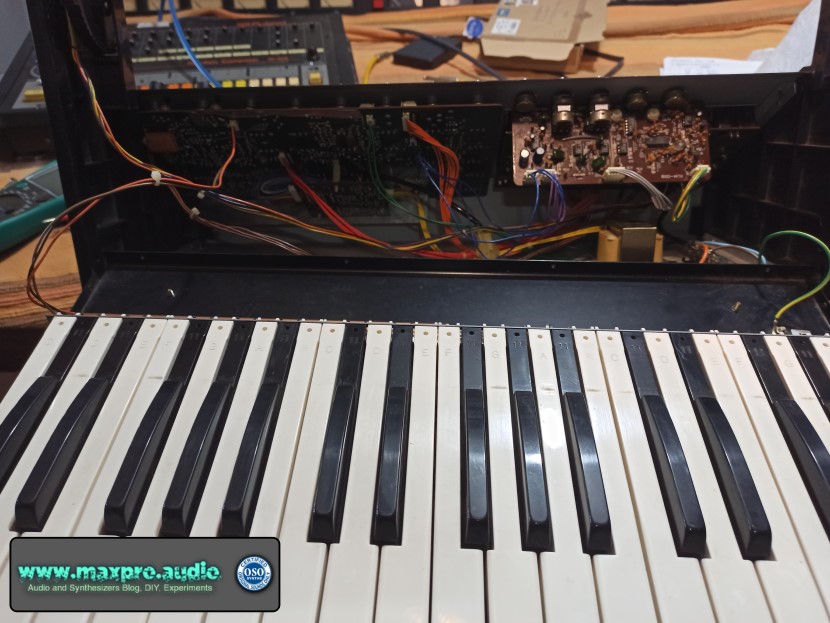
Finally, after too long, I decided to turn the Crumar Spirit, a first 80s monophonic analog synthesizer, back on to check if it was still working, given that last time it had shown signs of “tiredness”. While recording a video, I realized that something strange was going on. Sudden jumps in intonation, notes that didn’t want to play, or that sounded intermittent.. then suddenly the worst! The keyboard started emitting only the note pulses (Gate) and no longer the pitch. (CV) ..and so once again, abrupt split to the opposite cerebral hemisphere and here I am again to repair “in the field” my junk! Inspecting the interior of the Crumar Spirit, the first suspect was certainly the Input/Output board, where the CV/Gate data enters and leaves the synth. And in fact, the culpable was found there! At the height of the connector, a track of the circuit was broken, perhaps due to the action of the connected plugs, over the years. With a simple bridge, I was able to repair the circuit and bring back into the Spirit, its spirit!
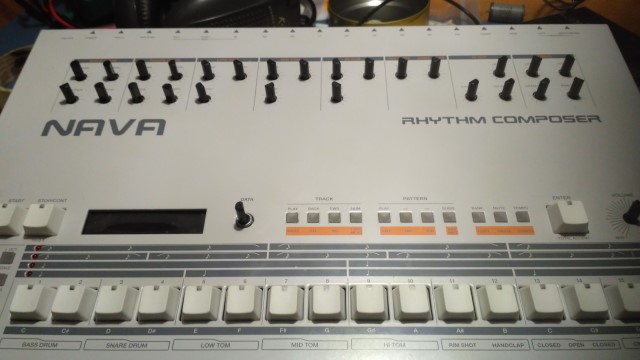
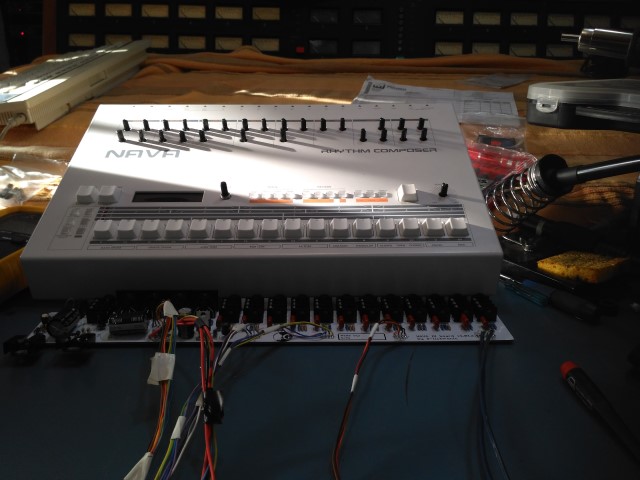
Done, it is finally alive !!! Ufff, it took me a lot of time, but surely it was worth it! Finally, I have in my hands a Roland TR909 as in the old days. The sound is identical because this is a real clone, the appearance not precisely the same, but similar enough to fade the memories and fully create the illusion.
I bought the kit two or more years ago, but because of some laziness to start a project of this size and the delay to reorganize and restore the studio, which could no longer be postponed, I only had complete it now. The NAVA is a clone of the classic Roland TR-909 drum machine, offered by the e-licktronic site in the DIY kit form: http://www.e-licktronic.com/en/nava-parts-kit/50-nava-tr909-clone.html
NAVA 909 insides
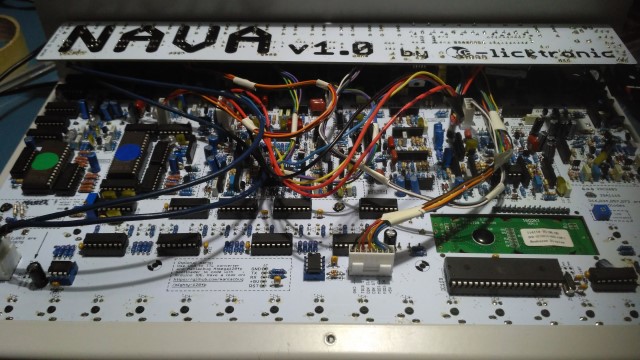
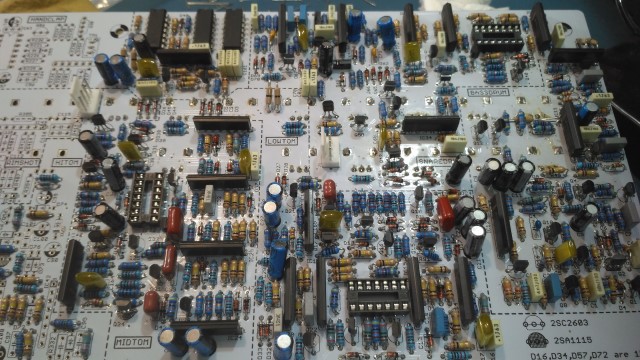
The kit consists of the motherboard and an I / O card, plus a series of transistors and ICs, which are obsolete and therefore difficult to acquire. It is necessary to buy a large list of components, but there is a BOM with a link to Mousers where a prepared trolley is already present. The project is quite complex, given the number of components and their density. The construction is even more complex as the connection points and the relative exposed copper are really tiny, forcing during the building, to never lower the attention.
Nava 909 motherboard
In fact, despite the many years of experience in DIY and the needed careful attention, the construction was not entirely easy. At the end of the project, after days (or in my case weeks) of work, the crucial moment is always to push the ON switch and verify the presence of “life” in a new assembly. Unfortunately, this time after loading the software and verifying that the sequencer was working, I noticed that the HH was not present … OMG impossible to stay too long without that emblematic OH! While I have no problems with the construction, not having studied electronics, diagnosing a failure is for me always a nightmare. This time, I was able to put into practice some techniques I learned on how to use the oscilloscope to trace failures. The culprit turned out to be a five pins transistor, the old 2SA798 quite difficult to find, at reasonable prices. I’ve been able to emulate it, using a couple of matched BC560 transistors, soldered together.
NAVA, Roland TR-909 drum machine clone
ATTACK OF THE CLONES
With the imminent arrival of the Behringer’s 909 and the Roland virtual analog reissue, we will soon be invaded by clones of this vintage drum machine, which will perhaps cause some of the magic of it, to be lost. BTW assembling with your own hands a piece of electronics with which playing music and having fun, is one of the greatest satisfactions a synth-nerd can experience. In my case, I have in my hands an electronic drum machine that I had loved a lot but then sold to switch to the, in those times new, PCM technology (a Korg DDD-1) and in the following years could no longer buy it because of the crazy prices of these units in the second-hand market.
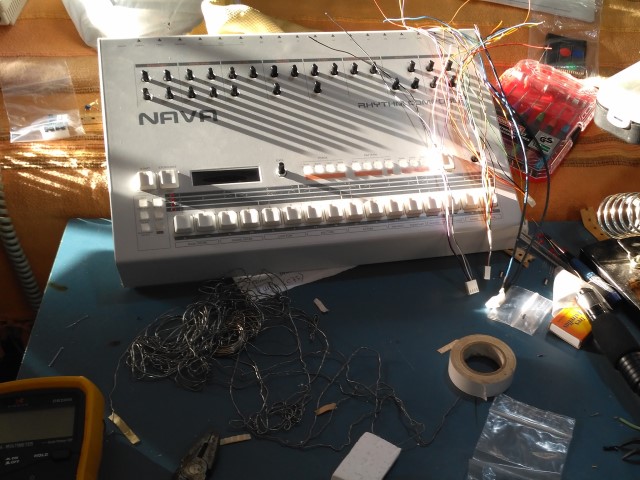
Assembling the NAVA 909
Below you will find some of my tracks recently released, using the NAVA Roland TR-909, thanks for listening:
I believe today analog consoles are seen by many as bulky, unbelievably thirsty of energy and continuously in need of maintenance items, in practical terms, obsolete tools.
The tendency, in the last decade, has been to abandon the traditional mixing desk in favor of virtual mixers or “control surfaces“: Focusing on quality converters with as many as possible inputs and hardware gear, like equalizers and dynamics processors connected to a patchbay, to combine at wish.
This choice has great advantages in terms of variety of sound and physical space, considering that you buy only the modules you really need or like for your usual session, possibly with different audio “colors“, to have a wide sound palette, instead of lots of identical channels as in the classic console.
Of course I agree with this approach, but limited to the phase of recording. I find the classic surface controlling and placement of knobs, ergonomically ideal, being the result of decades of “evolution” in mixing down techniques in analog. For this reason digital control surfaces mimic the shape and workflow of the analog desks. When you start working out of the box, is way more comfortable to have easy access and visuals of the parameters you are adjusting.
Having an analog mixing desk, forces you to a sort of marriage to your equipment, your mixer is the heart of the studio, it will imprint its own sound and needs all your care and attentions and the older, the more care it will need.
It is annoying to find your preamplifer is broken, but having a failure in the mixing buss of the mixer, for example, forces you to do an immediate repair, or you will have no music at all! Big mixers are modular for this reason, studios always had modules in stock, to swap them with already repaired ones, in case one of them was failing.
Trident Series 80b, Remix slider
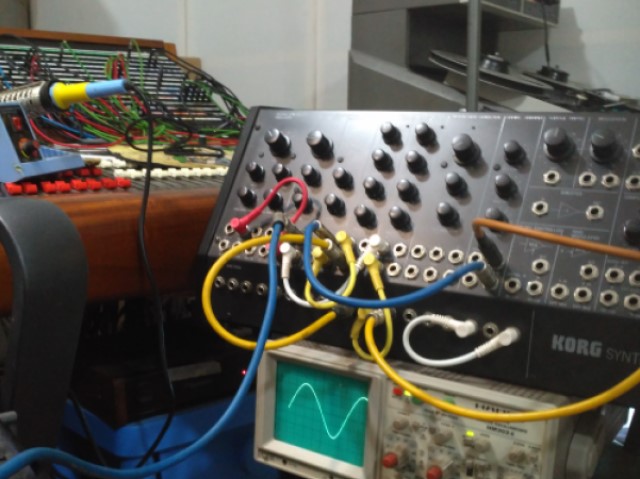
On my Trident Series 80b, its oscillator needed to detect the failures, was broken, it couldn’t generate a sine wave anymore. Instead judging from the scope, it was generating a strange saturated square waveform. I will do what is possible in the future to fix it, in substitution the old Korg MS-50 oscillator has been useful as lab tool once again. This time I used its oscillator, rounding a triangular waveform through the LPF, to obtain the sine wave I wanted for the tests.
Korg MS-50 Synthesizer, used as test lab tool
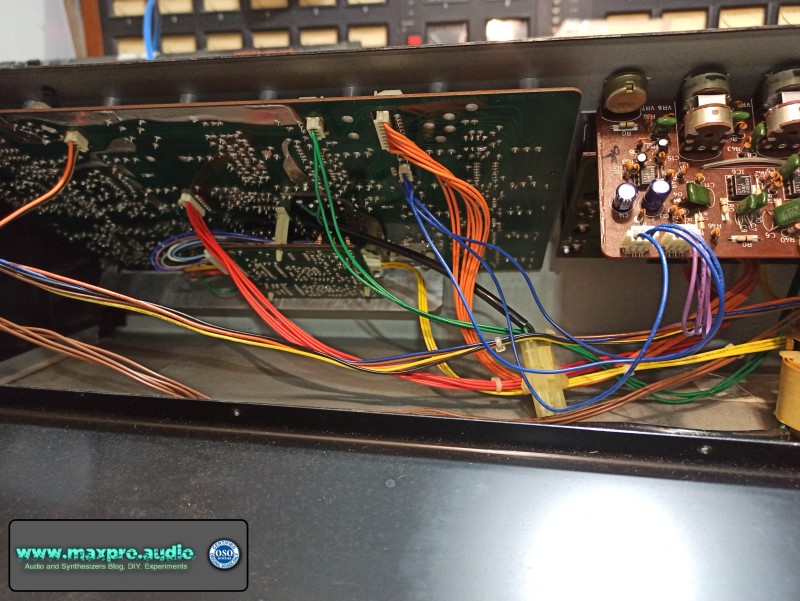
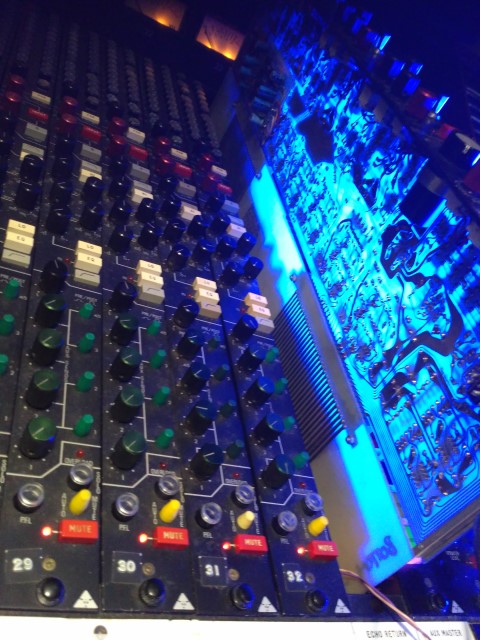
One of the problems the console was having, was a false contact somewhere in the remix buss, making at low gain, from time to time, disappear the right side of the stereo mix. The Trident Series 80 has plenty of TL-071 opamps, spread everywhere on its circuits. Usually if there’s something wrong in the signal, those are the first components I learned must be checked.
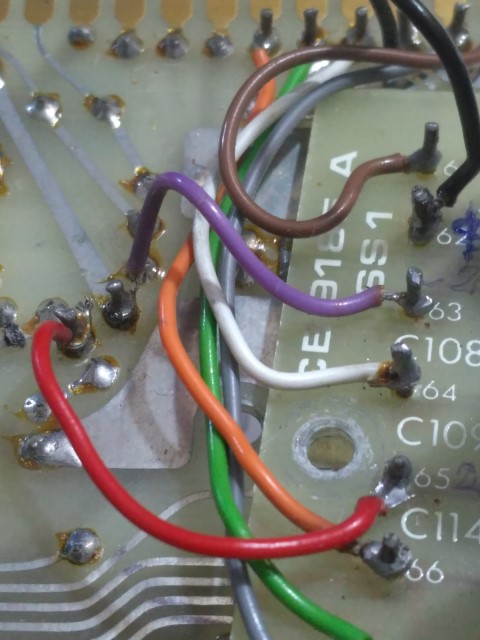
Trident Series 80b, Remix Buss card connections
This time, the culpable for the Remix buss fail, was a wrong peeling of the wires that connected the mix buss card with its motherboard (Echo Aux module) made sometime in the past. Because the copper core was cut too much, part of its filaments must have been lost with the shaking, during the various repairs in the last 35 years and the connection on both the positive audio rail and ground, was extremely fragile and intermittent.
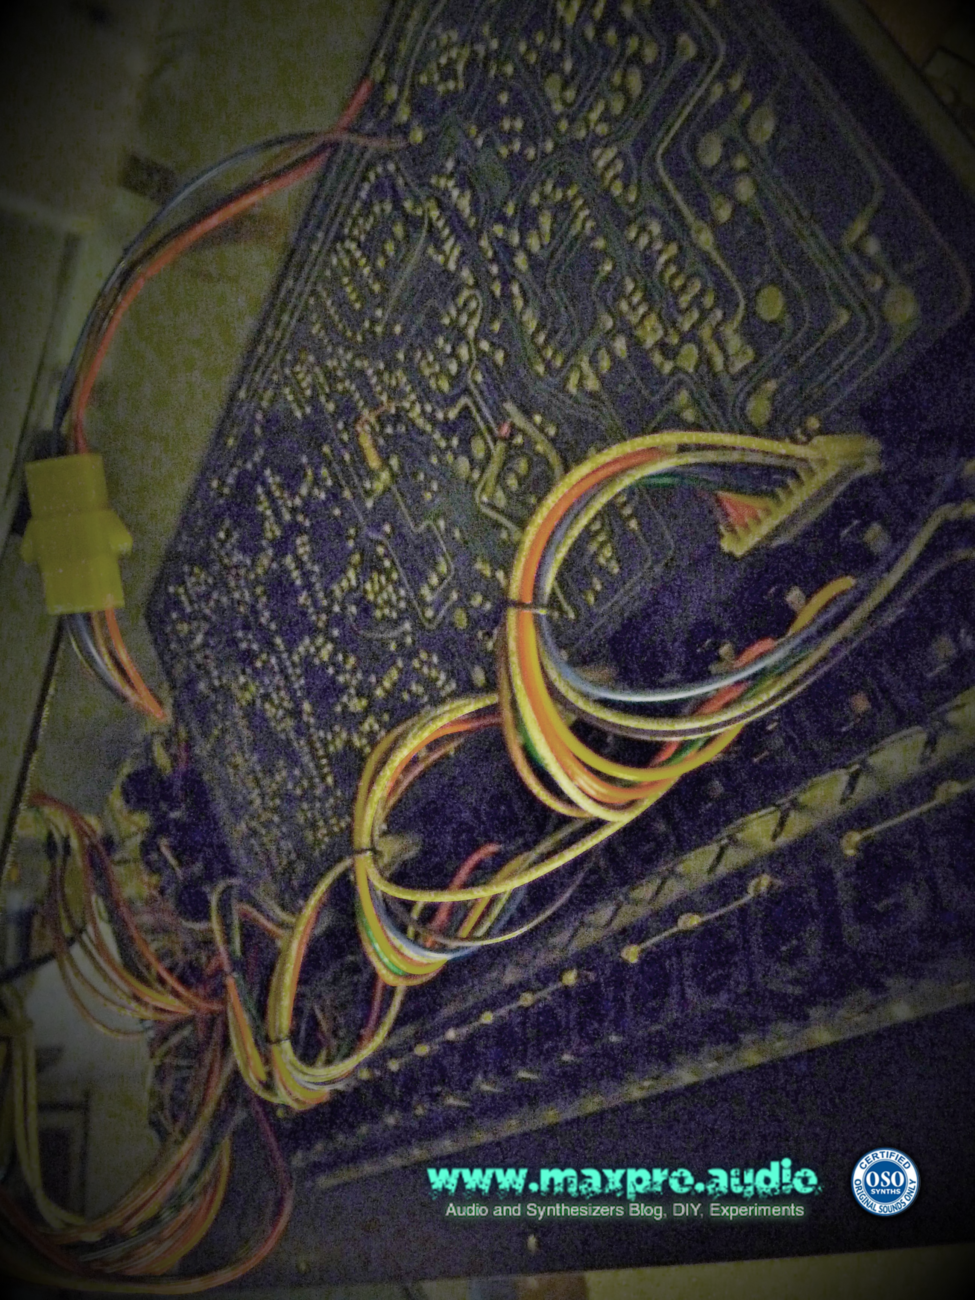
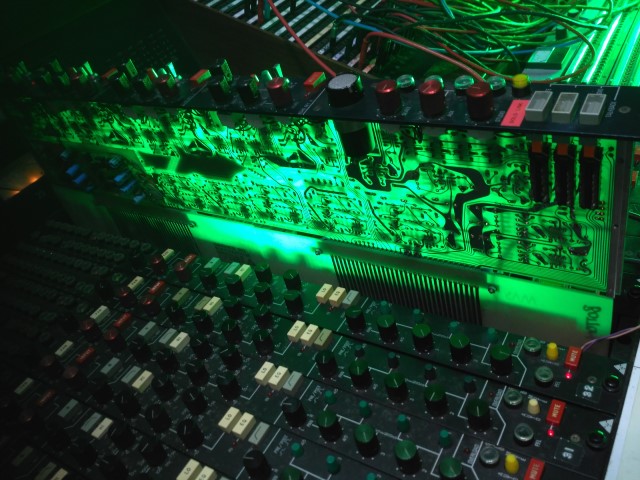
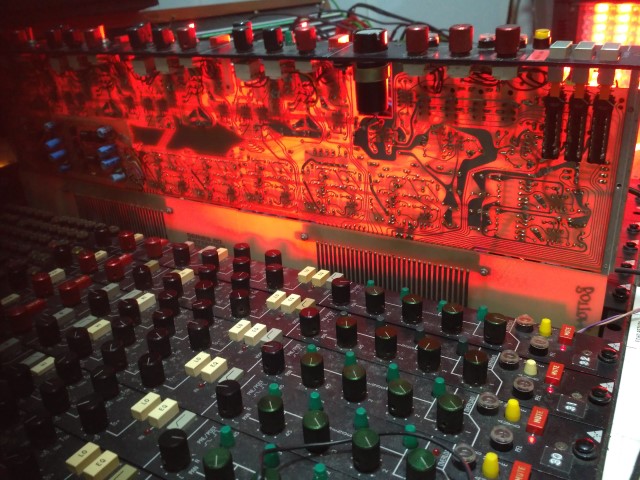
While illuminating the mixer’s board with a strong spotlight, I realized for the first time that the resin the PCB is made of, is transparent. We are used to the squared, mostly made of straight lines, tracks of the circuits of today, sure ideal for the mechanization process in their production. Looking at old circuits instead, I’m always fascinated by the “organic” shapes and in a certain way artistic, tracks “style”!
In all these years mixing ITB, I’ve been continuosly dreaming to return to mix in analog and to do so, try to remain as close as possible to the classic 70s and 80s studio setup. Thanks to the energy put in the last several months, I could restore my old Trident console, fix its patchbay and slowly move from a recording only setup, to a complete production and mixing studio.
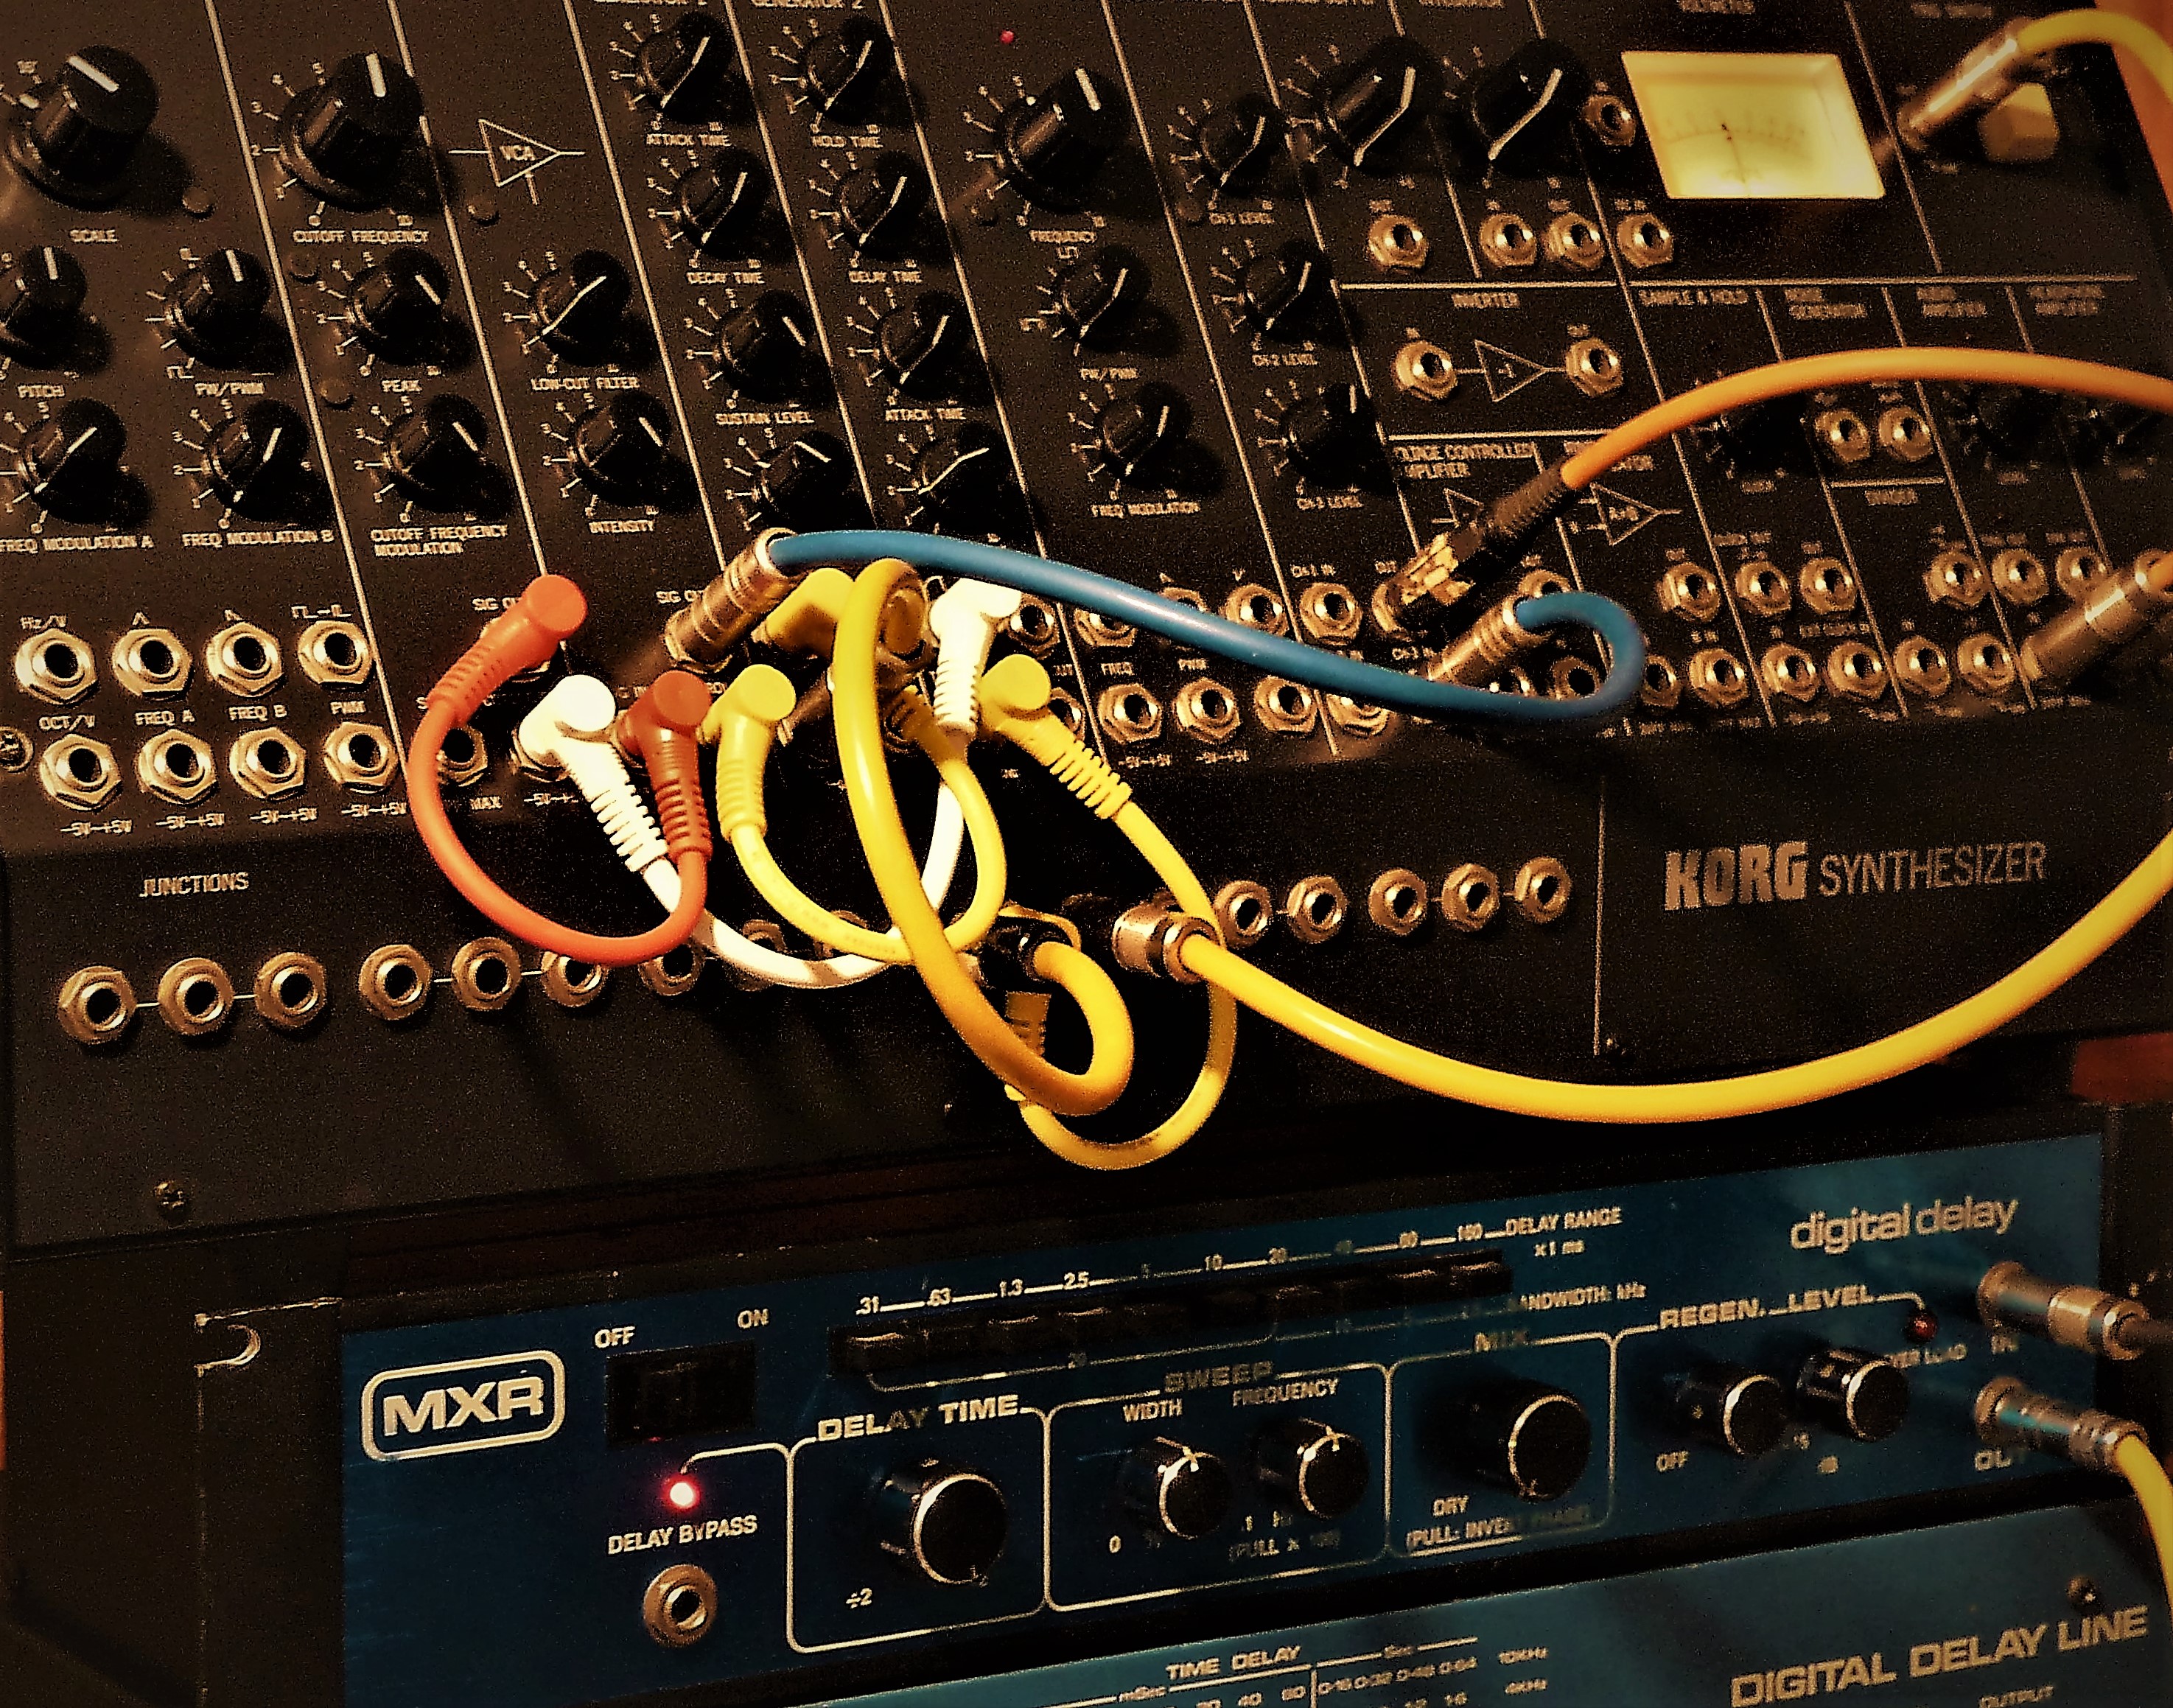
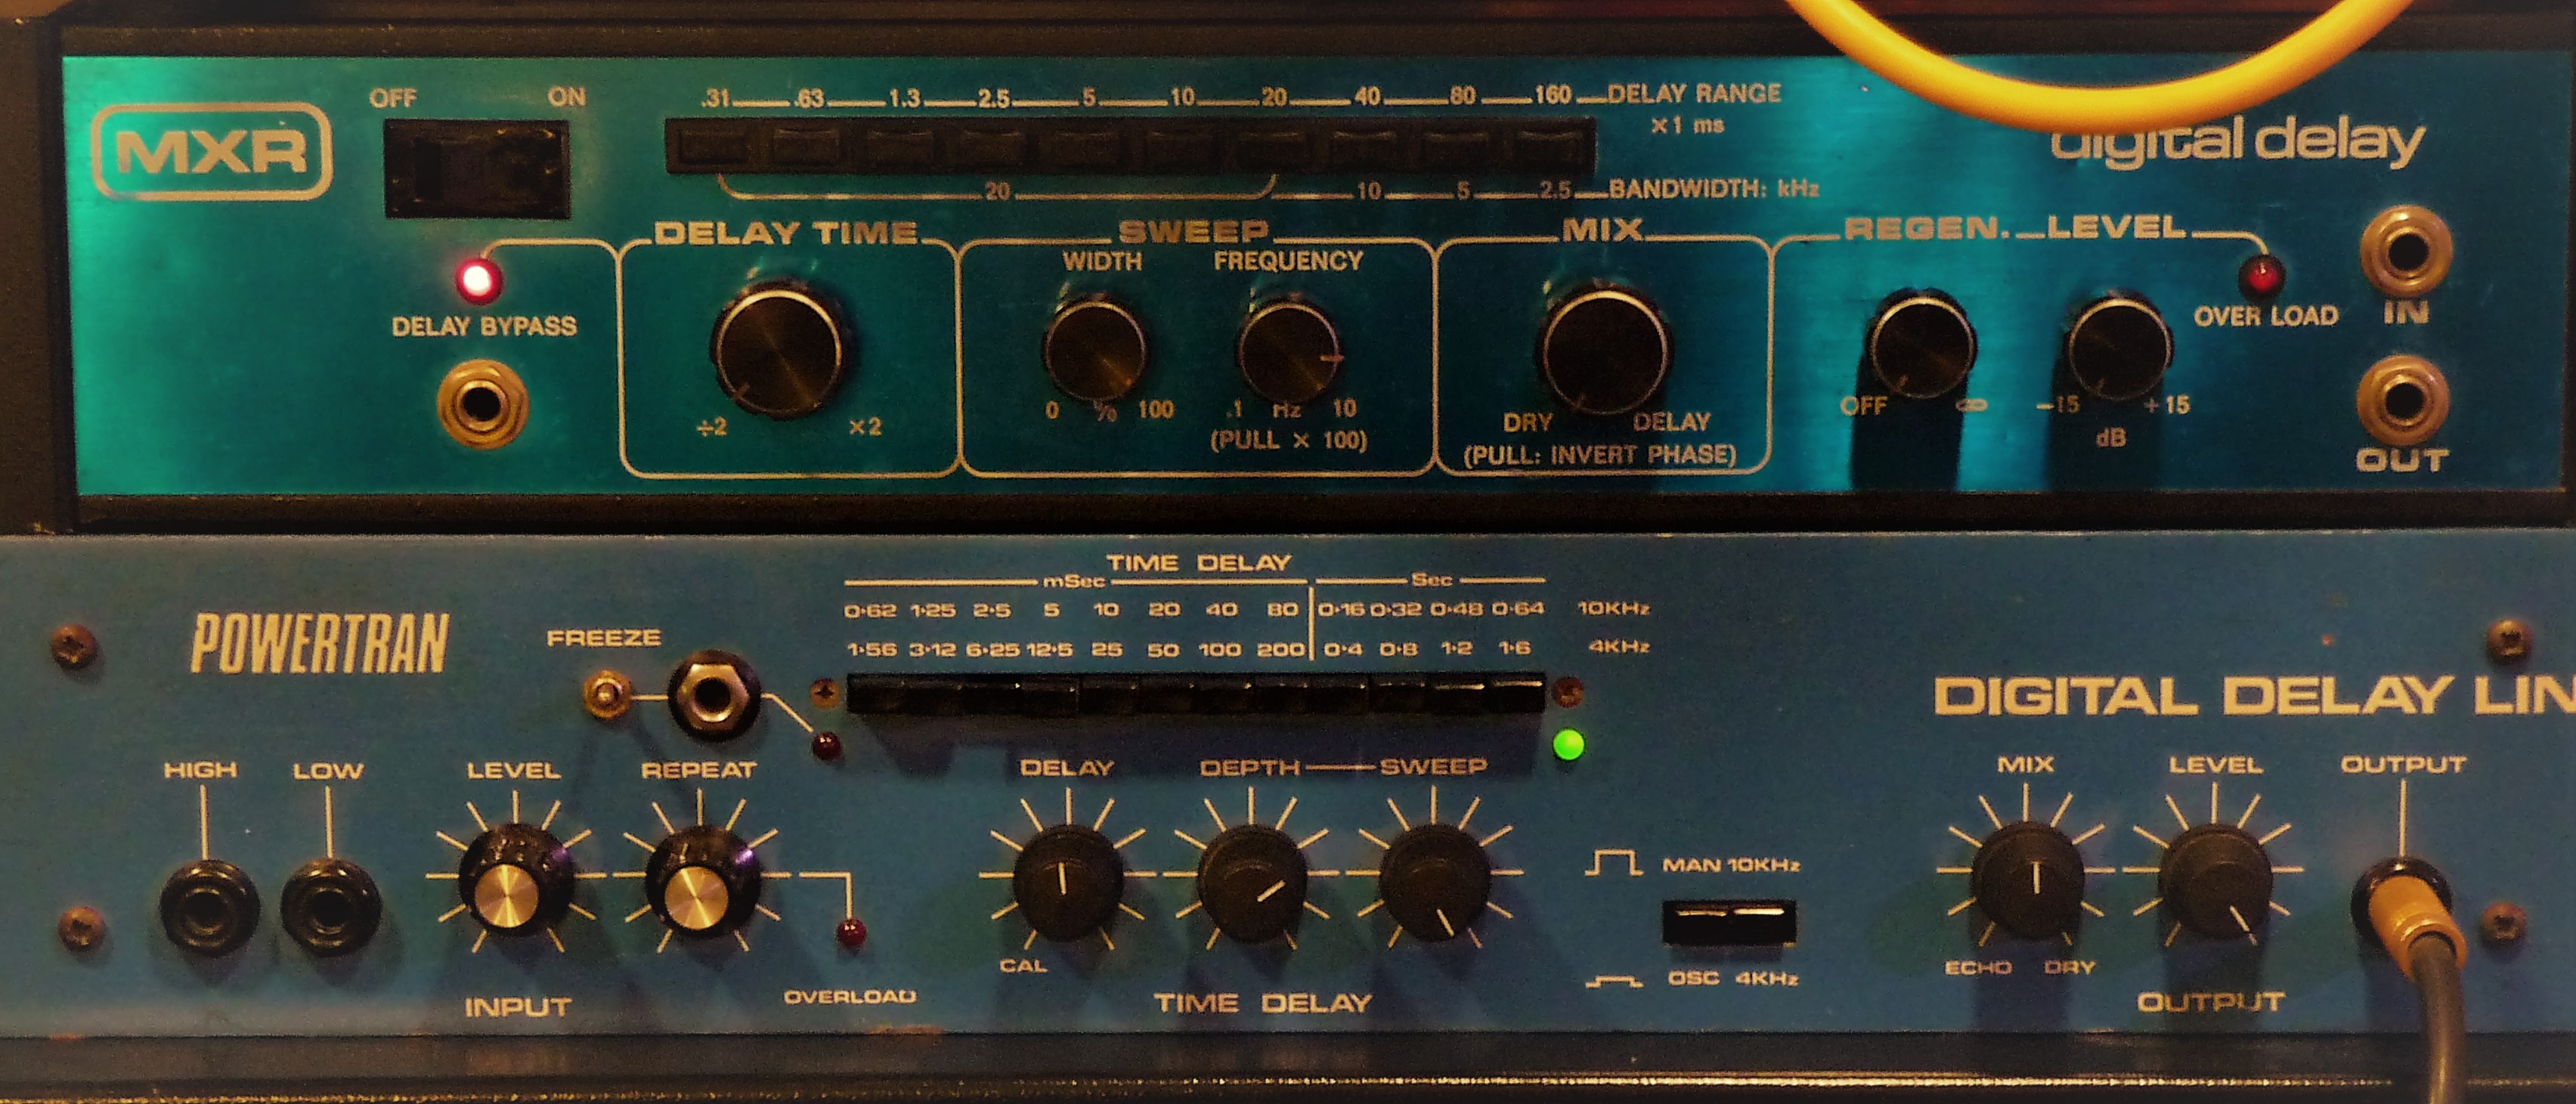
The MXR M-113 Digital Delay has been one of the most popular first generation audio delays, as it had a good quality but was more affordable than the previous processors. Introduced in ’76 at around 1000 USD, it was still expensive, but a lot less than the other digital delays available in the market.
MXR was specialized in guitar pedals, this delay was instead offered in a 19″ rack unit and, same as the other effects of the professional rack series, (Flanger/Doubler, Graphic EQ, Pitch Transposer) became very popular and used by famous artists such as David Gilmour, Frank Zappa, Roger Waters, Brian May and Mike Rutherford.
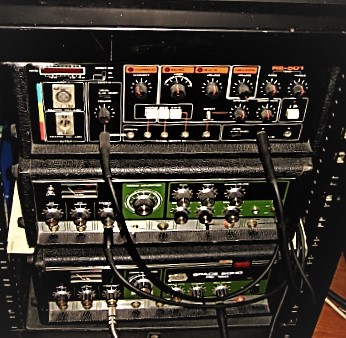
Modular
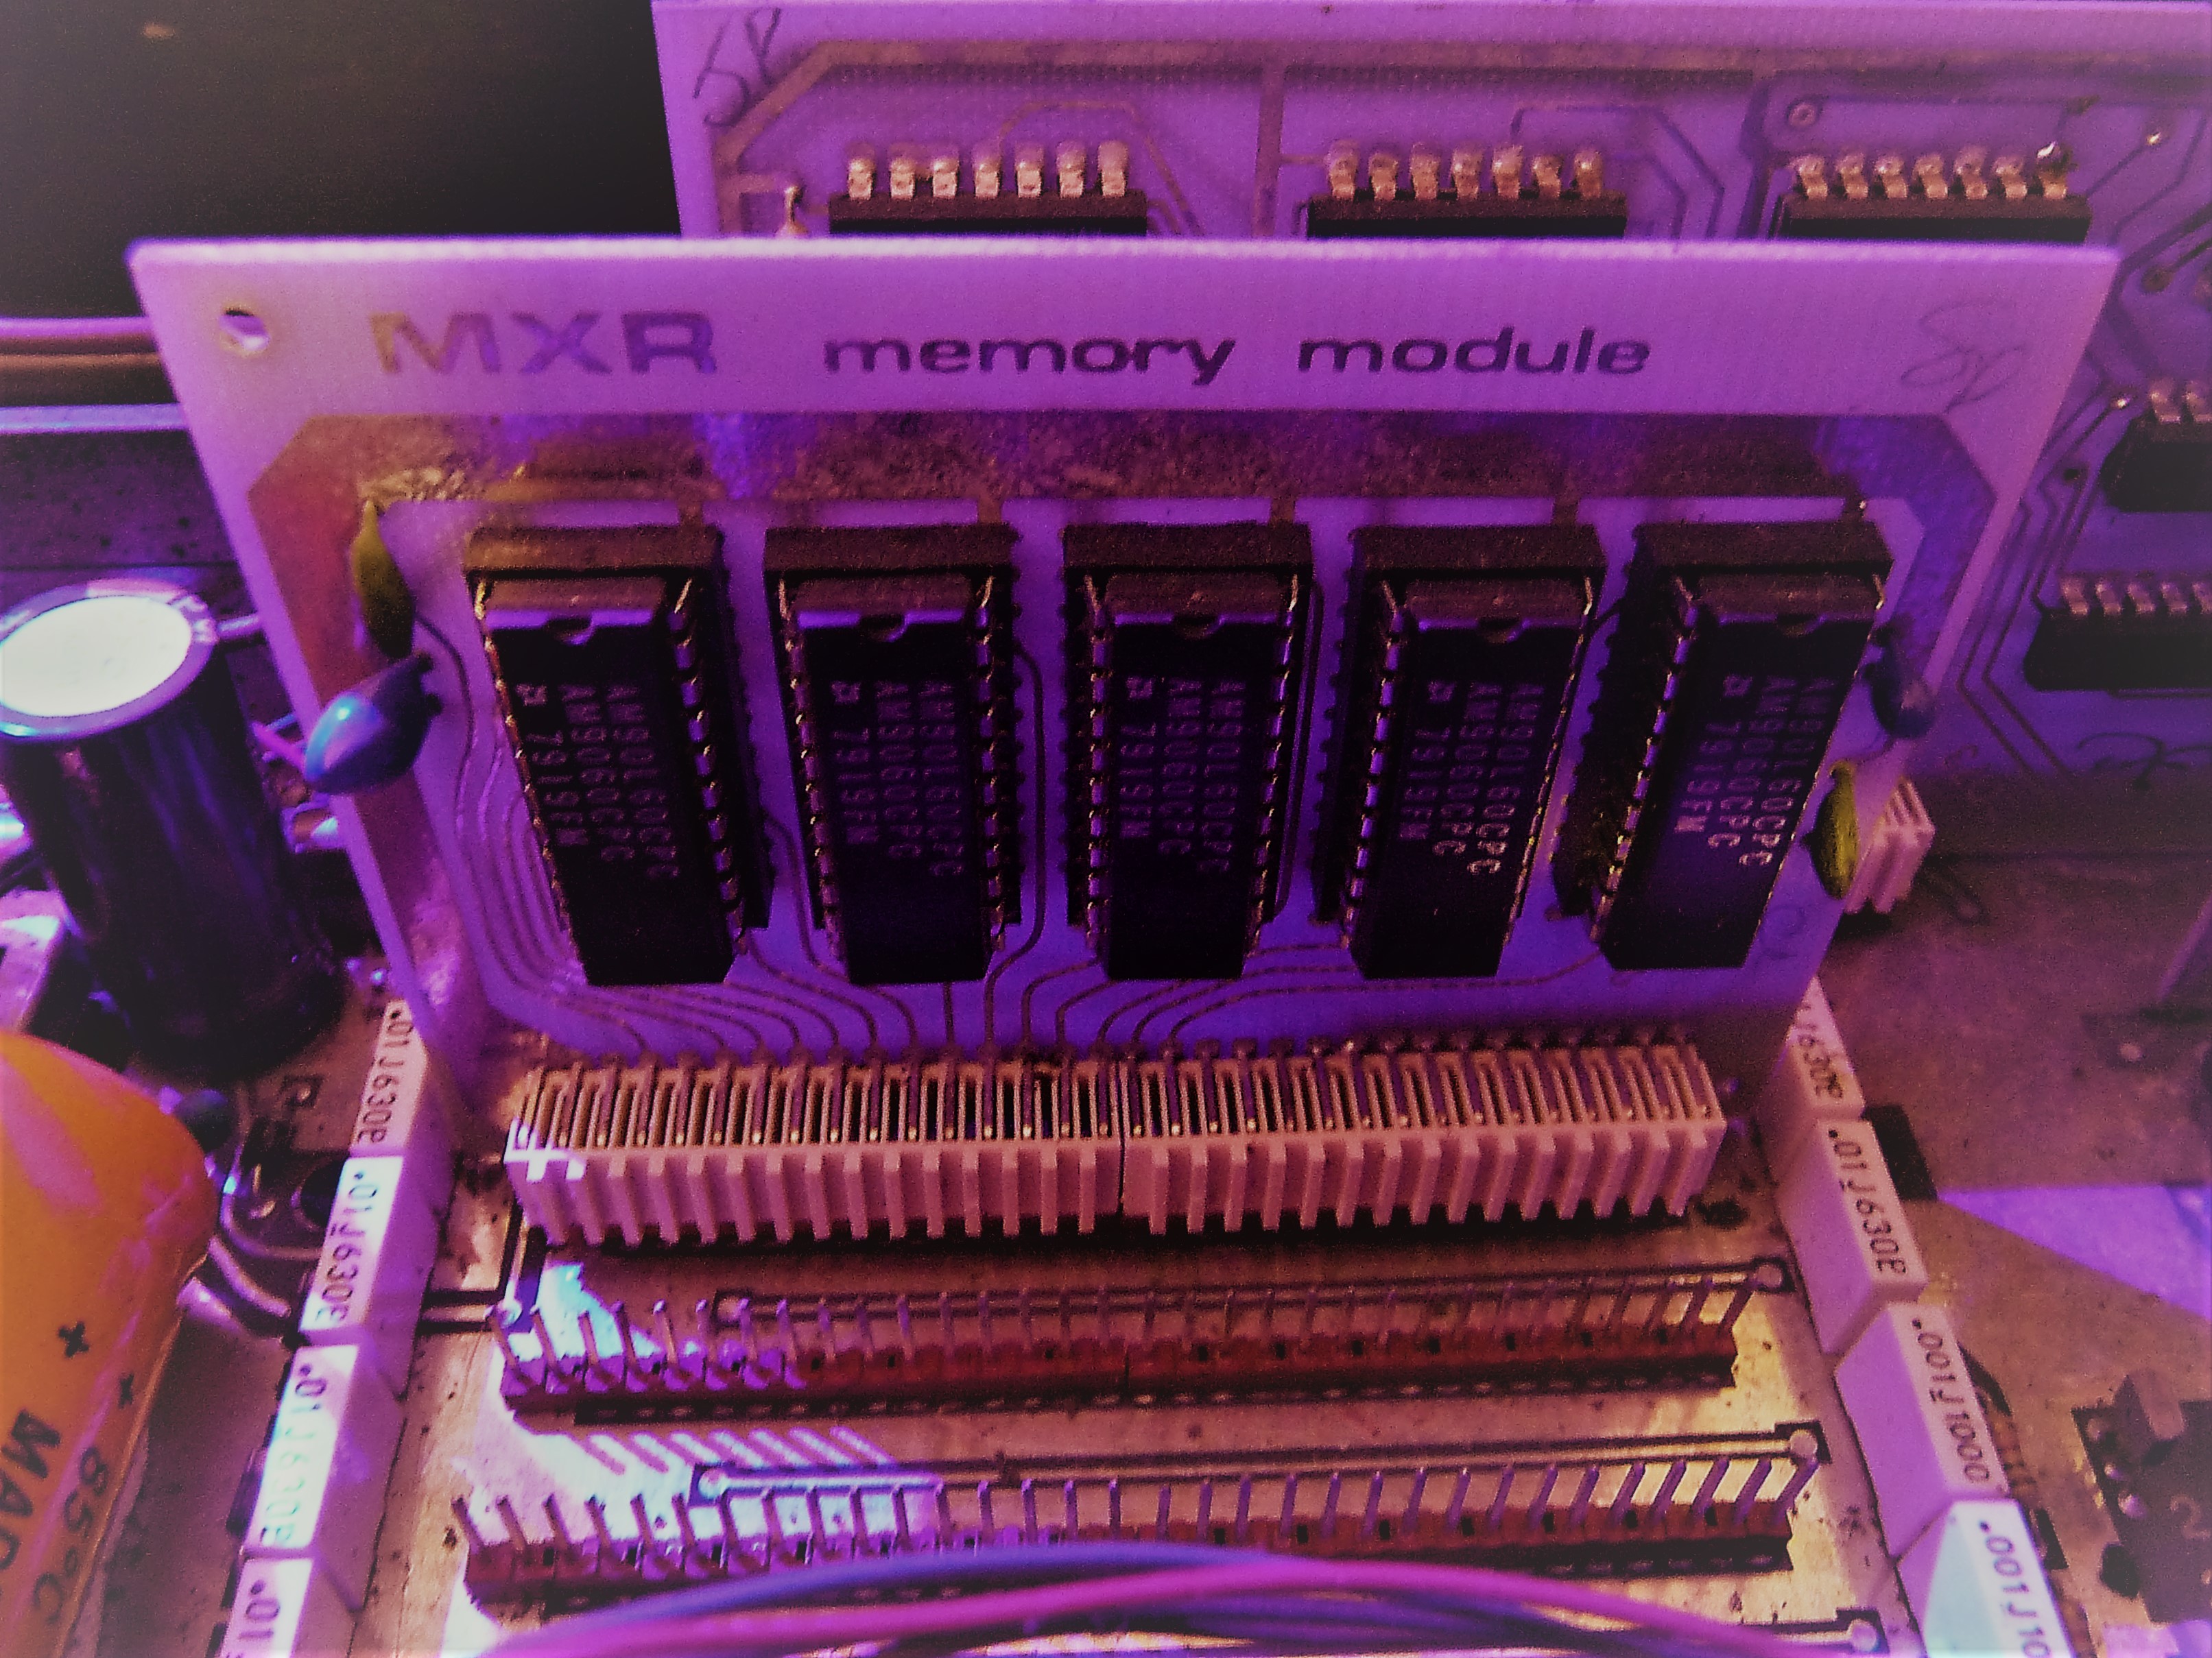
MXR memory module
To contain costs, a modular architecture was chosen. Optional memory boards were inserted in slots, to increase the delay time, but these were pretty expensive, costing almost like a complete unit.
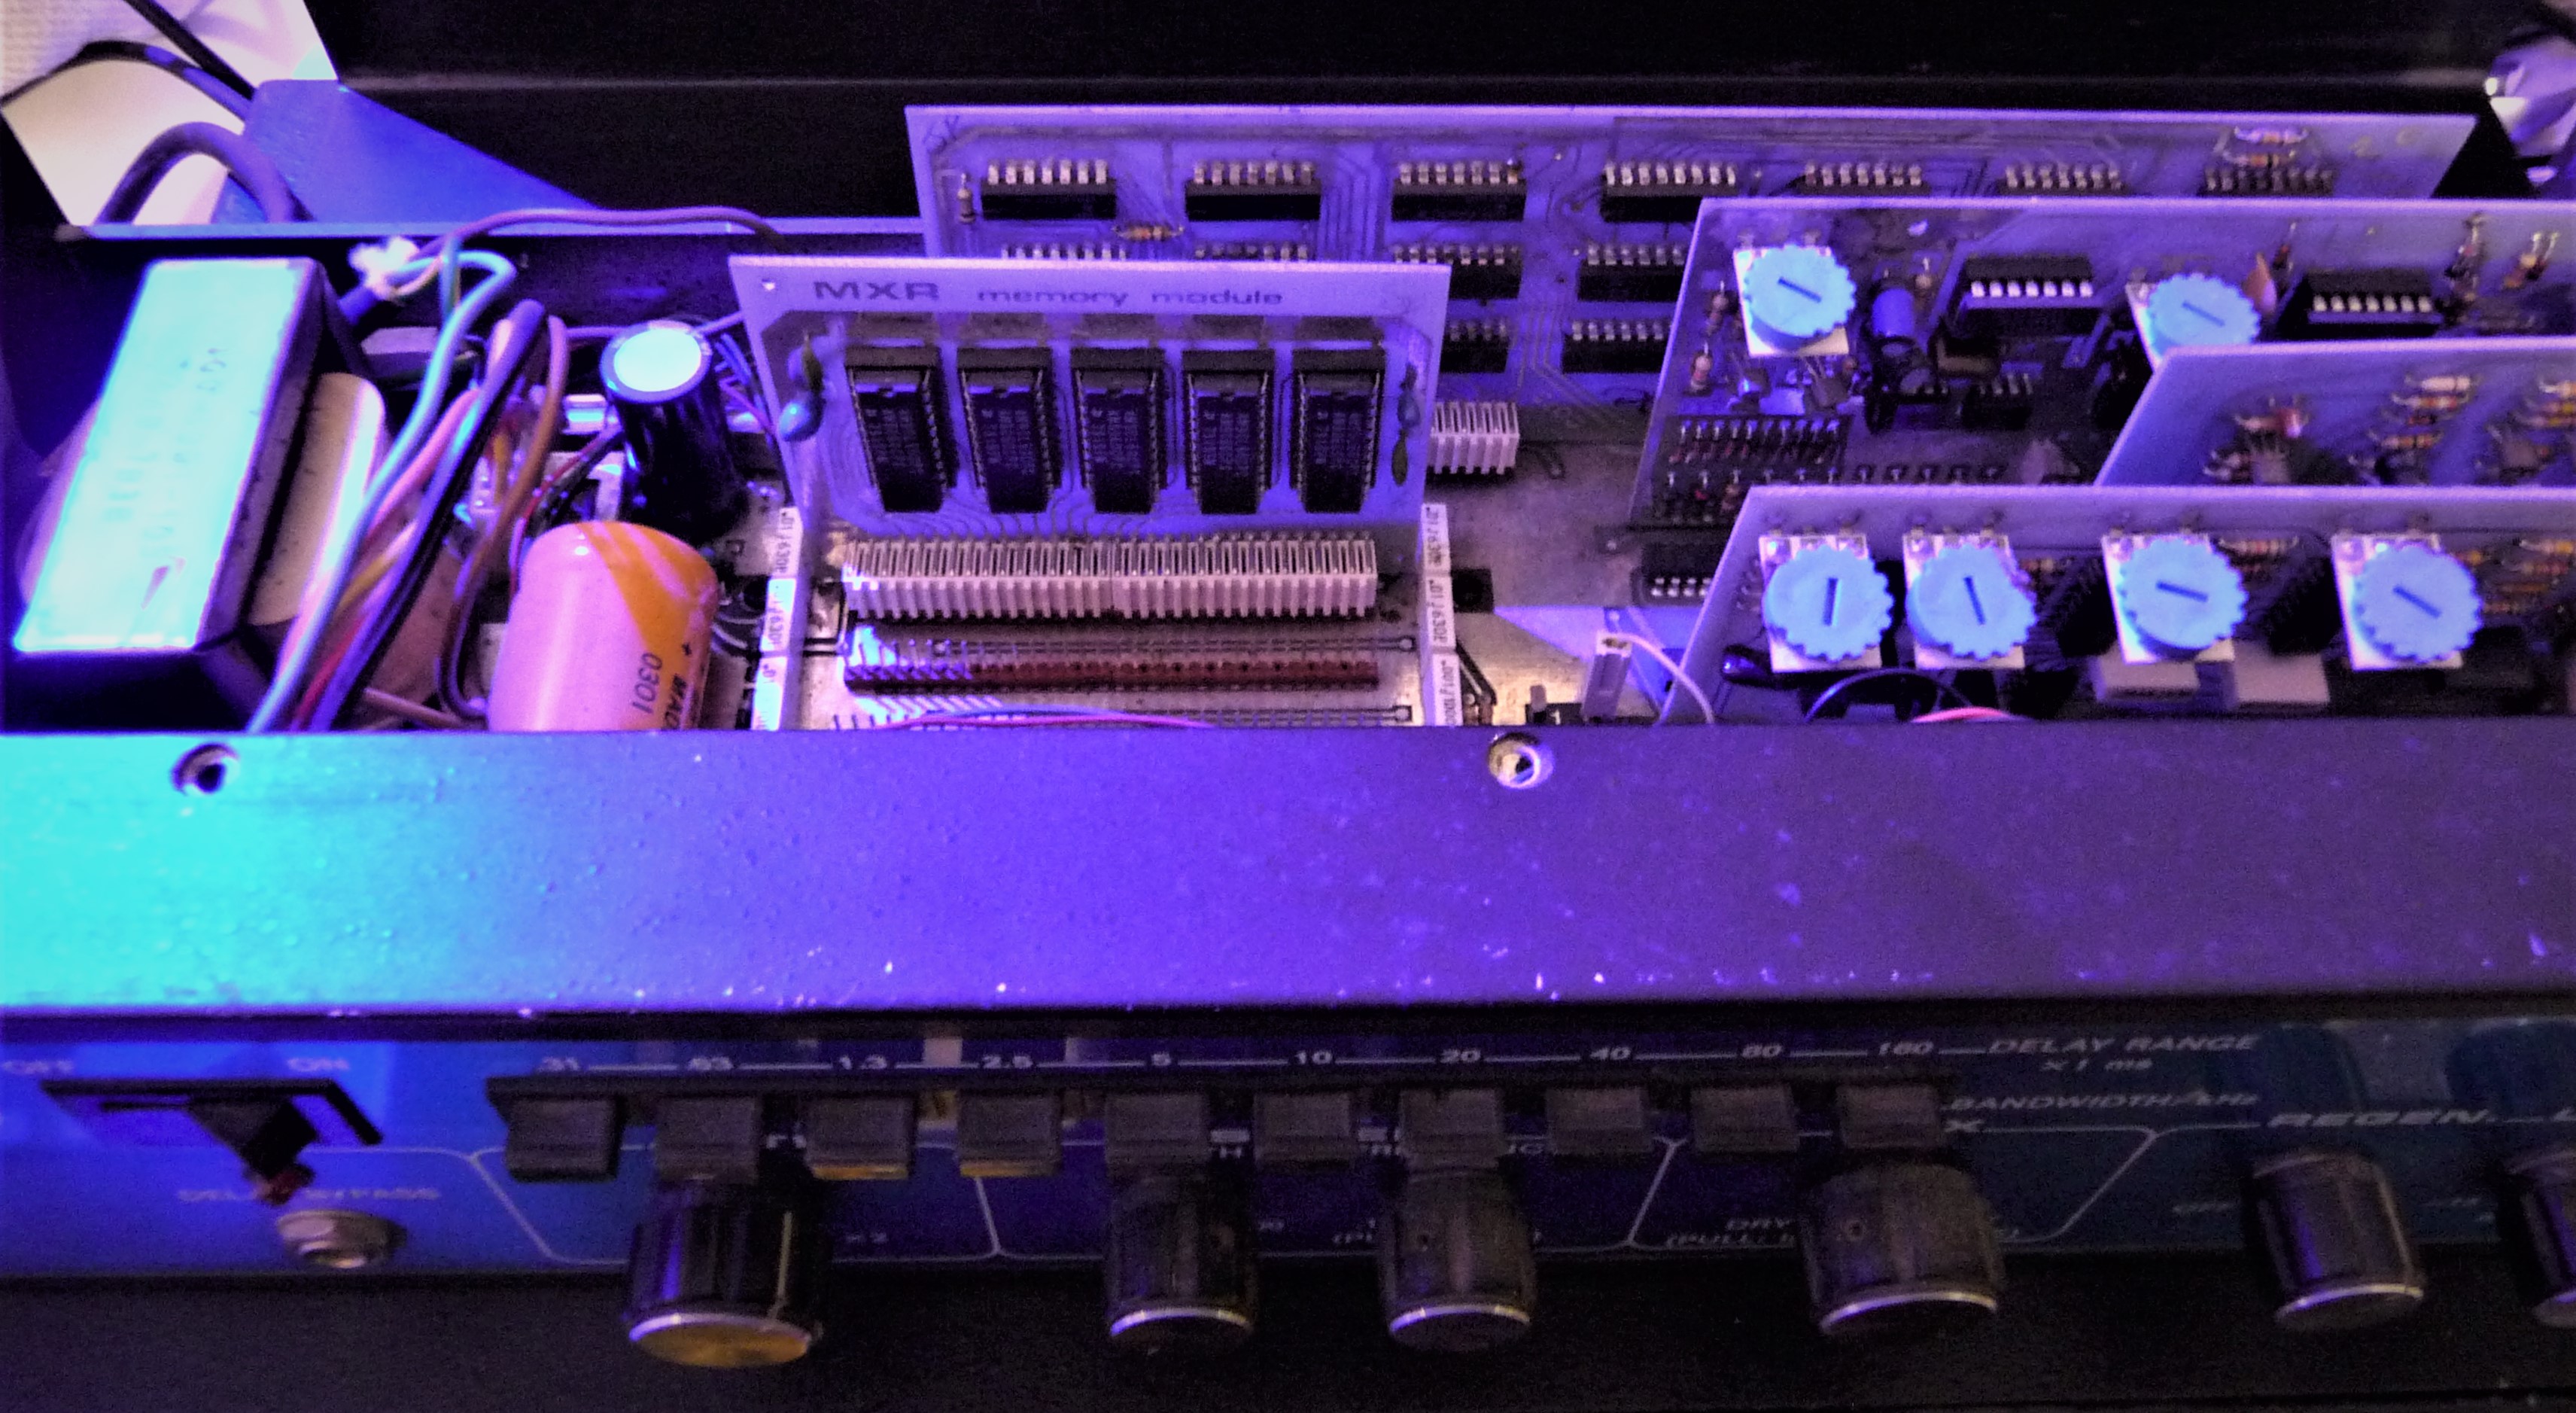
MXR Digital Delay Internal Cards
Digital noise..well not only that! :D
Unfortunately the M-113 Digital Delay, same as its collegues of the same period, is pretty noisy and not only referring to the actual standards. Apart digital noises always present, these processors have a marcated tendency to generate audio hum.
The Model 113, Digital Delay has a maximum bandwidth of 20KHz, but this decreases with longer delays, down to 2.5KHz. The longer the time between repetitions, the tighter the passing frequency band, being reduced through antialiasing filters (HPF and LPF) the more the delay time is increased.
MXR Digital Delay Test Drive
As there are several video examples already of this delay tested on guitar, I thought it could have been a good idea to try it, using some unusual but hopefully interesting sounds.
To record, I used a dbxDI box and the signal sent to a Universal Audio610 tube preamp, even taking all possible counter-measures, still a bit of hum is audible.
On the examples below, I feeded as sound source, a sweep from the filters in feedback of an old Korg MS-50 synthesizer, some piano chords I had recorded from a real piano and a couple of seconds of an oldschool reggae classic.
MXR Digital Delay, Test-01, (MS-50 Filter Sweep)
01) Dry sound, straight from the MS-50.
02) Delay Range 160ms, Delay Time x2, 50% mix and maximum regen (feedback)
03) Delay Range 160ms, Delay Time 0, 50% mix and maximum regen (feedback)
04) Delay Range 160ms, Delay Time 1/2, 50% mix and maximum regen (feedback)
05) Delay Range 160ms, Delay Time Sweep 01 (moving the Delay Time knob)
06) Delay Range 160ms, Delay Time Sweep 02 (moving the Delay Time knob)
MXR Digital Delay, Test-02 (Piano)
I chose these piano chords I recorded as, having long decays, are ideal to test the effect of short repetitions, when modulated. The effects space from phasing to complete madness. The last one is a strong modulation at the higher band of frequency of the sweep, reminding the effect of a ring modulation.
1) Dry Piano
2) Delay Range 1.3ms, 50% mix 3) Delay Range 10ms, 50% mix
4) Delay Range160ms, 50% + Mod
5) Max Frequency Mod
MXR Digital Delay, Test-03 (Rhythmic Loop)
On the following examples, let’s try something that really impressed me first time I played with a Powertran (An article on it, is coming soon). On the MXR the feedback has a faster decay and there’s not the “freeze” function, but the effect it is interesting, too. Once the delay is at tempo with a rhythmic pattern, having adjusted the decay time knob, all Delay Range buttons create a different version of the pattern, but on different speeds. Being the buttons based on a double time sequence, all these are compatible in tempo. Let’s experiment with a small classic reggae riddim loop:
1) Dry loop
2) Loop effected as sort of Beat Repeater
MXR Digital Delay, Test-04 (MS-50 patch)
Last example, this time using a more complex sound from the MS-50.
1) Dry MS-50 sound
2) MXR MS – 50%MIX, 75% Feedback
3) MXR MS – 50%MIX, 75% Feedback + Mod
4) MXR MS – 50%MIX, 75% Feedback + Fast Mod
Since ancient times, places destinated to public speech or shows, were chosen in base of their acoustical characteristics. A powerful voice listened near a sharp rock wall, could impress the public and add a magic ingredient, like if forces of nature were happy to help the venue, amplifying the wanted message.
Nymph Echo on a Roman painting
The Echo was so important, to have a dedicated character in Greek/Roman mythology:
Echo, a mountain nymph, was helping Jupiter in distracting his wife Hera, with interminable discussions, while the god was cheating on her with the other nymphs. Realizing the trick, Hera cursed Echo, removing her ability to speak. The only sounds she could emit, were the endings of words she could hear. As usual in ancient myths, the story ends in a tragedy, with Echo dead but not her beautiful repetitive voice, forced to live forever, but only in the most remote and inaccessible places.
Natural echo or reverb of special rock formations, or the reflecting shape of caverns, were used to create a dramatic effect on human speech, chants (and minds) for ritualistic or entertainment purposes.
The Art of Procrastination
Builders with time could, through architecture, recreate nature’s big spaces and the possibility to impress public with special effects, could slowly move from remote areas to the cities. Acoustically shaped amphitheaters and later, closed spaces like theatres and religious buildings were built for this function. Music started being played in dedicated “chambers” or “halls“, with reflecting walls and high ceilings, to obtain long reverberation times and decays.
At the beginning, recording studios used to record the space where musicians were playing, with microphones pointed to ceilings or walls, to capture the returning delayed sound and the signal was mixed to the original.
Later, rooms were dedicated exclusively to reverberation. A sound from the control room was sent to an amplifier in an empty room or chamber, completely empty and with reflective materials. One or more microphones were used to capture the effect, that was mixed to the rest of the sounds in the mixer. To add colour or to obtain special effects, metallic thin plates or springs, were recorded while resonating in the room, too.
Plates
At the end of the 50s, technology arrived to a point where the process of reverberation could be standardized and every major studio had a plate reverb like the EMT 140, or a DIY simpler version of it. The effect was obtained through the use of a big reflecting surface, in this case a metal foil put in tension through springs. A speaker inside the unit, puts the plate in resonation and a pickup captures the signal then amplified, through a tube preamp. There was a mechanical damper, to reduce the decay and later two pickups, placed in different places of the box, to obtain a stereo signal.
The effect is warm and beautiful, but unfortunately the technology needed big spaces as the plates were more than 1 meters long and these reverbs were very heavy and expensive.
Spring Reverb
Lee “Scratch” Perry and his Grampian spring reverb (Black Ark Studios)
A low quality delayed signal, could be obtained with the same process, implementing springs in tension, instead of plates. The idea, commercially developed by Laurens Hammond, the organ pioneer, was much less bulky then plates and even portable, to the point to become a standard on electric guitar amplifiers.
Spring reverbs give a particular vintage flavour to guitars, drums and percussive instruments, really great for old Funk or Reggae.
Tape Echoes
With the advance of technology, magnetic surfaces in the form of tapes (Echoplex) or disks/drums (Binson/Meazzi), were used to record and reproduce the delayed signal, on dedicated processors.
Roland RE501, RE-201, RE-150 Tape Echoes (maxproaudio)
The tape loop has been the first form of reproducing a sound with a delay. Two tape recorders where used before dedicated machine were born, one to record and the other for the playback. Delay time increased, the furthest the second recorder was placed from the repro machine.
One of the most popular tape echo units, has been the Roland RE-201 Space Echo, still searched by Dub producers has pretty high values, today. Its tape was left unrolled in a transparent compartment inside the box. Rising the top and watch the tape moving in an apparently chaotic way, listening to the smooth noise of it, while smelling the characteristic chemicals odour, remains a very unique experience.
Some special effects, obtained using tape echoes, were pretty popular in the 60s and 70s, especially for Sci-Fi and Dub. I recorded a few examples with my RE-201 with the “Intensity” (Feedback) at maximum, conditions under where the Space Echo starts auto-oscillating feeding its own noise. The effects obtained are warm and immediately bring back to the past. The first track, called RE-201 Slam, is obtained instead slapping the unit with force. The shock is captured by the internal spring reverb. The third track is dry at the beginning, while has some additional effects from the second part. Track 2 and 4 are sweeps, moving the “Repeat Rate” knob.
Many virtual tape delay plugins of today, are based on the RE-201Space Echo, the most popular of the RE series
In the wiki we can read that a bucket brigade or bucket-brigade device (BBD) is a discrete-time analogue delay line and that an analog delay line is a network of electrical components connected in cascade, where each individual element creates a time difference. A series of capacitors created the delay. Summing a big number of those, could create the desired long echo. Analog delays, cannot reproduce the same sound for long, each repetition has a dirtier sound and this, with the eyes of those times, was seen as something to improve. They are very popular and still produced for guitarists.
Digital Delay Lines
Digital delays, can repeat the same sound, maintaining intact the quality of the original same as a sampler, only when sample rate and bit resolution are high enough.
The first commercial machines had a very low resolution, so samples were noisy and with a limited bandwidth. This is the characteristic that, in my point of view make them attractive and useful still today, when clean sound is no more a priority.
At the beginning, these machines, were only at the range of professional studios or rich producers. Until Electronic & Music Maker Magazine published a series of articles with schematic and instructions for a DIY delay, making affordable and available to a wider public this new technology.
Being a lover of Dub and vintage equipment, I’ve been lucky to own a few of the classic delay devices, bought when prices were extremely affordable, as nobody on those times needed a bulky and noisy delay only, machine.
Vintage delay lines have an other interesting aspect.
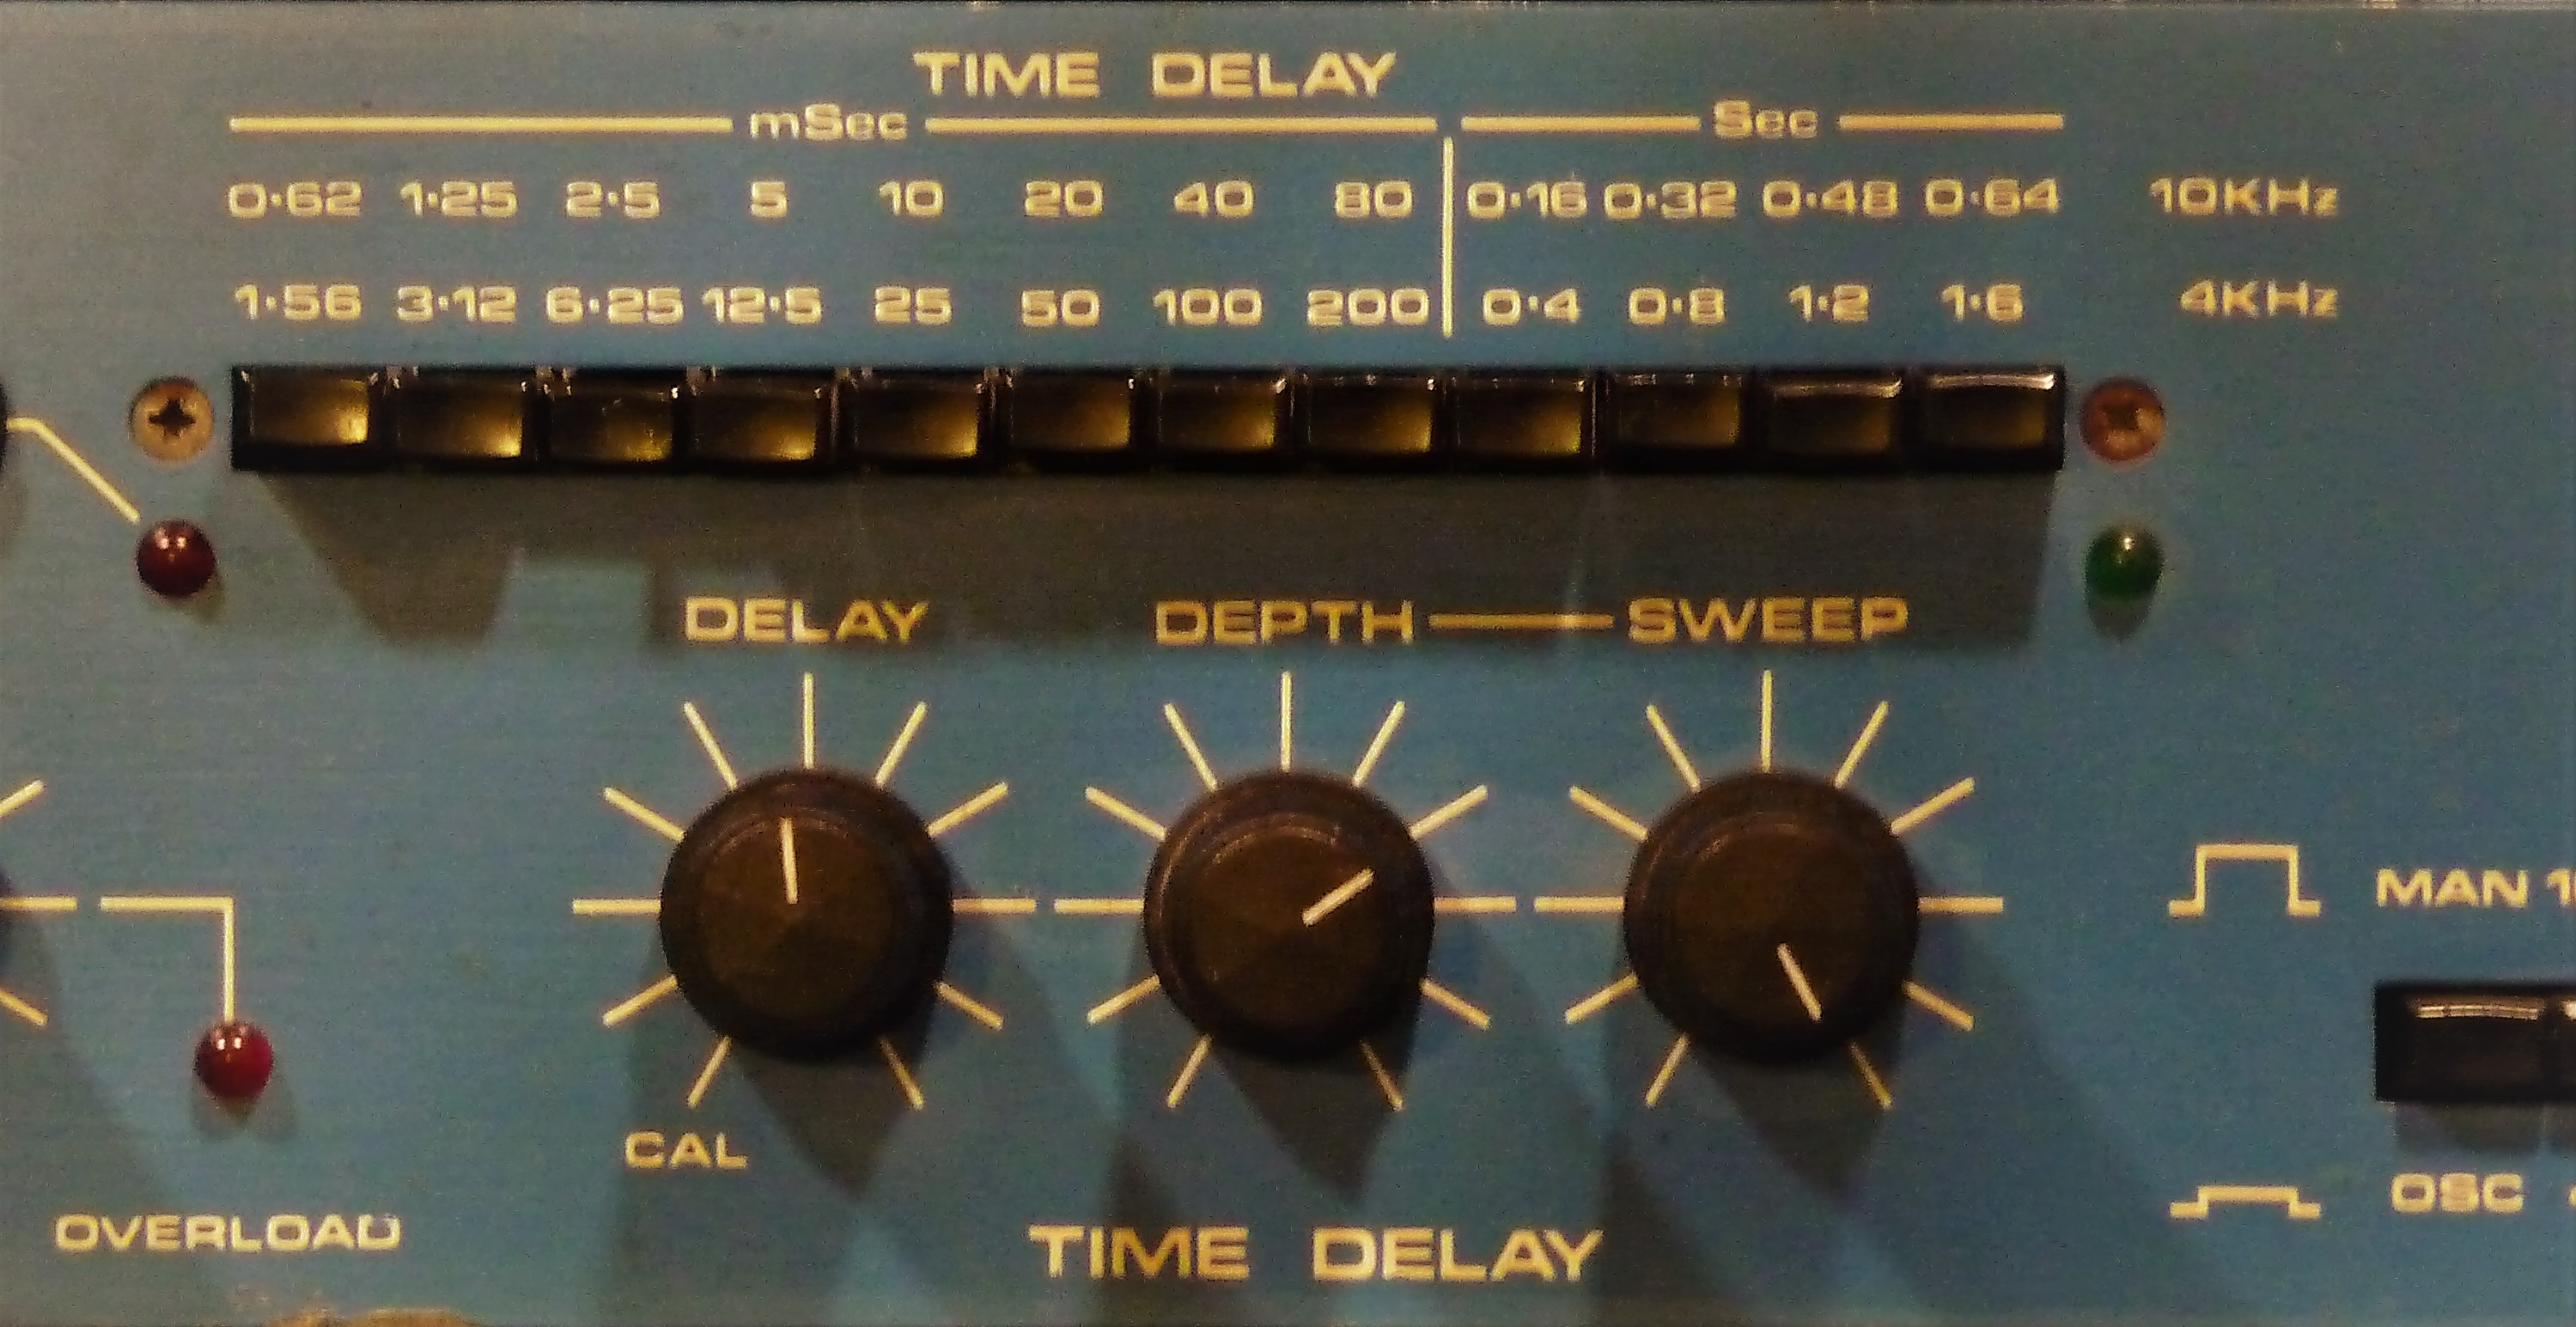
Powertran Time Delay switches
Their buttons select always multiples of the original tempo. If the delay is in sync with track tempo, pushing different switches, gives a today, very fashionable Beat Repeater effect, where for a example a loop is faster or slower, but always remaining in sync with the song. Some machines like the Powertran, had a freeze button, so that the sample was repeated without decaying, same as a sampler.
Effects obtained apart the Echo
A Delay Line, is able to create a series of effects, not stricktly limited to repetitions of samples. Through the modulation of the processed signal and blend it to the original, a series of interesting effects are obtained, too.
Phasing
When the same signal is combined with its delayed copy, it’s like having passed it through a filter. The Comb Filter resulting from counter phasing if modulated, changing the delay time through a Low frequency oscillator (LFO), becomes the pleasant effect called Phasing.
Flanging
Same as Phasing, but with longer delay (10ms). Similar to chorus, but a more dramatic effect and with a marked SciFi like, character.
Chorus
Even more delay and slow modulation, possibly with dry and wet signals on the opposite sides of the stereo field, gives the classic chorus effect that doesn’t need too many words more.
ADT
Automatic Double Tracking, was pretty popular in the 80s. Time delay is kept just below the perception of the single repetitions and is used especially on vocals, to give the illusion of doubling, without the need of recording two different voices.
On the next posts, we will test drive, three of the oldschool digital delays still in my hands: MXR Digital Delay, Powertran Digital Delay Line and the Roland SDE-3000
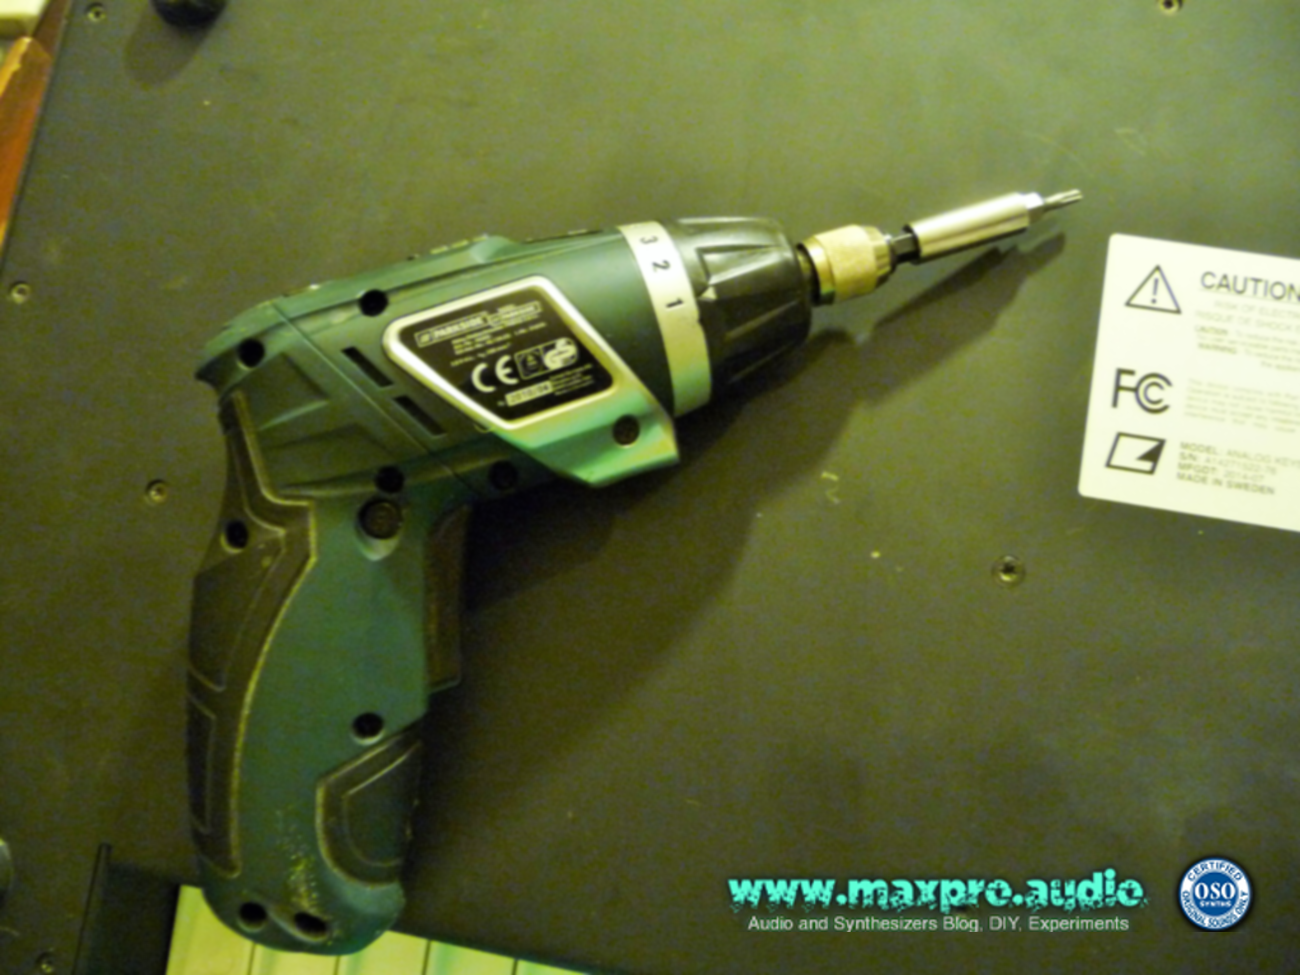
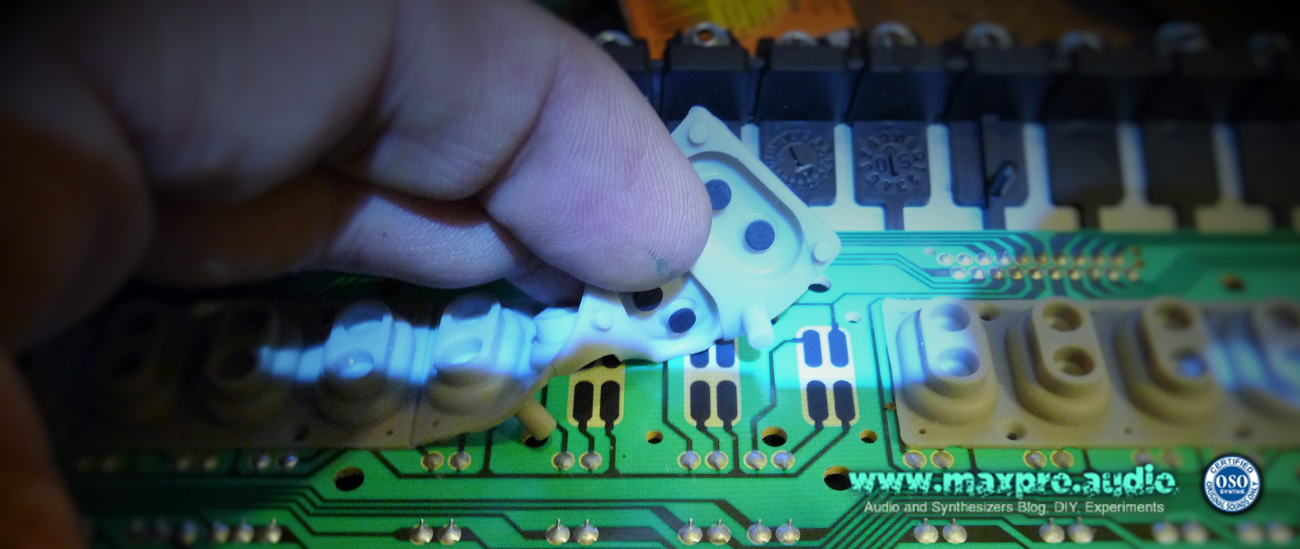
OK, a failure can happen even to the most modern synths, most commonly caused by a failing component, but finding a tiny polystyrene pellet right inside the contacts of my Elektron Analog Keys keyboard, has been really surprising. The small fluffy ball, found the way through, still in the production phase I guess, as when I opened the keyboard assembling all looked clean and the rubber tops were well sealed. As the warranty had expired already, I had the perfect excuse to check what was inside the only of my “unexplored” synths.
There are plenty of tiny screws to have access to the “insides”, better using a powered screwdriver.
Keyboard assembly
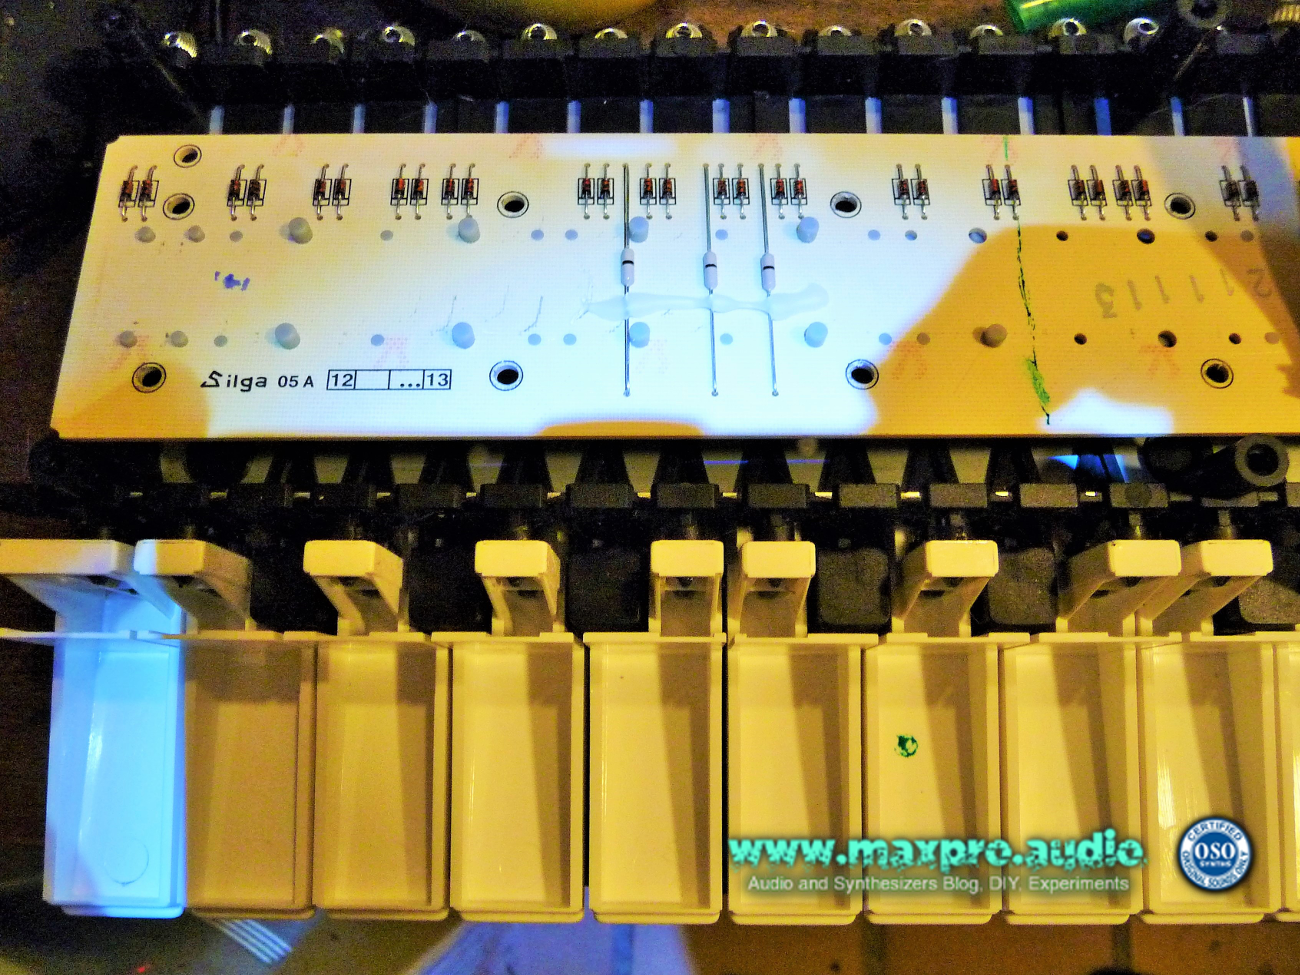
Keyboard PCB
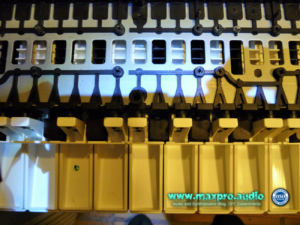
Contact pads
Under the contact pads is where I found the small pellet
Simply removing it and assemble all parts back, the synth’s keyboard returned to working smoothly.
For “The Dark Side”, I mean the real nightmare always lurking, while playing with vintage machines: Their tendency to break apart, often in the middle of an important session.
Always the best option, if possible, is to be able to do some small fixes in “DIY mode”, to save money and have the repair done promptly. The older the machine, the easier the repair is, usually. This is valid, if some rare parts availability, doesn’t interfere in the logic.
Doing some tests recently, I found that the auxiliary VCA section of my Korg MS-50, had one of its jacks broken inside. The plug was not kept in its place, like if there was nothing inside to retain it. I suspected the positive pole plate got broken.
Good occasion to open up the synth and look what’s inside ;)
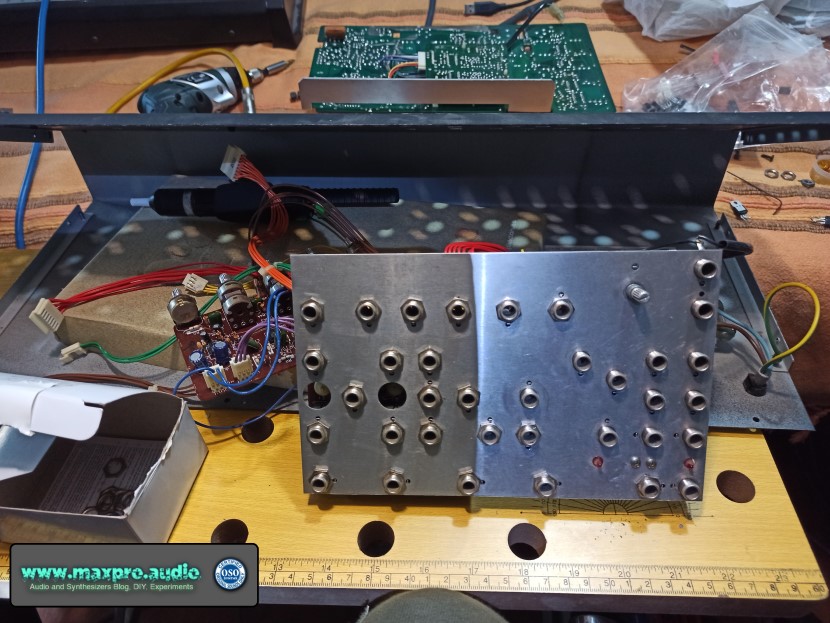
As soon as I unscrewed and removed the later panels, I remained impressed by the fact that in the interior of its panels the Korg MS-50,..ehm…IT’S EMPTY! :D It’s pretty impressive how Japanese technology was advanced, considering that this synth was in production, since 1979.
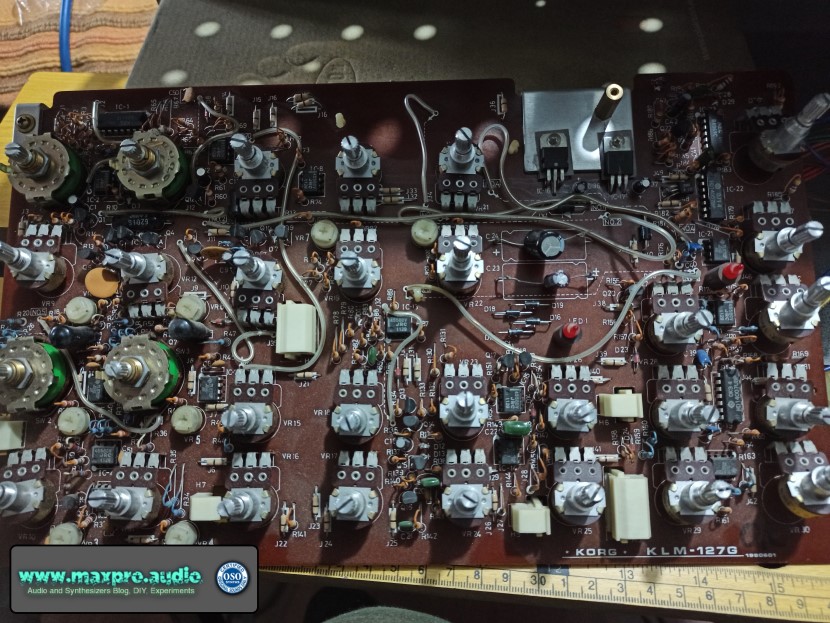
In the interior of the Korg MS-50, there are just a couple of thin PCBs, plus the PSU board.
What occupy much place, are the plastic slots for the jacks metal connectors plates.
The only thing really modular to me, is the placement of the jacks in the front panel, simulating the modules of a real modular synth. Modules can be connected through external connections only , same as a modular and not as the rest of the MS series, where some internal patching is placed already.
This not complete modularity, can look a bit suspicious by the most purists, but the sounds that this machine is capable to create are fantastic, even with it’s limited single oscillator configuration.
The Korg MS-50 have been pictured in Aphex Twin studio and should have been used by The Chemical Brothers.
REPAIR
Inspecting the interior, (with major relieve) I discovered wasn’t necessary to disassemble the whole synth, as removing the main PCB from the front plate, must be a really tedious process, considering all the jack bolts, to unscrew.
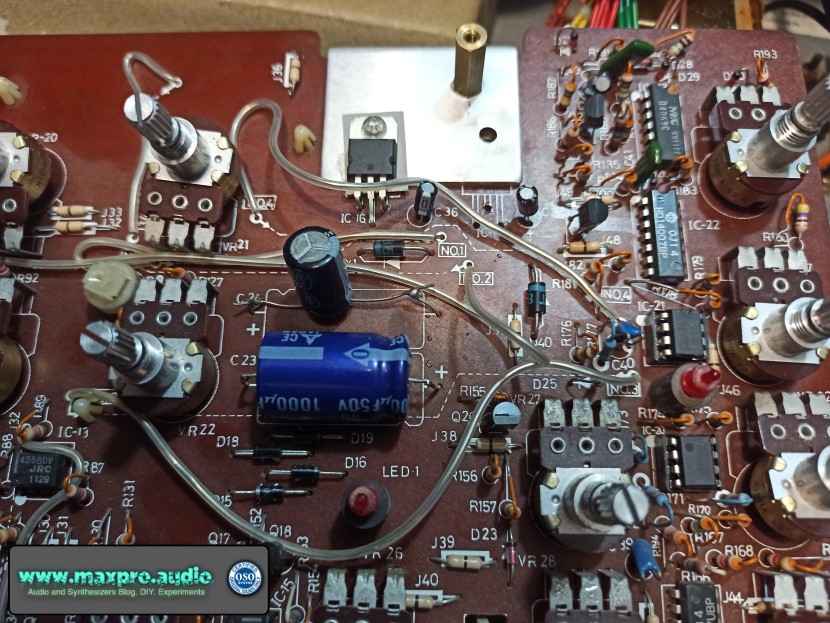
The cause of the fail for the broken jack, resulted in being the connector plate of the + polarity, that I found off its slot.
MS-50_int connector fail
Just some glue solved the problem, a much easier solution than what I thought was necessary, at the beginning.
TEST DRIVE
To test the VCA repair, I decided to make a demo, squeezing from the Korg MS-50 single oscillator, all its waveforms. I triggered them from its two Envelope Generators and a Korg SQ-10 Analog Sequencer that plays the sequence.
Are you sure analog recording is reserved to just to a few lucky audio nerds, with big budgets at their disposal?
Even if this, considering the price and maintenance requirements for top end professional analog equipment, is pretty true today, recording in analog isn’t expensive when we take in consideration the amount of cheap consumer grade, analog recording devices we can find used for almost free, still around us. They have been lying down somewhere in our homes unused for decades, it’s time to give them a new life, tranforming them in “effect” processors!
With the abilities in time stretching and audio quantize, present on most of present day’s DAWs, time shifting problems of cheap devices, can be corrected in seconds.
Why, as plugins can do that?
Tape simulation software, can do a good job, at maybe 1/10th of the time needed for a real analog recording.
If your objective is to produce one hit after the other, time is money. Better to recur to plugins and stay tight to them, in this case.
But who loves producing music as a form of creativity expression, have fun in the process of making it, too.
Joy comes not only from the results obtained, but from the memories of the experience, by the process itself.
Creative and experimental techniques are many times the key to activate and stimulate creativity.
The collateral effect, is that the musical results are unique and very personal. The infinite number of variations obtainable while experimenting, is not possible by any plugin.
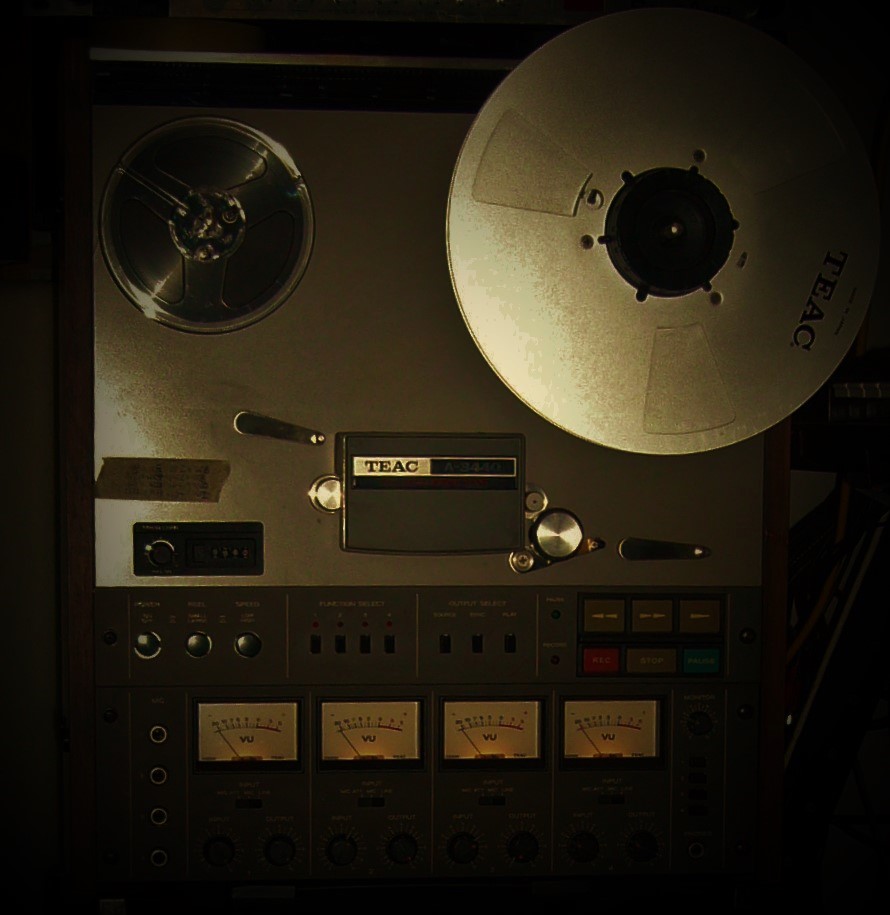
PC synchronization to tape
In the professional analog recording realm, to synchronize tape and a computer, the only way has always consisted in using a track of the multitrack recorder as guide for the computer, recording on it a special audio tracking signal. The sequencer is then adjusting continuously track tempo, taking this time code as reference, to remain synchronized. Tape recorders have always had small fluctuations in time and pitch (Wow & Flutter), impossible to correct, even on the most expensive machines, due to their mechanical nature. The problem was resolved through the standardization of a synchronization signal code, called SMPTE. https://en.wikipedia.org/wiki/SMPTE_timecode SMPTE audio track, can be read from an interface (for example a MOTU MIDI Time Piece) and transformed into MIDI clock, signal which keeps the DAW in tight synchro.
The perfect tool
Let’s go back to the main subject of this post and let’s start having fun, too!
Do you want to experiment with analog, without having to spend a fortune on rare equipment and with no hassle?
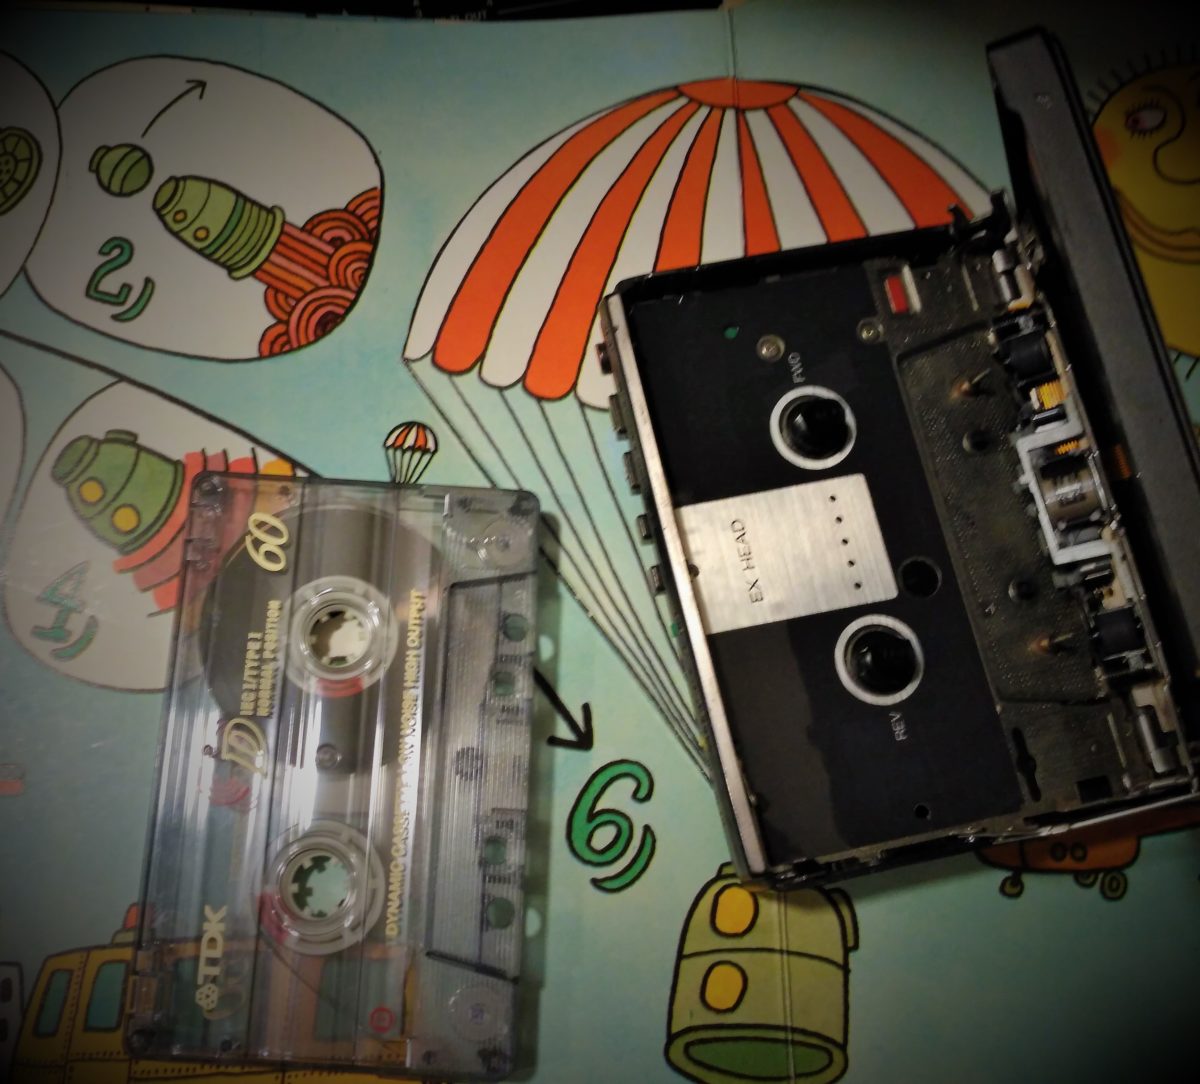
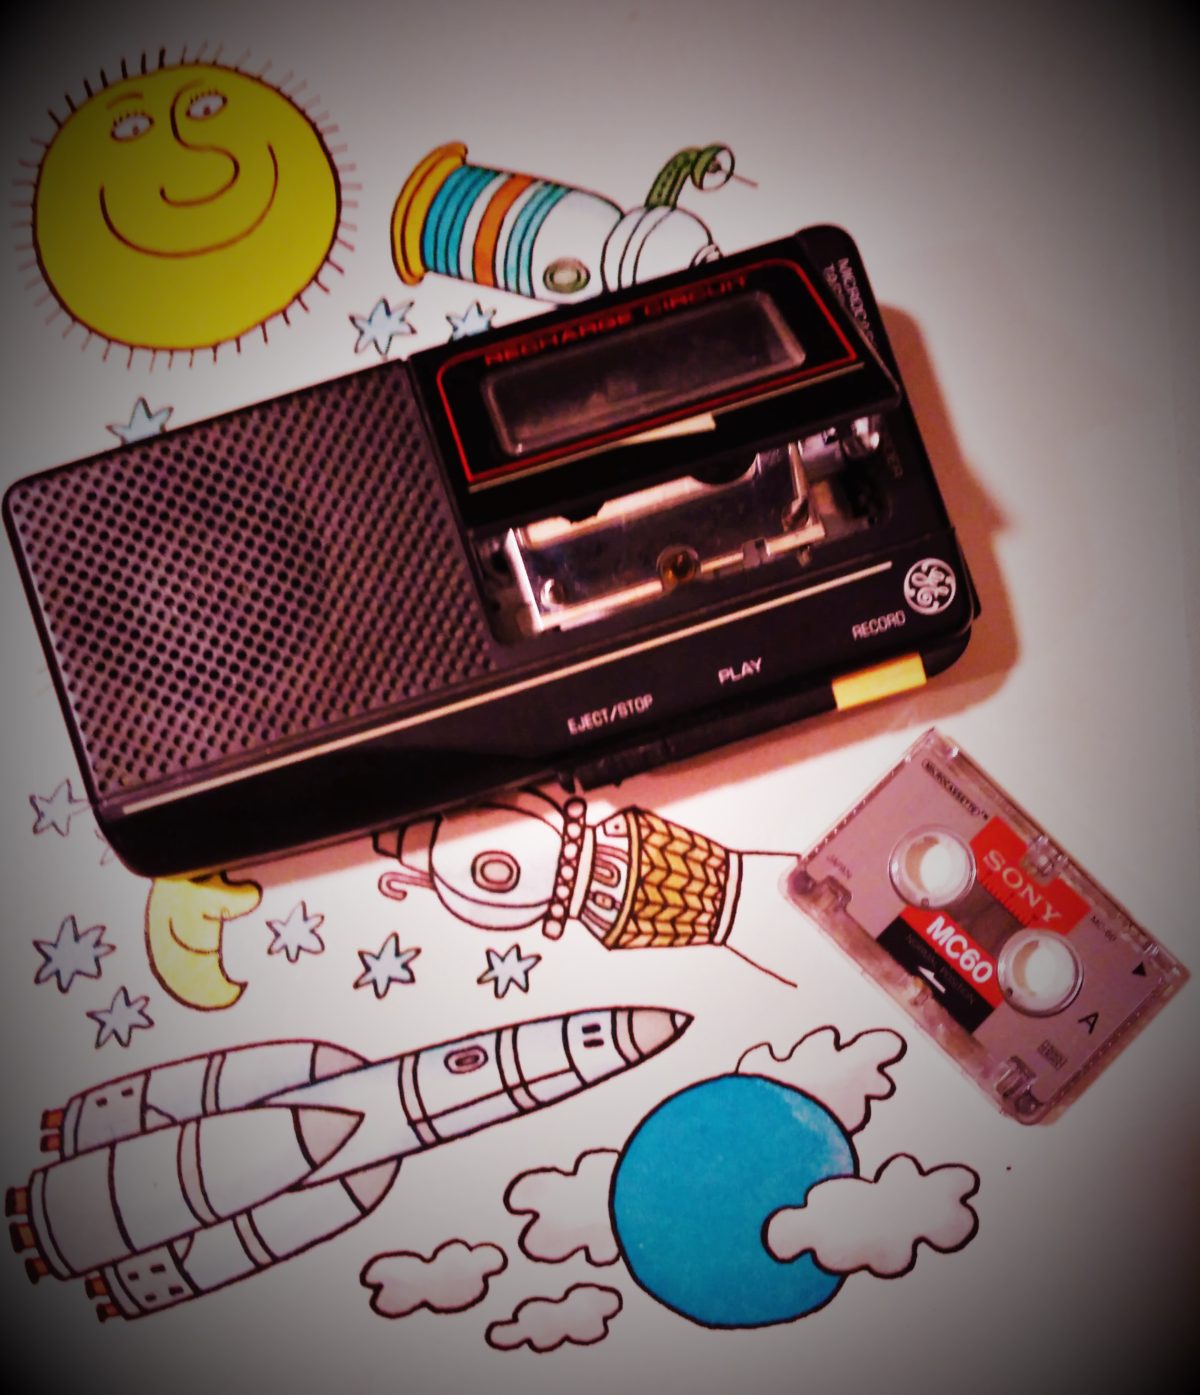
First we have to identify the perfect tool, maybe easy to find in a parents old technology drawer: a microcassette dictaphone or a walkman type cassette tape recorder, are perfect. Usually the narrower the tape, the less quality you would expect. Same with tape speed: Lowest speeds, less highs and more noise. Microcassettes have the most distorted and noisy sound around and can be useful for “sampling” speech and single instruments. Standard cassettes can be used to record drum loops too, their quality is a bit better.
recording sony walkman
What I’m suggesting on this post, is to record straight to one of these old analog devices, bounce the result in an audio track and time stretch the audio results, until correcting the differences induced by the “cheap analog” manipulation.
These devices have often an internal speaker, recording from it through a microphone, can add some variation to the recording sound.
Having fun!!
We gonna make an experiment using my old GE Microcassette tape player/recorder:
GE Dictaphone
Some audio manipulation will be needed after processing. When we deal with short vocals or effects, there’s nothing really needed apart normalizing the file, that will then sound super loud, due to analog narrow tape heavy compression. It will be also “enriched” with low frequency noise (hum) and its high counterpart (hiss). To make the file usable, we need to reduce its audible band through a band pass filter or a HPF/LPF combi. In the following example we will use a 250Hz High Pass Filter, combined to a 2kHz LPF, add some room effect, some phasing modulation and some delay.
I’m gonna record a drums loop, to make things a bit more difficult. To be usable, instead of only filtering, it will need some time stretching to correct analog recording tempo fluctuations. We then will see how it can work added to the original track.
As the effect we gonna expect is of a low quality, distorted oldschool sound, we gonna work on a classic Roots Reggae “standard”,
Studio 1, Sound Dimension “Real Rock”. This is the original:
To record drums, I used samples from the Casiotone MT-40, http://en.wikipedia.org/wiki/Casio_MT-40 the same sounds used by the first digital Reggae Dancehall producers.
On the first example I playback the track to be recorded on the dictaphone. On the second you’ll listen to the result in the analog microcassette, but already filtered and effected, while on the third, you’ll find a mix including our analog dirty loop. The result should sound nice (at least it does this effect on me) and give the necessary dirtiness, to a loop otherwise too “cold”
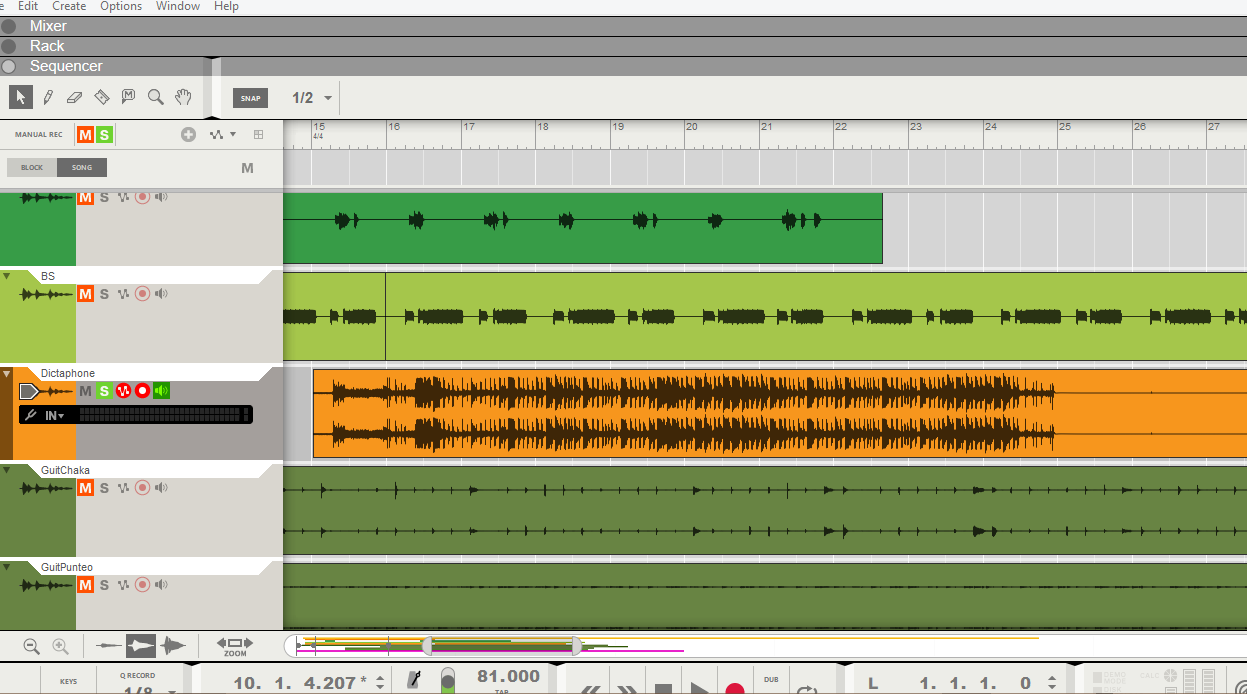
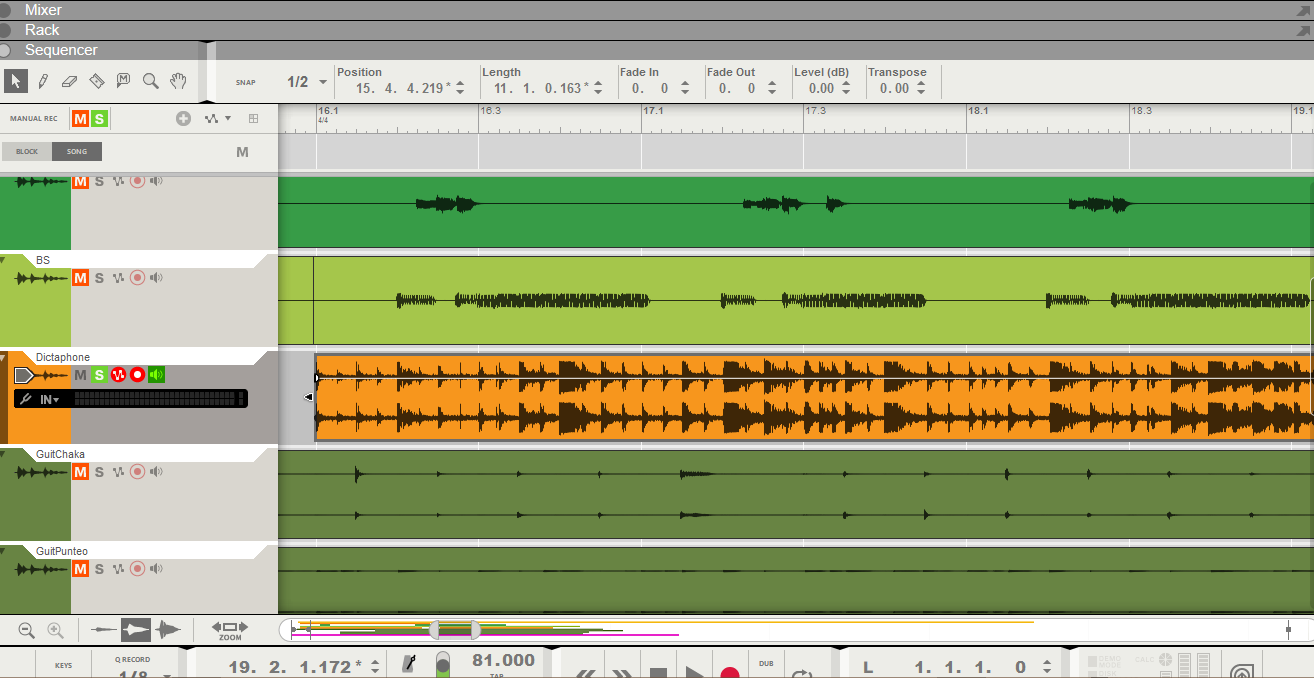
Once bounced the audio from our tape recorder, we need to identify which is the first beat of what we consider the first bar and move the file to the beginning of one bar, in our sequencer. Having the sequencer grid as reference we then time stretch the audio, to make it correspond to the DAW tempo grid.
Due to the typical tape behavior, there will be some time shift from the original loop, even if time stretched correctly. Once in the right position, we can give an audio quantize (of more or less % depending on the variation required) and mix the result to taste.


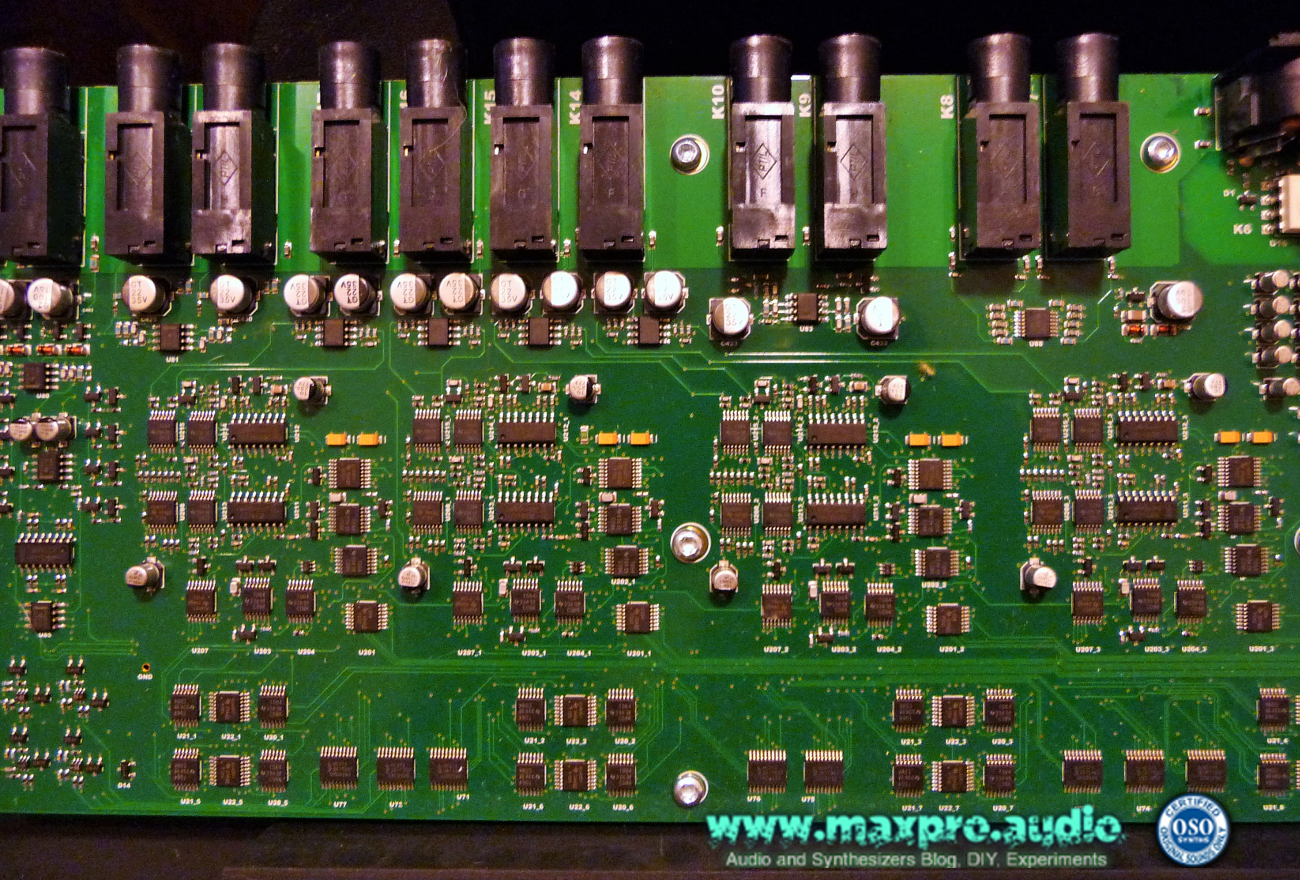
 Elektron Analog Keys PCB